Showing posts with label Bookmark. Show all posts

Saturday, August 8, 2015

PC: Blackwork Floral Bookmark Finish


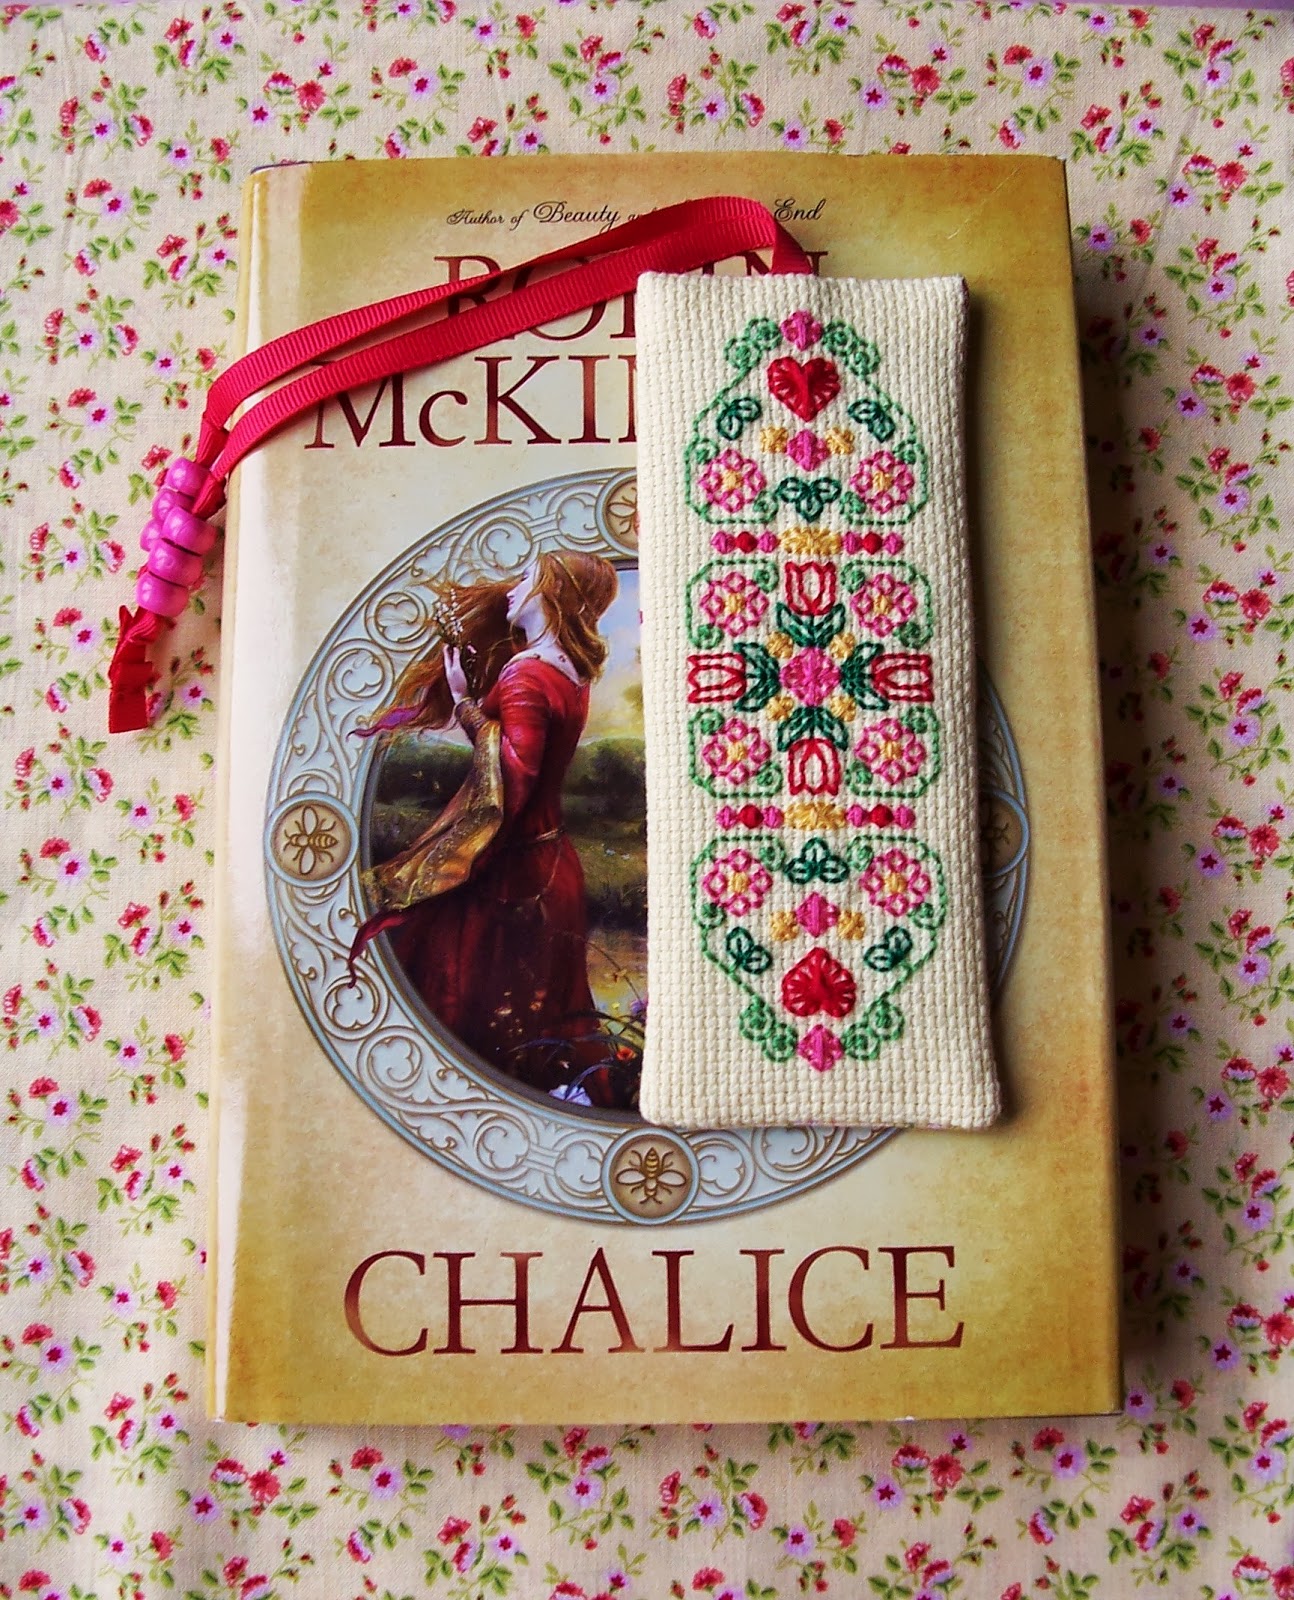
My recent post on the wonderful thread known as Perle (Pearl) Cotton brought an old, unfinished project to mind, and I'm happy to say that I final-finished it at long last! I first wrote about my Blackwork Floral Bookmark way back in 2013, when I was running the ES Bookmark SAL and intended to write a tutorial on making the tassel. I never did get around to it, but there are lots of tassel ideas in that post :)


Perle Cotton (PC) is not just for useful for embroidery - it's amazing on Aida cloth too! I used a 14 count for this project, and at first I wanted a dark colour to show off the gorgeous Anchor variegated PC #8 (1315), which has pinks, oranges and yellows all mixed together! It's very tropical feeling and cheerful :)


At the time I was stitching this, the only dark hue I had that even remotely matched was the tan, but after I put the first few stitches in, I thankfully switched to white instead! Unfortunately, the white was a remnant from a bad batch of Aida, which I didn't realize when I chose to use it. Also, it was really far too narrow, and I now know from experience that it's better to leave a little extra than to be too short!

So I actually stitched this design twice:


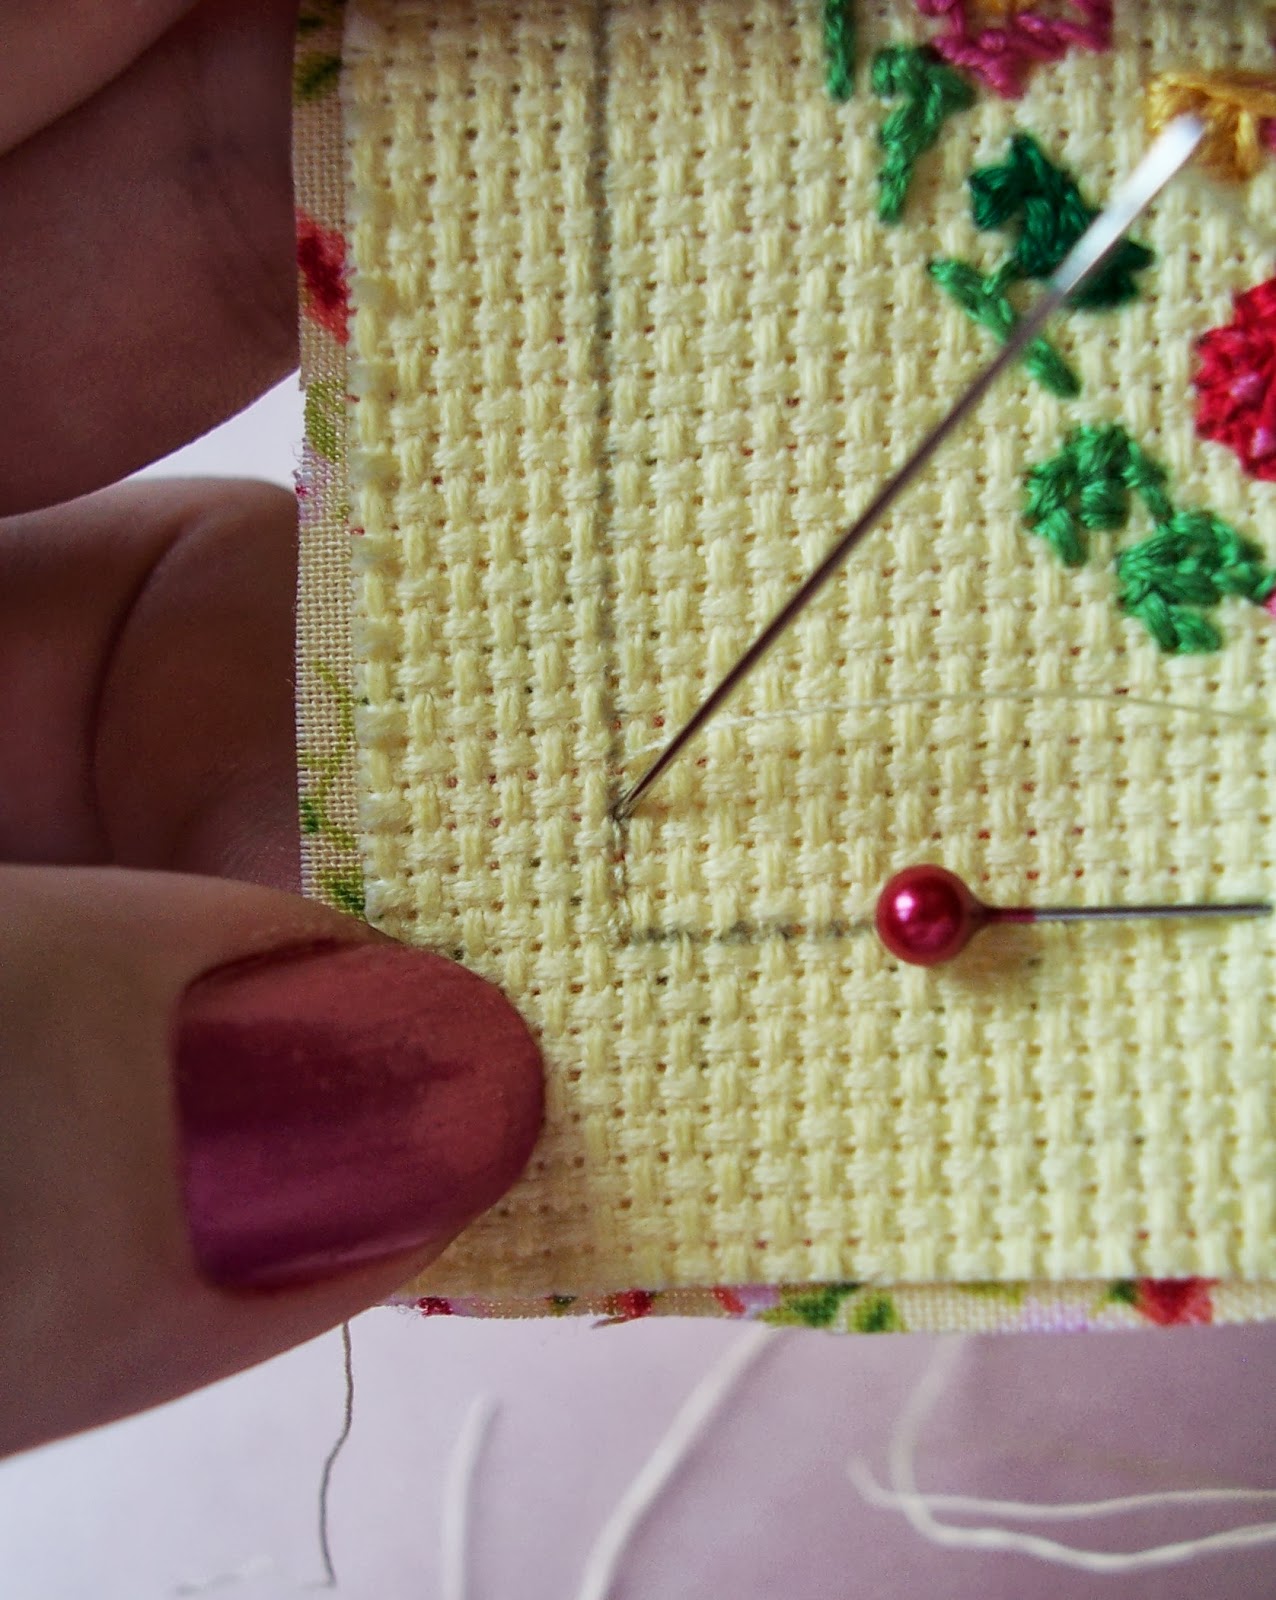
At top is my final finish, and at the bottom was my first attempt. Things were going along fine until I turned it, at which point the top edge of the Aida frayed apart so badly that there was no way of fixing it. I tried stitching the frayed parts together -


- but unfortunately I wasn't able to salvage it. I used a different backing fabric for this one, a dark pink polyester cotton that also frayed badly at the seams inside.


It was a mess, and I was so disappointed with it that I put it away for a long time :(


Thankfully, I remembered it when I was writing my post on PC, and I worked up the courage to try again! I had already restitched the bookmark and still had the tassel, so it was just a matter of assembling everything, which is always the scary part ;)

The green PC I used is also seems to be #8, from an old unlabelled ball in my Stitchy Guru Mother's Stash, which was a huge tangle when I found it. So I wound it around an empty Gutermann thread spool to keep it neat. It's a beautiful colour!


The variegated PC was so lovely that I went back in and added a few simple filling stitches to the pattern just so that I could see more of those tropical tones. The flower is one of the prettiest motifs I've ever seen, and was fun and quick to stitch. Also, I love the way the stitches resulted in a little pulled eyelet at the center!


I am glad that I used a different backing fabric, because the thicker cotton was so much easier to stitch and was more comparable to the weight of the Aida, making for a smoother look. The first fabric I used was so thin and flimsy that every stitch pulled a little at the seam. Never buy anything with polyester if you can help it!


I think my favourite part of this project is the tassel :) PC makes wonderfully thick and shiny tassels!!! Instead of making cording for the tie, I made a simple braid, and the extra texture is pretty. I would love to try a fancier beaded version ;)

Finally, here's my Blackwork Floral Bookmark in an actual book:


This is the first novel in Mercedes Lackey's updated fairy-tales series, and although I haven't read it yet, it's been highly recommended so it's at the top of my reading list!

I only added one layer of quilt batting as filling this time (versus the two-layer padded insert I used in my SAL Bookmark) and I'm much happier with it :) It's quite a bit flatter, and a single layer adds little bulk beyond that the seams naturally add.

As for my first botched bookmark, I've kept it even though I'm not sure exactly what to do with it! My Stitchy Guru Mother suggested cutting it down into a band to use on the top of a scissors case or needlebook, but I would like to keep the length out to the two cute little hearts on either end. If you have any suggestions, please let me know!

Sunday, September 22, 2013

ES SAL: Erica's Elegant Finish!

Whew! I'm back :) Thank you all so much for understanding, and for the very lovely comments about my Pansy ;) She's gotten so big over the last sunny week that I had to transplant her to a nice new pot today, and I noticed several new buds so hopefully she will bloom again soon! But I'm still behind in blog reading and e-mailing, sorry :(

This is also not the post I intended to write today - I'm sensing a trend here lately - but I have the most wonderful news to share and simply couldn't wait - a new SAL Finish!!! And what an absolutely gorgeous and unusual finish it is too :)

Erica, who blogs at Erica's Stitches and is currently on hiatus, always crafts very creative projects, and her bookmark is no exception! I actually consider it a Spring Garden Variation, and her work is a fantastic example of how you can easily adjust a pattern to make it truly "yours", something that fits your own personality!

Erica is not a fan of hearts, and so she replaced them with geometric floral elements:


Isn't it stunning?!!! The flowers she designed remind me of Chrysanthemums, and along with the pretty colour palette she put together (more about it here and here!), the bookmark has a crisp Autumnal feel, which is very apt given the time of year:


Here's a closer view, where you can see that the innovative layering of the light and dark oranges lends the two motifs their depth and helps give the impression of a large, many-layered flower in what is actually a very small design space!

Erica also replaced the simple spacer bars with lines of incredibly elegant eyelets!!! This is definitely something I want to try stitching in future, and I really like the way she incorporated all her palette colours, alternating light and dark shades!

With so much added detail, Erica minimized the other Specialty Stitch elements - namely the Center Diamond and Algerian Crosses - by working simplier versions, which I think was very smart, as it keeps the eye on all the elements instead of just the center tulip motif. Her bookmark is also a great example of how a few small changes in a design can make a really BIG impact, and the result is so impressive :)

And as the perfect finishing touch, Erica chose this lovely classic botanical print with an inquisitive little birdie, which ties together all her Autumnal colours:


Finally, I really admire Erica's even finishing, and she explained her method to me:

"To finish, I didn't do the sew and flip right sides together - when I do that I can never get nice corners. Instead, I backstitched around the edges of the main design and basted the extra cloth to the inside while mitering the corners. Then I cut some heavy duty fusible interfacing to the same size and fused it to my backing fabric and basted and mitered again. Then I was able to whipstitch the two sides together."

(I'm sharing her own words because her instructions are great, so clear and concise!)

This is most definitely a technique I would like to try in future! My corners, as you have likely noticed, are always wonky - and I thought that you may want to try it out too! If you do, please let me know :) For me, though, I will have to conquer one of my most dreaded Stitchy Foes, The Whipstitch ;) Although a more recent opponent than my staunchest longtime enemy The French Knot, my first effort did not go well.

For that, I will have to work up some courage, methinks, although I do have my poor Blackwork Bookmark (abandoned but not forgotten!) just waiting for its Final Finish. Or perhaps I'll have to stitch up an Autumnal Garden of my own...

Thank you so much Erica for sharing your gorgeous work and lovely pictures!

Wednesday, July 31, 2013

ES SAL: Yvonne's Stitching Finish!

Wow, it's so hard to believe that this is the last day of July already!!! I don't know where this summer has gone. Mostly it went with me wishing for snow, LOL! And *that* is something I'd never thought I'd say :P The last few weeks have been unreal, although thankfully nothing like the severe heatwaves elsewhere in the world.

A nice, warm summer day here in Newfoundland is usually 22 to 25 degrees Celsius, with the humidity making it feel two or three degrees warmer. But lately we've had high twenties/low thirties temps with the humidex often up to *ten* degrees higher! So it feels like high thirties/low forties. Ugh. Yesterday was a nice break (11 degrees!) and today isn't too bad but the weekend is going to be yet another scorcher. *sigh*

For most people, the unexpected heat has been a great treat, but unfortunately I just find it really uncomfortable, so I haven't been able to do much except sit in front of the stand fan! I've not been around much online either because my poor little laptop is older and suffers from the humidity too - it keeps trying to overheat! So I'm sorry I'm so behind in my blog reading but hopefully this warm weather will break soon :)

In very happy news, Yvonne sent me a lovely photo of her *beautiful* bookmark:


Isn't it GORGEOUS?! She used two strands of floss for her impeccably neat stitching, and it really lends a crispier look to the design (I used three strands). You can see her basted outline in this photo too, which I think is incredibly clever! A very neat trick I'm definitely going to try in the future :) I'm forever accidentally skipping or adding one stitch here or there and find keeping track a bit of a chore, so this would help!

Wonderfully, Yvonne told me that she is intending to stitch Spring Garden *again* in black now! So she will be the second, after Emma, to make two bookmarks and the first to stitch both colour and monotone versions :) I can't wait to see them finished!

Important Information About The SAL Pattern:

After a great deal of thought, I have decided to retire the SAL design (Blackwork Spring Garden) after the last finishes of the SAL Participants come in, whenever that may be (since everyone is stitching and/or finishing at their own pace now), or on the Autumnal Equinox on September 21st (the end of Summer), whichever comes first.

Since this wasn't a competitive SAL and there were no prizes (although I did really want to send everyone a little something, it's just wasn't possible), making the pattern a limited edition is my way of thanking the SAL Participants for stitching with me :)

That said, I have recently gotten several lovely e-mails from people who wanted to stitch Spring Garden, and I have sent them the patterns since they took the time to inquire. I realize that there were those who were interested but couldn't participate for a variety of reasons, and so if you send me an e-mail before I retire the pattern, I will send it to you; I'd also be happy to post any photos you'd like to send here on ES!

Although I haven't been able to do much stitching in the heat, I have been working on some small projects I hope to be able to share soon! And there is one good thing about sunshine - like this freebie says, at least you don't have to shovel it, LOL!

P.S. A really HUGE "Welcome Back!" to Karyn, of the awesome video-game themed A Riot Patch of Pixels, who has returned to blogging after nearly a year away!!!

Tuesday, July 9, 2013

ES SAL: Emma's First Finish (of Two)!

So sorry for being so quiet this week! We've had an unexpected mini-heatwave, with abnormally high temperatures, terrible humidity and a heavy "haze" from the forest fires in Quebec and Labrador. Nothing life-threatening, just a little uncomfortable :)

It's been too hot to even be on the computer, let alone stitch, so the Tassel Tutorial has been delayed yet *again*. Oops! But no matter, since Emma (of EveningEmma) has come up with an absolutely fabulous beaded braided marker that is AMAZING:


Isn't her finish so FUN?! Emma pulled the pink, yellow and green from her stitching (the original colourway) for the braiding and then added some great contrast with green, red and orange beads at the end of the marker! It's so Summer-y and fresh! I think the tri-colour braid is so clever, and that's definitely something I'd like to try. It's really striking combination, and I think Emma's bookmark is *gorgeous* :)

Make sure to head over to read her great post for more info, and to find out about her creative choice of backing fabric! As Emma mentions in her post, this is actually her second stitching of the pattern, the first being this beautiful variegated version:


Although this version isn't final finished yet, her stitching finish also surely deserves a mention :) I'm *incredibly* flattered that Emma liked this pattern enough to stitch it twice, and I can't wait to see her second finish too, whenever that may be!

Thankfully, the weather is supposed to cool off over the next few days, so I'm really looking forward to stitching again! Jeanne Dansby, of WyrdByrd Designs, has just offered a pretty new FREE Blackwork Small called "Summer Lace", and I'm hoping to start this soon! I'm thinking of stitching white on blue :) Or white on pink!!!

Monday, July 1, 2013

ES SAL: Important News + CS's Finish!


Well, it's been a wonderful month here at ES! A really heart-felt and HUGE Thank You to everyone who has been following along with the SAL posts, and to the SAL Participants for making a long-time dream a reality for me!!!

It has been absolutely *amazing* to see a simple little pattern from my imagination become a reality in other talented stitchy hands! I'd love to try this again sometime in the future, maybe in the Winter when there's more time for crafting ;)

Today is the last day of the SAL, and while I'm a little sad to see it go, I'm happy to be moving on to other things too - although I don't know exactly what, LOL! There are still bookmarks being made, and I will happily be featuring them whenever photos come my way, but I've decided not to extend the deadline again. This was designed to be a relaxed SAL, with everyone working at their own pace, so just continue to do so!

Technically, you have until tomorrow, July 2nd, to be "under the deadline" but please don't feel pressured to get it done! I rushed mine, and while I was happy to finish by June 20th because it was a personal stitchy goal I had set for myself, it did make it a lot more stressful to do! Which was exactly what I was trying to avoid, LOL!

In more exciting SAL News, CrazyStitcher - aka CS - (from the always entertaining Crazy Cross-stitcher blog) finished her beautiful bookmark yesterday! And she has also written a wonderful post about her working process which is a fascinating read!

CS added some lovely seedbeads in yellow (which was a stash find that happened to match *perfectly*!) and spring green, and backed her stitching with some pretty sparkly white felt she fell in love with on a recent visit to a local craft store. CS tried out the Invisible Ladder Stitching I mentioned in my SAL Bookmarking Finishing Tutorial, and the result is beautiful! I definitely want to try backing with felt now :)

But what is really awesome is her absolutely gorgeous marker!!! CS made an elegant twisted cord and then added a *fantastic* Swarovski crystal bead as her tassel top:


And here's a close-up of her super sparkly tassel:


Isn't it lovely?! This is definitely something I'd like to try in the future! This is an idea that could be very simple - with a large wooden bead, for example - or made very fancy, like CS's crystal! Make sure to head over and read her post for more!

As for the SAL, if there's no objection, I'd like to leave up the links and Finish Gallery in my sidebar for the rest of this week (at least) in case some more in-progress or finish photos come in. I'm still working on updating ES, and hope to find a more permanent home for the SAL section! Hopefully one with room for future SALs ;)

Thank you all again! You have made this SAL experiment an amazing adventure!!!

Wednesday, June 26, 2013

SAL Update: Yvonne's Bookmark Start!

Our newest SAL Stitcher, Yvonne, kindly sent me this wonderful photo of her start:


Isn't her stitching lovely?! I think her wooden thread bobbins are really neat too!!!

Tuesday, June 25, 2013

SAL Update: New Stitcher! + Diagrams

Just a quick little note to share some very exciting news - we have a new stitcher in the SAL! A big welcome to Yvonne from the Netherlands, who doesn't yet have a blog but is hoping to start one soon! She will be using the original colourway too :)

Also, thank you all so very much for your enthusiastic response and very kind words about my SAL Tutorial, especially since it wasn't the one you were likely expecting, LOL :) I totally forgot to mention at the start that I had set aside my idea of doing a Tassel Tutorial and a Finishing Tutorial with another bookmark in favour of trying to finish my own SAL bookmark. If I get some time, I'll try to do those soon ;)

Before I go, I quickly drew up some diagrams for the specialty stitches that I missed adding to the pattern packet (oops!), so here they are:

The lozenges in the center of the spacer bars - 


And the accent diamonds, which are just smaller versions of the Center Diamond -


Sorry they look a little blurry here, it's because they're so small! To save, click on the image; a larger version will open in a new window (if you see a little + sign with your cursor, click again for the full size) and then save to your computer.

I'll be sending around the revised pattern to the SAL participants, but just wanted to share since these stitches are easily adaptable to other projects too :) I'm falling in love with the whole Rhodes family and can't wait to try some more variations!

If you're interested in stitching along, there's still time! Just e-mail me to join in!!!

Sunday, June 23, 2013

ES SAL: Bookmark Finishing Tutorial!


Tutorials are made for sharing! Please use the title photo and link back to this post :)

As has long been promised, I am SO pleased to *finally* be able to share this tutorial with you! As I mentioned in my last post, this padded bookmark is a combination of the flat finished bookmarks I've made previously with a two-layer quilt batting insert that I learned to make this past Christmas for ornaments :)

The padding is optional, and you can skip those steps if you want. Mine turned out a little thick - I think I may try one layer next time (with the edges finished the same way to prevent stretching) - but I'm happy with it and you might like to try it too!


Here's my bookmark posing with Robin McKinley's "Chalice", which is medium-book size (smaller than a normal hardcover but larger than a normal paperback, equivalent to a "trade paperback"), to show the scale. They make a pretty pairing!

This tutorial is the most comprehensive that I've ever attempted, and consequently it will be very heavy on the photos, as I've tried to take a picture of each stage as I stitched it myself :) It's EPIC. I finally figured out how to use the self-timer on my camera too, so please pardon the many *really* close views of my fingers! (Eep)

There are essentially three different sewing techniques involved:
1. Sewing the sides of the bookmark by hand, with Backstitch;
2. Sewing the batting insert, with Blanket Stitch or Whip Stitch; and
3. Sewing the top invisibly closed with Ladder Stitch.

I've tried to illustrate each of these stitch steps, so effectively this tutorial is three mini-tutorials in one :) However, I'm not an expert in hand-sewing (hardly! LOL), so there may very well be easier, quicker or better ways to accomplish the same thing, this is just what I tried out this time, and what miraculously mostly worked ;)

Note: As I photographed over two days that wanted to be sunny but were frequently cloudy and occasionally threatening rain, the colours in the photos change a lot!


Necessary Materials:
~ Stitched Bookmark (free SAL design)
~ Ribbon Marker (mini-tutorial here!)
~ Backing Fabric
~ Matching Sewing Thread
~ Hand-Sewing Needles
~ Small Fabric Scissors
~ Pins
~ Pokers: Knitting Needle, Orange Stick or Cuticle Pusher


For the Padded Insert:
~ Quilt Batting (two rectangles roughly bookmark-sized; trim to fit later)
~ Matching Sewing Thread (White) *not shown*

For Pressing Once Finished: *not shown*
~ Iron, Ironing Board and Fluffy Towel

Optional: *not shown*
~ Thimble, for Hand-Sewing
~ HB Pencil and Sharpener

Highly Suggested:
~ Patience (always a virtue! LOL)

I'm making a point to mention patience because this is a sometimes fiddly and finicky process that inevitably leads to much finagling! All finishing is like this (at least to me!) but the Turning of the bookmark is especially fraught with frustration, so don't give up and go slow :) I have to keep reminding myself of that, and you should too!

If you'd like to see a LARGER version of any picture/collage, just click on the image!

I'm going to divide the tutorial into three parts (with sections) for ease of reading.

Part I: Sewing the Bookmark Together with Backstitch (or Other Stitch)

You can use any stitch of your choice for this, but I used Backstitch, since it's so familiar to me. I also think that it is better to use a tighter stitch to reduce puckering where the fabric joins the Aida cloth. I started by pinning out my guidelines:


Using inexpensive rainbow-coloured quilting pins, I counted from my stitched motif to where I wanted my edge to be and placed my pin along the center of that line:


In my case, I decided that I would like the distance between my stitching and the edge to be five stitches, and working counter-clockwise I pinned around on the lines:


When I finished pinning, I realized that I had quite a lot of excess Aida on the top and bottom, so I roughly trimmed it down to size:


You don't need to be too neat at this point, since your edges will fray (especially during Turning) so it's good to have extra, this just makes it more manageable.

Next, place your stitching on your backing fabric and cut roughly around the edges:


I always cut my fabric a little larger (after I accidentally cut an edge far too close to my stitching once!) and trim it to fit later:


Now, when making ornaments, I often just work from the pinned guidelines since Aida is easy to follow. But when I'm outlining an unusual shape (like a circle) or really want to be certain, I use a little trick my Stitchy Guru Mother taught me:


An ordinary pencil can mark great guidelines! I was *so* skeptical at first, but the graphite sticks to the Aida fibers - it doesn't show through the fabric (if you mark lightly), it doesn't smudge and it doesn't come off on your thread! It's really amazing!

This is just an HB pencil (I have long loved Staedtler's Mars Lumograph drawing pencils, and this is what I happened to have at hand since I don't use regular pencils much any more). These are easier to work with than mechanical pencils, since those leads tend to snag in the Aida threads and snap. Turn your stitching over:


And then lightly sketch the edge lines, following your pins and working around them. I find it's best to use light, quick layered upward strokes to avoid catching the nib:


You can always start light and then go over the lines to make them bolder if needed. I went a little darker than I normally do so that the camera would pick it up:


Here I've removed the four pins, and if you look closely you can see the gaps where I outlined around them. This is useful for the next step:


Sandwich your stitching and backing fabric right sides together (wrong sides facing out). Then pop your pins back in the guideline gaps! Make sure to catch both layers.

The stitches that will join the layers will be nearly invisible (using Backstitch and most other close-sewn stitches) so you could use almost any thread colour but I prefer to use a close match to the dominant colour, in my case pale yellow.

This particular hue is not lemony and not pale enough to be buttercream, and so it was a little hard to match! I finally found an old spool of Coats thread (Y5801, 65% Polyester and 35% Cotton) that still had the price on the label:


Wow, have things ever changed! I couldn't resist taking a picture, and I managed to pull the thread off the spool without breaking the label, LOL :) It's almost antique!

After I got over my amusement, I cut off a long length of sewing thread (roughly double the wrist-to-shoulder ratio; if you'd like sew with doubled thread for extra strength, you'll need to add more; I used one strand) and threaded my sharp needle:


I used one, from my Singer Hand Needle Assortment again, that looked good to me (very scientific, I know). Then I anchored my thread in the top right corner of my bookmark. There are a lot of different ways that you can do this, but I use what I always think of as a "Loop Knot" and since I couldn't find any tutorials to link when I was working on my Ribbon Marker I decided to try to describe it:


Going from left-to-right along the top row: Bring your needle up where you wish to start (1), and go back down near the entry point, leaving a loop with your thread (2) when you pull through. Come up near the loop and catch it with the tip of your needle (3). Going from left-to-right on the bottom row: Pass your needle through the loop (4) and pull tightly, which makes a knot that looks neat from both the front (5) and back (6). I like to end my thread this way too, and darn the tails in the work.

From now on, it's a matter of backstitching around, which is the most tedious part of the process! I timed myself, and it took me a little over an hour, although that's with a few stops for photos :) It's the kind of easy work that goes almost on autopilot once you start though and a little television watching or music listening makes it go faster!

Here I am starting my stitching, I usually go back over the first few stitches twice:


And a bit further along, reaching the first side pin:


This is what the Backstitch looks like from behind, did you know that it's actually Stem Stitch?! I didn't connect the two until I started embroidering and read that the back of Stem Stitch is Backstitch, and vice versa :) It's a nice sturdy line:


Speaking of sturdiness, when I turn corners I like to reinforce the stitches by going over them twice, here I did three stitches on each side:


It takes a LOT of poking to get the corners to pop out when the bookmark is Turned, so it doesn't hurt to make the corners extra strong :)

Stitch around the two sides and bottom only, ending with a Loop Knot at the top left:


As you can see, I pulled out all my pins except the one at the top as I stitched along, to avoid stabbing myself (well, truthfully, to reduce the occurrence LOL) :)

Then it's time for the close trim! Following your guidelines, cut a set number of stitches AWAY from them. Again, I used five stitches on the sides and bottom, but I've learned that it's good to keep a little extra at the top edge for folding so I left seven stitches there. Then clip the corners to reduce bulk in the seams, but be careful not to clip too closely because then the corners can pull apart when you Turn!


It's easy to cut diagonally across blocks of Aida weave, I clipped along the first three-block line of mine. Remove your top pin, and get ready to Turn your bookmark!

Turning Out The Bookmark

This is pretty much the trickiest part of the whole endeavor, and so it deserves some special attention. Personally, this is the part I *always* have the most trouble with - sure, it sounds really easy to just pull it right-side out, but in practice it's really hard!

There's three basic steps that I think of as the Scrunch Down, the Corner Grab and the Topsy Turn Out :) Sounds like an Aerobics class from the 80's, doesn't it? LOL!

First, puff out your bookmark and then use your thumb to scrunch the fabric down close to the bottom corner of your choice, the one you intend to grab:


Remove your hand. You'll have a very sad looking crumpled tube left (1):


While your bookmark is feeling sorry for itself, creep up on it from behind (2) and use your first two fingers to grab your bottom corner (3), getting a firm grip (4).


Tug the corner out - once you have your corner captive, the rest of the bookmark will have no choice but to follow it out :) Gently but firmly coax and cajole the fabric to turn topsy-turvy until it finally pulls all the way inside out!


Unfortunately, Turning is one of those instances where one must be cruel to be kind, LOL, so you now need to commence attacking your poor bookmark with various poker-outers to pop out the stubbornly stuck-in corners :)


From top to bottom (1) and left to right (2): my favourite choice, a Revlon manicure set Cuticle Pusher, the oft-suggested Orange Stick and the it'll-do-a-pinch Knitting Needle. I prefer to use the rounded plastic bottom of the Revlon tool, since it's sharp enough to shape the fabric but not sharp enough to pierce through the stitches (like the points of the knitting needle and the pointy top of the Orange Stick tend to do).

Here it is in action, as you can see the corners turn out slightly rounded:


At this point, if you don't want padding in your bookmark and prefer a flatter finish, you can skip the next Part II and head right on down to Part III :)

Part II: Making the Padded Insert with Blanket Stitch or Whip Stitch

Honestly, I almost skipped this section because I realize that most everyone will not want a padded bookmark, or at least not an insert this thick. However, this is a useful trick for ornament finishing that may be helpful, so I'll quickly cover the steps:


To cut the padding for your insert, lay your bookmark on top of one of your quilt batting rectangles (1) and roughly trim to fit (2). Lay the trimmed batting over the other rough rectangle and trim to size (3), which will give you the two layers (4).

Here are those layers held against my bookmark:


I thought that the two layers would be a good fit, since they compress a little when stitched. The insert does fit the available space well, and looks nice when finished but it's a bit too thick for regular paperbacks. For hardcovers or heavy oversize books (like the Needlework books I've been reading from the library) the weight of the covers and pages helps hold the bookmark in and it works well with those.

So whether or not you choose to use padding depends on what you want to use your bookmark for :) Then I trimmed my batting again, so it would fit under the top fold:


With the little bits of excess I decided to make a test piece to show the stitches. Naturally, I use white thread with the batting so the stitching blends in but that is hard to see in pictures. So I used a contrasting red thread for this stitch experiment:


This is the Blanket Stitch edging that I decided to use for my ornament inserts this past Christmas after learning the stitch for edges of felt. The middle photo shows what the stitch looks like finished, and I've numbered the steps for easy reference.

To start, bring your needle up through the batting at the corner (1), come around the edge and up in the same place - making a loop around the edge - and then pass your needle through the loop and pull tight (2). This is an edge version of the Loop Knot we used to start the Backstitch on the bookmark :)

Next, bring your needle up and through the back and out the front (3), making a loose loop; pass under the loop with your needle and pull tight (4). Voila! This is a blanket stitch. Keep making stitches up the side spacing them evenly. When you get to a corner, skip the turn and make your next stitch in the same place as your last (5); the thread carries itself along the back (6). End with a loop knot and darn.

Since I had some space left over, I decided to change it up and try Whip Stitch, which is often recommended for edgings. I've tried it on a smaller scale before without much success, but the large stitches work up very quickly on the quilt batting:


The stitches themselves are just straight and slanting - this collage is to show the difference in the corners, which are a bit neater. I still prefer Blanket Stitch :)

Before I ended off my thread, I took some pictures to show how I sew up the middle to keep the layers of padding from slipping:


It's simple Running Stitch, just a few roughly spaced long stitches up and then back down again to fill in the gaps, which results in an even unbroken line on both sides.

To assemble my insert, I laid my marker on the first batting layer and then pinned the other layer over it, leaving about two inches of the marker in between:


Taking up some white Gutermann sewing thread to match the batting...


...I started stitching around the edge. I did try to space my Blanket Stitches more evenly this time, since the stitches not only join the two layers but they compress the edges giving the insert it's shape and prevent the quilt batting from stretching out:


Here's the insert held up to the light so you can see how the marker sits inside:


As you can see, when I reached the marker, I tacked it down inside by using Running Stitch along the ribbon inside the insert to keep it from moving.

I continued this Running Stitch down the entire length of the bookmark to keep the two layers of quilt batting together, first going down (1) then back up (2):


Here's what the insert looks like when it's finished:


It looks a lot shorter than the bookmark here because the top has yet to be folded down. To get your padding into the bookmark, fold it gently in half and place it in:


To settle the padding in the bookmark, you'll need to pinch and push and pull it down and then smooth it out with your fingers to make sure the batting doesn't bunch up or get lumpy inside the bookmark:


Make sure that it is stuffed all the way down into the bottom corners:


And there you go! Here's the bookmark before padding (1) and after padding (2):


There's not much difference here because the before photo hasn't been ironed flat.

Part III: Sewing Up the Bookmark Top Invisibly with Ladder Stitch

Before we get to the closure, we need to fold the top edges together and down inside. In the photos that follow, you'll see me working my closure over the padded insert, but if you skipped the padding, just pretend it's not there and work the same way!


Here's the top of my bookmark - you can see my pencil guideline inside. This is where the top fold will go. If you didn't mark your lines, just count out your stitches.


Starting with the top row, left to right: Put a pin on the right side of your bookmark where the top fold begins (1) and fold the excess fabric down inside so that it lays flat against the front (2). Take another pin and insert it through the front of the bookmark and the bottom of the inside fold (3).

From the bottom, left to right: You'll have two pins on the front (4); turn your bookmark around and fold the backing fabric inside, pinning your fold near the top to keep it in place (5) - fold both corners in as tightly as you can (6)!

Now it's time to start stitching!!! :)

Ladder Stitch is a brilliant and easy way to close edges seamlessly! It's most often used in soft-toy ("softies") making but, rather confusingly, this is also the name of a bead-weaving stitch. There are a TON of tutorials online, but most of them are for felt or two layers of fabric. Ladder Stitch with Aida is even *easier*! :)

The blocks formed by the weave of the Aida are a wonderful guide that makes for evenly spaced stitches, which is important for Ladder Stitch because if the stitch lengths are at all uneven the joins tend to pucker.


Here is a very rough diagram I drew up to help show what I mean by that, with the Aida at the top and the backing fabric at the bottom. This is the way I like to hold the fabrics because I find it's easier to see the backing fabric this way, but you could reverse it! For a really neat finish, you could draw a guideline on your backing fabric before folding to make sure your stitching is straight, but I just winged it ;)

Here I am working the stitch up to the edge of the ribbon marker:


On the first row, left to right: I brought my thread up at the right corner (1) and anchored it with a Loop Knot (2), and then passed through my first Aida block (3).

Second row, left to right: I crossed over and picked up a bit of backing fabric roughly the same size as the Aida block (4) - pick up the innermost layer of backing fabric on the fold only!!! The corners are the hardest because they are bulkier. Then I picked up my second Aida block (5) and went over again to pick up some backing fabric (6).

Third row, left to right: When stitching the "rungs" of your ladder, you need to stay a little loose so that you can see to pick up your stitches (7). Once you've put a few stitches in, pull them tightly as you go by tugging gently but firmly on the thread (8)! Keep stitching until you reach the edge of your marker (9).

If you aren't using a marker, just stitch until you reach the end.

Because my marker was firmly sewn into the insert, it was already in the middle. But even so it's best to check to make sure that it's lined up, and an easy way to do that is to take your needle and sight it down the center of your bookmark like so:


If you haven't used padding, now is the time to position your marker, since these stitches will join it in. The 1/4" Grosgrain ribbon I used turned out to be the width of four stitches, so it was easy to line it up with the pink diamond in my stitching :)

And then you keep working Ladder Stitch *through* the ribbon:


I found it helpful to flip the ribbon back and forth over my fingers away from the side I was working on. You'll only need to make two or three "rungs" so it's quick work!

Keep stitching until you reach the end, at which point I ended with another Loop Knot and darned the end of my thread back into the stitches:


And this is what the finished closure looks like!:


I did have a tiny bit of puckering on the left, but this is the neatest Ladder Stitch closure I've yet to achieve and I'm very proud of it ;)


Even when the ribbon marker is flipped open, you can't see the stitches! Neat, hey?!

Here's the front and back of my bookmark after closing the top up:


Confession: I forgot to curve the top corners to match the bottom corners, so I used a thick, blunt needle to further pop out the bottom corner stitches a little bit:


It's not a big difference, but it helps when ironing the corners! This is the bookmark just finished, before pressing:


In my excitement, I popped it into a book right away, LOL:


I really like how the marker lays against the spine...


...but it *is* a little puffy:


Okay, a LOT puffy, LOL ;) This was before ironing, mind, and it's now slightly flatter. But I overestimated with going for two layers, next time I'm definitely going to try using only one. I still think that padding is a good idea because it lends a smoothness to the bookmark and prevents the seams at the sides from feeling bumpy!

The FINAL Finish!!!

Ironing, to borrow what my Grandma always says about icing and cakes, can cover a multitude of sins ;) As you know, I'm not a natural iron-user, so I followed my Stitchy Guru Mother's advice about Pressing, which is this:

Put an old fluffy towel on your Ironing Board, and place your bookmark *front side down* on the towel. This will keep the stitches nice and crisp and avoid flattening them! Using the Cotton setting and steam, iron the back of your bookmark gently. You can also iron the tips of the ribbon loops on your marker if you like.

Here's my bookmark before and after pressing, from the side:


Pressing makes a HUGE difference! I really recommend it :) I was so pleased with my new, freshly ironed bookmark that I couldn't help but take MORE pictures, LOL:


So there you have it ;) If you've made it all the way here to the end, THANK YOU!!!!! I hope that at least some part of this has been helpful. If you have any questions at all, please don't hesitate to ask :) If you would like the SAL design, there's still time - just e-mail me before July 1st to let me know and I'll send you the file.

I can't tell you how much I appreciate all of your interest in this little design and the SAL, your encouragement has been amazing and means a great deal to me!!!

If you're interested in making your own photo collages, I used the free Pixlr Express!