Saturday, December 19, 2020

Tutorial for an Easy Padded Ornament


It's so hard to believe, but another holiday season is upon us! After what has been an incredibly challenging and difficult year for many, I know I'm not the only stitcher behind on Christmas gift stitching right now. So I'm sharing an older step-by-step photo tutorial - Final Finish: A Snowflake in Summer! - from way back in August 2013 that is perfect for last minute ornament assembly!


This type of flat, padded stitched ornament with twisted cording edging and tassel is the standard way of finishing stitched ornaments in my family, and I first learned how to do it from my Stitchy Guru Mother many years ago. These days, I've been experimenting more with ornaments laced over cardboard, for a firmer structured look, but these quick padded ornaments are great for sending in the mail - they are unbreakable and light! This makes them extremely easy to store too.


Here's an example of the step-by-step photos I took while making my ornament - here I'm showing how to make the padded insert from two layers of quilt batting. I hope you'll find the tutorial helpful, and if you have any questions, please feel free to ask in the comments or e-mail me (my address is in the sidebar under the pretty postage stamps)! You can read more about the beautiful snowflake design - a freebie from Wyrdbyrd Designs - and my stitch choices in the original post

I added a lot of sparkle with seed beads and metallic thread!


If you make an ornament of your own using this tutorial, I'd love to see it! As the years pass by and I grow older, family traditions like these little padded ornaments mean so much more to me. They are stitched with love, and that is what really matters ❤ Wherever you are and however you are celebrating this year, I wish you health, happiness, creativity and much stitchy joy!!!


❄ Merry Christmas & A Happy New Year from Eglantine Stitchery ❄

Friday, November 6, 2020

๐Ÿ A New Start for Autumn ๐Ÿ‚

Has there ever been something that you would absolutely love to stitch but have never been able to buy for some reason (or have bought but haven't had the time to start)? Dimensions Gold's Fall Fairy has been at the top of my wishlist for years! I've loved it ever since I first saw it on the cover of a Herrschners mail order catalogue when it was released several years ago (unfortunately, I can't remember the exact year - if you do, please let me know! I'd really appreciate it). 

Most of my stitching has been gifts for others, and I rarely do large projects - and never one for myself, as of yet, although I have several planned in my Stitchy Stash. They require a much larger commitment of time, energy and resources - and space! 

And Dimensions Gold kits are expensive, because the designs are complex and intricate - in my opinion, they're the best mass-market cross-stitch kits available, although I've ever only worked one: my Twilight Angel (which is a smaller Gold Petites kit), which is still unfinished (but not forgotten - I'm still waiting on finding the perfect frame to finish stitching on the background scattering of stars and sequins and the embellishments). 

To my surprise and delight, a very kind friend - who isn't a stitcher (yet!), but who happened to remember my love for this kit from a passing conversation - gifted me the Fall Fairy for my birthday this year, and I'm so excited and grateful to finally have a chance to stitch her! It's an amazing feeling to get your dream project in your hands ๐Ÿ˜ƒ

This design is based on Ruth Sanderson's amazing artwork:


Although the cross-stitch version is cropped and simplified - the fairy is missing her butterfly wings, and the many little pixies and sprites have vanished - she retains the lovely joyful exuberance that I also feel for Autumn. You can almost feel the magic wind she's creating whirling the leaves and whipping her clothes! 

And the Fall Fairy is part of an informal seasonal series of Dimensions Gold Sanderson artwork adaptations!  I absolutely love designs based on the Four Seasons ๐Ÿ‚❄๐ŸŒท๐ŸŒป

There is also the beautiful Woodland Enchantress (Winter):


Thanks to my Stitchy Guru Mother, who gifted this kit to me a few years ago (she was looking for the Fall Fairy to give me but it was out of stock at the time), I also have the Enchantress in my Stash and she will make a wonderful companion for my Fall Fairy! 

She's a kit I've put off stitching because, frankly, the design is very intricate and a little intimidating ๐Ÿ˜† I also thought I would need a dedicated space to leave her set up  - and an actual needlework stand of some kind - but I'm finding ways around both with my Fall Fairy. So if I can finish this kit, this will be the next big project I tackle ๐Ÿ˜„

Also, there is the delicate Spring Fairy, playing a flute (I love her wings!): 


And finally, there is the charming Fairytale (Summer), which unfortunately seems to be out of production at the moment:


Although I don't think these were meant to be an official set, I do think they compliment each other perfectly! For anyone who has wondered what comes in a Dimensions Gold kit, I thought I'd do a quick run down. The kit contents come in clear plastic folder with a large full-colour photo on the front:


The charts have changed, and are now on shiny paper. I was concerned at first that this wouldn't take highlighter well (I mark off the stitches as I do them to keep track of my place), but thankfully it does. Both pages are double sided, with no overlap. There is a small inset for the detailed backstitch on the face. The symbols are large, clear and multi-coloured. There is an additional page with instructions in several languages, a legend for floss and materials, and stitch diagrams and order.


My favourite part of Dimensions Gold kits are the presorted threads!


There are 38 colours (with 8 blended colours) and a single-stranded gold metallic. They come already affixed to two cards with a small image of the colour and the colour number. Extra threads for some colours come in additional bundles labelled with the colour number only. I love these, and I make my own versions for nearly every project. 

The only thing that could be improved is including the stitch symbol by each colour! I try to draw my own on, but they're always wonky ๐Ÿ˜‚ I also use a hole punch to add a parking spot for each thread colour on the opposite side, in the white space. For the blended colours, I'll be making my own little thread card to keep them tidy.

The kit comes with a gorgeous blue-gray 16 count Aida - the colour of a blustery Autumn sky - and gold beads. There are also two needles, one tapestry and the other crewel (for beading, I think, although it's a little thick). I'm using a 17x17 Q-Snaps style frame (mine is made by Unique / H. A. Kidd) instead of a hoop.

For this project, I decided to do something I've never done before: I gridded the fabric!


Although I've seen gridding recommended for larger projects, I've never tried it before. Because the design is fully stitched (also a first for me!), I wanted to make the counting easier. It took some time to set up but I'm so glad I did - it's really helped

There are many different ways to stitch a grid pattern on your fabric, and several different special materials available, including guideline threads. Most tutorials recommend an easy-to-see colour not used in your project (frequently bright red) and a stiff thread, like fishing line or monofilament.


Since I was impatient to start my Fall Fairy, I used sewing thread to grid, using the Over 8, Under 2 method to make 10 stitch squares. I chose this design because it keeps the majority of the thread visible on top the fabric, so it's easy to adjust the tension and there's less chance of getting the gridding thread caught up in my cross-stitches. I only gridded the vertical lines, and that works well for me - again, less gridding thread to catch in my stitches, but a great guideline for positioning them. 

As you can see, I started the threads on the front side of the fabric from the bottom, gridded up and over and then back down, in a U shaped pattern. I let the ends dangle so they are easy to adjust and hopefully easy to pull out once my stitching is finished!

The blue star pin is marking the middle of my fabric, the point where all four sections of the pattern converge. I later changed it out for a less pointy (and therefore less thread-catchy) green heart pin. I left the gridding threads a little slack so they float over the cross stitches; it's easy to make them tighter or looser by pulling them out with your needle, and I just nudge them aside when stitching close to them.

It took a bit of time to adjust to working in this new way and it was awkward at first but I'm only sorry I never tried it before! It really does give you a way to double-check your placement and avoid counting errors. I've made a few small ones but the grid has made me catch them much faster than I would have otherwise.


Here's my start so far! I'm really enjoying stitching my Fall Fairy during her Season, it makes it extra-special ๐Ÿ‚ What's your dream stitchy kit or project? And do you enjoy seasonal stitching? I hope you'll follow along with me on this new stitchy adventure! 

Thursday, October 29, 2020

๐Ÿงฉ Puzzle Review: Sewing Room ๐Ÿงถ


Continuing on with my current love of crafty jigsaw puzzles, this is Eurographics' Sewing Room, with beautiful artwork by fantasy artist Ciro Marchetti

Although they're really not at all similar, it reminded me of a Dimensions Gold kit I've always liked called Maggie the Messmaker (with artwork by the late Charles Wysocki):


Both feature a mischievous cat let loose in a craft room, lying next to a beautiful vintage sewing machine. I'm not a cat owner (fiercely allergic in fact) but cats and creative pursuits just seem to compliment each other - most of the crafters I follow online have feline "helpers" who adorably lend a paw (or two) in photos ๐Ÿ˜ธ

I absolutely loved putting this 1000 piece puzzle together, the colours are so vibrant:


I really liked the other crafts included: the patchwork pillows, the balls of wool and knitting needles, the pretty floral hats and the tatted lace doilies. The rolls and bolts of fabric were especially fun to put together. The portraits of two lady seamstresses were a lovely touch. And there are all kinds of cute little details - I especially loved this little mouse sneaking up on the sleeping cat:


The pieces are a regular grid design but fit together very nicely. I highly recommend this one, and it would make a lovely gift for that crafty puzzler in your life ๐Ÿ˜Š

Do you craft with help from a pet?

Sunday, August 2, 2020

Review: Cobble Hill Jigsaw Puzzles


"Love Never Faileth" - one of my favourite details from Grandma's Buttons

The world has become really overwhelming since the last time I posted! I hope you and your loved ones are keeping well, as much as possible right now ๐Ÿ€

One of the few perks of the pandemic is a renewed interest in jigsaw puzzling ๐Ÿงฉ In my family, we usually always did a puzzle together at Christmastime; often Santa Claus would leave a gift for "all of us" under the tree, and in the post-Christmas lull we would all put a few pieces in here and there. I have very happy memories of those times ๐Ÿ’•

What I've never done, until now, is buy a puzzle for myself and put it together from start to finish alone - and I've discovered that I really love it! When I can't focus on anything else, or I'm feeling restless, anxious or upset, working on a puzzle calms me down. I love the bright colours, shifting the pieces through my hands, knowing that it will all fit together in the end - somehow ๐Ÿ˜† I enjoy the process as much as the finished result.

As a consequence, I've discovered a whole new world of premium puzzle manufacturers and puzzling fans and reviewers! For anyone else getting back into the world of puzzles, I highly recommend having a look at brand websites, YouTube reviews that show actual puzzles in assembly to get a feel for a brand's design, and searching for puzzle blogs. I've only scratched the tip of the iceberg, but I was happy to find a thriving online jigsaw community that is currently growing by leaps and bounds!

A trio of helpful links to start with:
๐Ÿงฉ Jigsaw Junkie's extensive Brand Comparison
๐Ÿงฉ Karen Puzzles on YouTube, with helpful videos on all aspects of puzzling;
๐Ÿงฉ and My Jigsaw Journey, the blog of an avid puzzler!

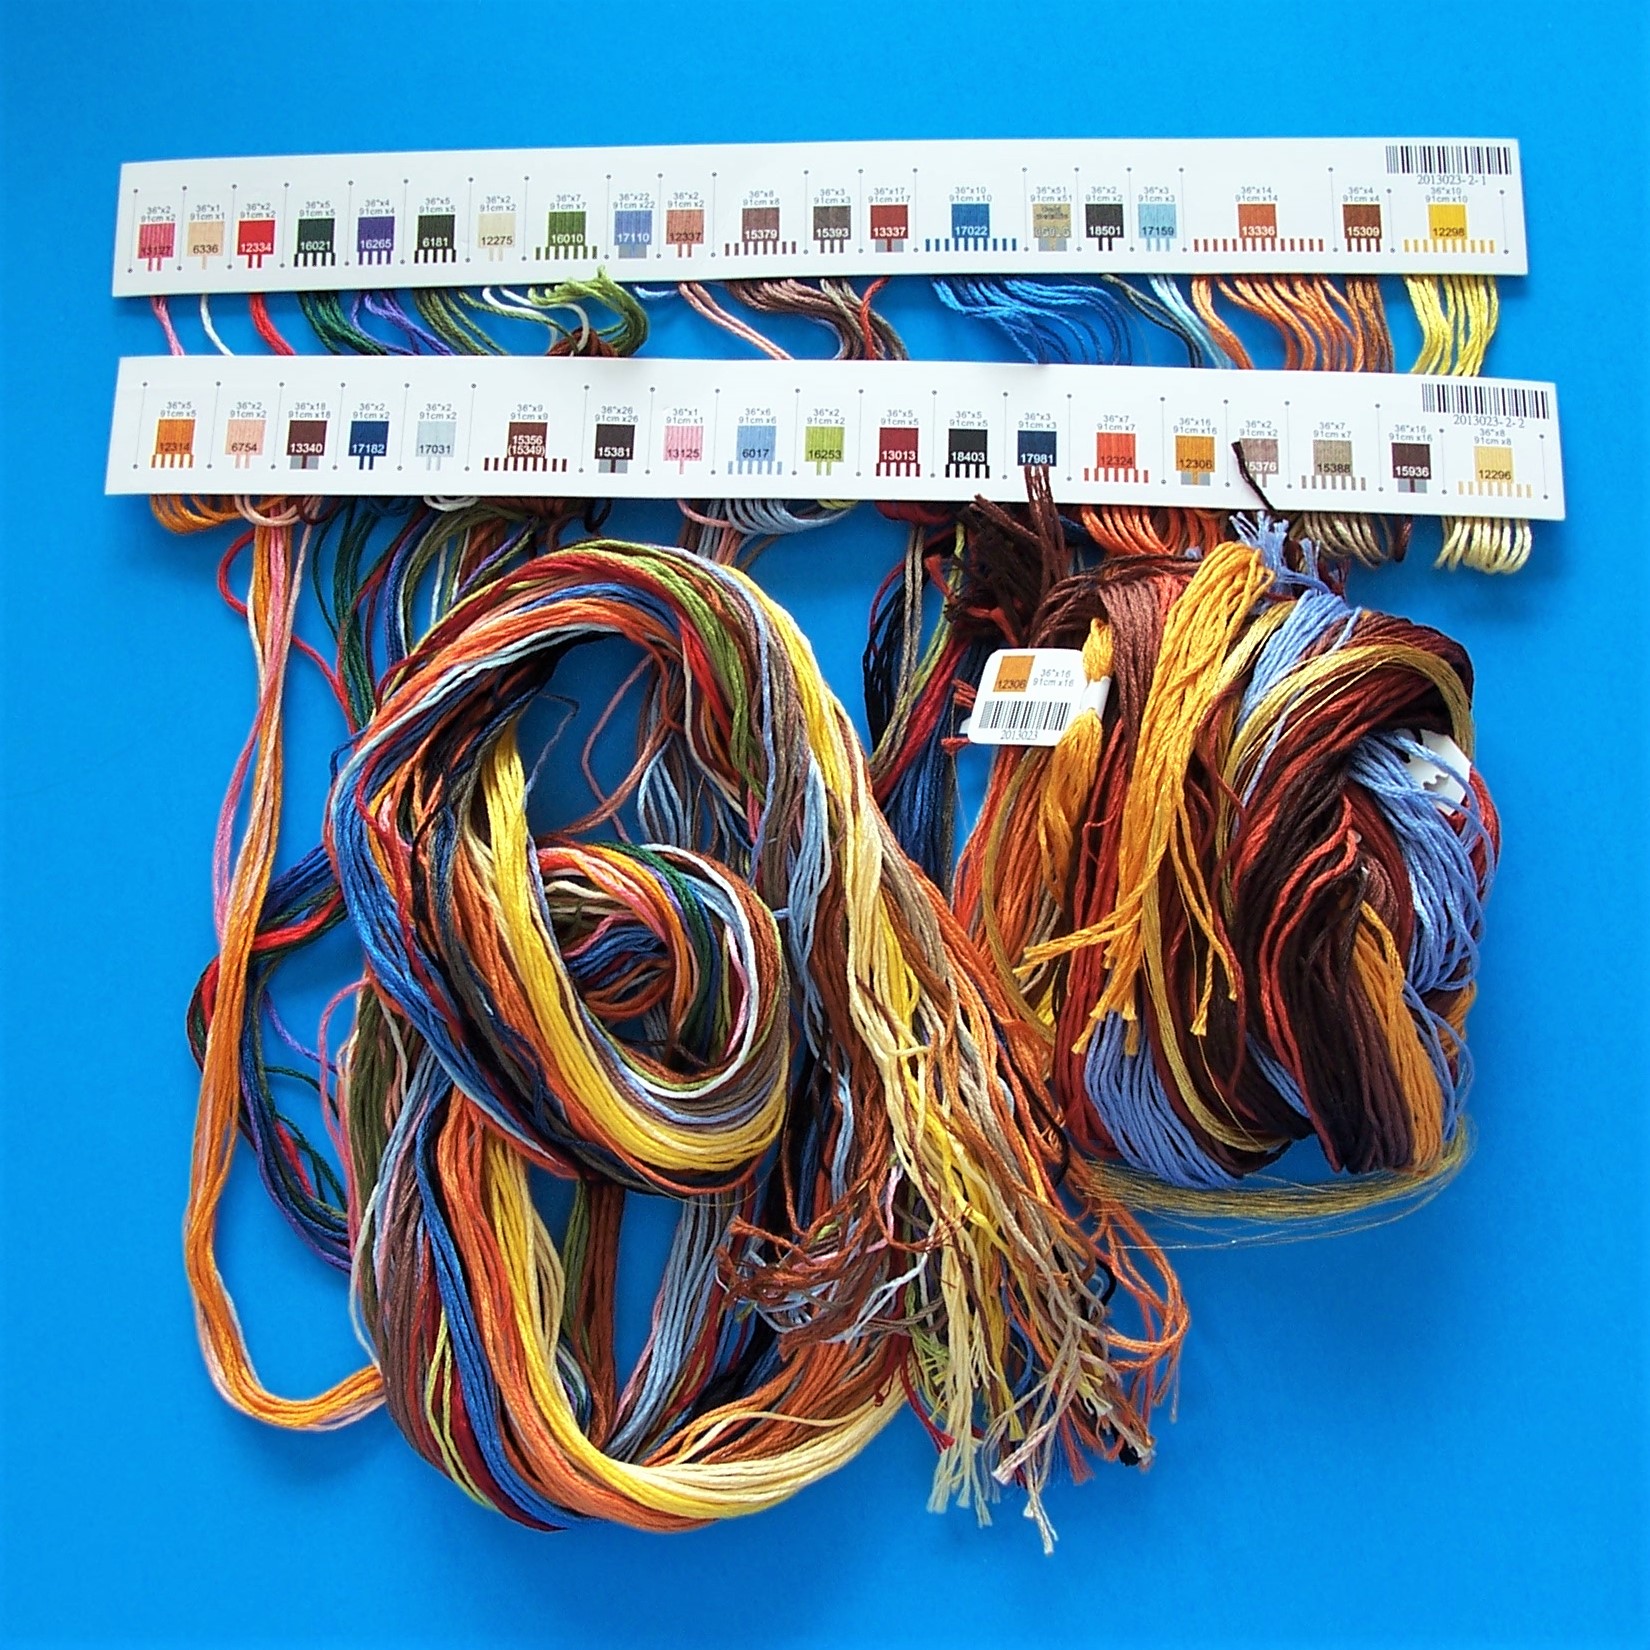
First, I worked through my small pile of puzzles from Christmases past. My favourite was this one, Cobble Hill's Sewing Notions:


I bought this for us for Christmas 2016, but that was a very difficult time with a death in the family and so I didn't put it together until April 2019. The gorgeous image - which includes vintage needlebooks, needle packages, embroidery floss, wooden thread spools, crochet hooks, knitting needles, and many buttons! - is by amazing college artist Shelley Davies. My favourite detail is this vintage cross-stitch band:


And to my surprise and delight, when I posted about this puzzle on Instagram, Shelley told me that it's actually pillowcases that her Grandmother made! How wonderful is that?! One of the things I love about most needlework is the way it transcends generations and is often passed down in families ๐Ÿ˜Š

Notice the beige edging on the box: this is the old-style Cobble Hill puzzle, starting with number 5 (it is now available in the improved new version, but this is something to be aware of as older stock may still exist in stores). They do not have a reference poster, so the corner with the logo is a mystery. Also, although I love the image so much, the cut on the pieces wasn't great, with a lot of "play" between them - you couldn't put small sections together and then move them to the board. It was also my first random cut puzzle, where all the pieces are different shapes, and it was very challenging at first! It's something I've really come to love though, you know for sure you have the right piece in the right place. And the unique shapes are interesting to the eye.

Recently, I treated myself to two more of Cobble Hill's crafty puzzles:


You can see these are the new number 8 series, with a green edging. The number 5 series puzzles had a sky-blue cardboard for the pieces, which didn't fit together as well as they could. I'm happy to report the new version - with a regular cardboard back - fits together beautifully! These new puzzles share the lovely matte linen finish of the last series. Both come with a "poster", which to my delight is an uncreased great quality print, suitable for framing for your craft room!


This puzzle was a delight to put together from start to finish!


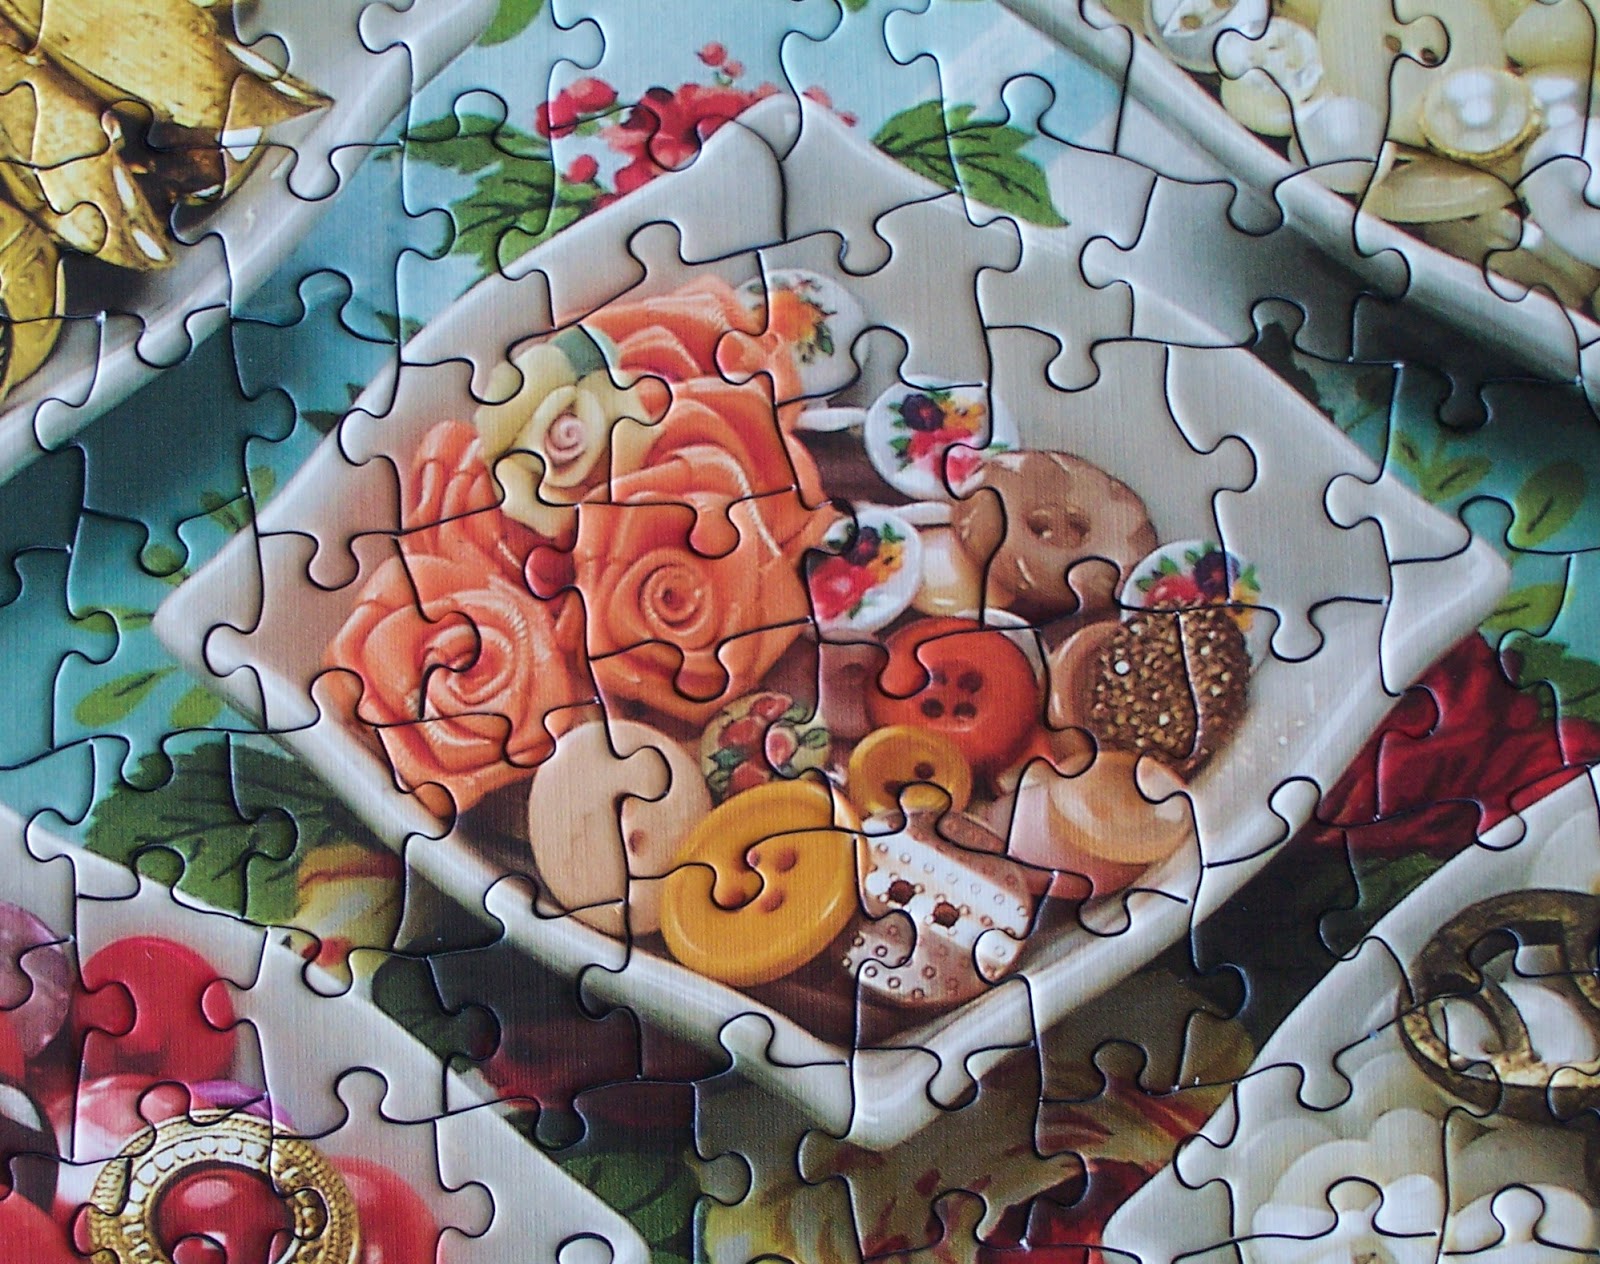
It was so fun to look at all the different buttons! In my family, we have a tradition of button tins. I have fond memories from when I was very young of playing with my Great-Grandmother's button tin; I could spend ages shifting the buttons through my hands, marvelling at the different colours, shapes and textures. Not much has changed ๐Ÿ˜† My Grandma has several small collections, mostly lost and orphaned buttons; my Mom has a large collection, mostly on cards from her sewing days; and I'm proud to have my own these days! Some of the buttons in the puzzle were similar to ones in our collections, and some - like the sparkler on top of this dish - I'd love to own!


With this puzzle, I found myself putting together each dish by colour, then doing the edges of the dishes, followed by the pretty vintage floral background.


I love the little ribbon roses in this dish too!


And this single gold-rimmed dish reminds me of beautiful real Mother-of-Pearl buttons that were plentiful in my Great-Grandma's button tin, so long ago ๐Ÿ˜Š

Since I was a young child, I've been fascinated by crazy quilts! The traditional rich jewel tone colours, the beautiful specialty fabrics like velvet and satin, all the different textures of appliques and ephemera, the intricate combinations of stitches - it all speaks to my stitchy soul and my magpie stashing instinct! I would love to make one of my own some day, and I have been collecting a few books on the subject for inspiration.

So I was thrilled to discover Cobble Hill's Crazy Quilt puzzle:


This was another puzzle I greatly enjoyed and would highly recommend, but it is definitely on the more challenging side! I had thought that I would enjoy following the stitches in the seam treatments, but the puzzle image is a painting by Helen Klebesadel (from her series Watercolor Quilts: Everyday Use) and up close all the stitches fragment so you can't really match them up. The colours are much farther ranging than the brights you immediately see, because the draping of the quilt necessitates lots of really dark shading. So I put the pieces together by colour!


It's a very fun effect, because while you're working close up with the pieces it almost looks like stained glass, and then when you step back from it, all the stitches finally come into focus and you see the quilting effect! Although the cover image is vertical I ended up putting together the puzzle horizontally, as I find it easier to reach that way.

I use a sheet of black foam board core and hold it in my lap, across the arms of a comfy chair; it's light and maneuverable, the dark colour makes the pieces show up, and it's easy to stow away under a couch or a bed while the puzzle is in progress. And, as you can see, it's just the right size for most 1000 piece puzzles!


My Some Day Crazy Quilt will definitely have a fan motif, I've always been drawn to them - so I was thrilled to discover this one in the puzzle (there is also a traditional cobweb too)! It was also very fun to try and identify the different embroidery stitches used. This is one of the most challenging puzzles I've ever done, and the most challenging puzzle I've ever done solo, but it was worth it and it's one I can see doing again and again.

Although Cobble Hill puzzles are in the pricier "premium puzzle" bracket, I think they give excellent value for money and are sturdy, to withstand repeated assemblies. I love both of these images enough to do the puzzles again, and they would make great gifts for a housebound stitchy friend! Although jigsaw puzzles have been nearly impossible to buy during the pandemic, due to renewed interest and manufacturer closures, Cobble Hill has recently reopened and is slowly restocking, and I've noticed that a lot of other puzzle companies are doing the same. I have bought all of mine on Amazon Canada.

Do you do jigsaw puzzles? Do you have a favourite brand or subject? In addition to crafty things, I love bright colours and also enjoy bird and flowers motifs - not unlike my stitching preferences, in fact ๐Ÿ˜‰

Sunday, April 12, 2020

Flashback: Easy Felt Easter Ornaments


Happy Easter, Happy Spring, Happy Happy Everything! This year, due to the pandemic, I think Easter is going to look very different for everyone, but if you have some extra time this afternoon and would like to make something for the holiday, I have an older tutorial (from 2015) that you might enjoy for Fun Felt Easter Egg ornaments!


They're really simple - just pull out your stash of felt and your embellishment tin (or wherever you keep your sparkly bits!) and go to town with your imagination ๐Ÿ˜†


This egg with the ribbon embroidery - which was surprisingly simple! - is probably my favourite ๐ŸŒธ The beaded ruching was really fun to do and it turned out to be really pretty. It's a technique I'm definitely going to try again in a future project. I think it would make a great edging for an ornament too!

Wherever you are and whatever you're doing this year, I wish you a Spring filled with Sunshine, Flowers and Small Joys Everywhere ๐Ÿ’• And lots of Creativity too! ๐ŸŽจ

Friday, January 3, 2020

๐Ÿงต A Needlepoint Round Robin! ๐Ÿงต


Happy New Year ๐ŸŽ‰ Hope you had a wonderful Christmas and that 2020 brings lots of lovely stitching your way ๐Ÿ˜Š I had a fun stitchy adventure over the Holidays! My friend Shannan of Bobbin and Fred told me a about the #passthecanvas project hosted by Dish on Instagram (@dishingstitches) a few months ago and I was so excited to join in!

Dish is sending her beautiful funky geometric needlepoint canvas to stitchers around the world, like a round robin, and we each stitch five blocks in a week before sending it to the next stop! Happily, I received the canvas on December 30th, and I really enjoyed working on it in the quiet of the post-Christmas rush - it's now on it's way from snowy Newfoundland & Labrador ❄ to sunny Florida ๐Ÿ๐ŸŠ

It has been many - MANY - years since I last tried needlepoint! When I was a teenager, I made a sampler out of my Stitchy Guru Mother's leftover supplies from her own bargello adventures in the 1970s. I used her vintage stitch guides to make an add-as-you-go mix of stitch blocks. I remember working on it all one Summer - it was my first and last experience trying to stitch outdoors ๐Ÿ˜‚ The wind liked to play with my threads, all the bright colours attracted flies and creepy crawlies, the sun was in my eyes - it was awful! And the edges of the canvas, even covered with masking tape, were so sharp that I took to wearing a pair of neon pink and black leg warmers on my arms to protect them from scratches, and they were way too hot, which added to the misery ๐Ÿคฃ


That sampler is still in a tote box, waiting to be made into a cushion. I always meant to try more needlepoint, but I had trouble finding the supplies. So although I was super excited to add my block to the travelling canvas, when I first opened it, I was a little intimidated too. I had no idea what threads or stitches to use!


Here's the canvas as I received it! There are so many beautiful blocks, in all kinds of threads - velvets, braids, wools, metallics, and cottons. The stitch texture is fabulous, I wish you could run your fingers over the blocks and feel the stitches for yourself!

The package came with the canvas, a white storage bag (I just used the Ziploc the canvas was in), a little blue book to record your name, stitches used and materials used (which was so helpful and inspiring to read, especially the little messages to other stitchers!), and a cute little pocket stitch guide that was SUPER HELPFUL:


It's hard to tell from this photo, but it's a tiny book! With my favourite lay-flat coil binding. Small enough to slip in a project bag, and packed full of stitch diagrams:


I had so much fun flipping through this little guide and wondering what stitches I could try! Here are my five blocks, with a bit about stitching them:


Like most of the other stitchers, I chose my colours based on the printed blocks on the canvas. I started with the center block, using a leftover black Kreinik braid from the Bag O' Bits I received for the SFSNAD Challenge. I taught myself Norwich Stitch from the stitch guide (although I modified to fit the smaller space).


I absolutely LOVE this stitch, and it's one I will try again! It results in a wonderful woven effect ๐Ÿ˜ It looks complex, but is surprisingly quick and easy to do as long as you pay careful attention to the order of the stitches. Using a non-divisible thread like the braid makes the woven effect stand out and makes it easier to lay the stitches.


Then I added the teal block. I knew I wanted lots of sparkle, but I didn't have many thicker threads suitable to needlepoint canvas on hand. I had intended to buy some DMC perle (pearl) cotton for this project, once I knew which blocks/colours I was stitching, but it being the Holidays, the local quilt shop that carries it was closed and I didn't have time to order anything online.

So I improvised! For this block, I used DMC 3812 (nine strands) with Gutermann Metallic Blending Filament in #235 (4 strands) and did a slanted Satin Stitch.


The small blue block was next. This was my first time using the new DMC Etoile thread in C798 (a gift from my friend Karen!). It is very different than regular floss, it is fluffy and spreads easily, giving it great coverage! I used 9 strands, and it worked great on this canvas. I intended to make Smyrna Cross Stitches, but I liked the base Cross Stitches so much I left them - I love the filigree look, where the canvas peeks through! I added a Woven Cross Stitch in the corner where both stripes meet.

And now for the BLING:


This is, without a doubt, my favourite block ๐Ÿ˜† You know how I love glitter!


This magnificent beauty is Needlecraft Craft Cord, meant for needlepoint and plastic canvas! It has a white base with a rainbow of pastel metallics woven in, in shades of teal, pink and gold. It is #55026, Rainbow White Frizette.


It came in a small bag of stitchy supplies from a thrift store that I bought several years ago, and I have been looking for a way to use it ever since! I was so disappointed when I realized it was too thick to go through the canvas easily. I put it aside, but in the end I decided I really wanted to make it work. So I laid it on top of the canvas, weaving it together at the corner (inspired by the Norwich stitch) and then worked Padded Brick stitch over top, with DMC 957 (six strands). It's a little wonky, and definitely quirky - so much so that I debated taking it out for a while - but it's super sparkly and love it ✨


And for my last block, I ended up going entirely off script. It was spontaneously stitched (seems to be my new stitchy theme lately, and I'm really loving this approach)! I wanted something softer after the bling block, so I used DMC 964 (9 strands) to stitch what I think is Smyrna Star, On Point, with Compensation Stitch edging (aka Make It Up As You Go Along Stitch) ๐Ÿ˜‚ It's not quite what I had in mind when I started stitching, but I do like the fun zig-zag bumpy texture and the pretty seafoam green colour.


And finally, I stitched my initials next to Shannan's (hers are in blue, to the left of mine, and her blocks are on the lower left of mine) using the same pink from the bling block. It is amazing to be part of project with stitchers I don't know from all over the world, but it is also really cool to stitch on the same project with a stitchy friend I do know, which is why I chose to stitch my blocks next to the ones Shannan did ๐Ÿค— I did tent stitch first like all the other stitchers but then couldn't resist making them Cross Stitches ๐Ÿ˜


And here is the canvas, ready to pass on to the next stitcher! I'm so glad that I had to chance to participate in #passthecanvas, and it's inspired me to try more needlepoint in the future ❤๐Ÿงต And if you have any online suppliers you'd recommend, I'd love to hear about them! I've been looking for Canadian shops, but haven't had much luck so far in finding blank needlepoint canvas; most offerings are tent stitch kits, or painted.

Have you participated in a crafty round robin project, or would you like to?