Showing posts with label Blog Hop. Show all posts

Wednesday, December 4, 2019

🎄 Stitchy News: Holiday Special 🎄


It's that time of the year again, and the Holiday Rush is upon us! It's the first time in forever that I've done a Stitchy News post, but I have some exciting news to share with you today, including an online stitchy advent calendar and a great giveaway! ❤🎄❤


Mary Corbet of Needle N' Thread is generously running her fabulous A Stitcher's Christmas giveaway series again this year, where she shares top of the line embroidery notions and supplies! She's currently on the 2nd Giveaway, so make sure to visit the website or sign up to her free newsletter (which sends you the blog posts as they are published) to keep up with the giveaways. If you're new to A Stitcher's Christmas, please visit this year's first post for more information on how it all works 😉

It's a super popular series, and there's often hundreds of entries for each giveaway, which can seem discouraging. But I was incredibly fortunate, and won the Inspirations Giveaway from 2017 , so if I can win, you can too! I wasn't blogging at the time so I haven't shared my kit finishes yet but I will soon. It was an incredibly difficult year for me, the first Christmas after my beloved Grandpa died (on Christmas Day 2016) and that prize made me pick up my needle and thread for the first time in over a year, and helped get me through a terrible time. Best of luck to you if you enter ☘


Laura at Bugs and Fishes has a super cute Retro Felt Baubles Tutorial for you, great for making last minute Christmas gifts! If you leave the ornaments unpadded, as Laura mentions, they would also be fabulous for sending in Christmas cards. There's all kinds of possibilities to pull out your embellishment tin and go crazy, and I think these would be a great way to use scraps of pretty trims and edgings!


DMC has a number of free holiday patterns, including this pretty Nordic Heart. It uses two shades of the shimmering new Etoile floss, but would look lovely in a single shade of variegated Coloris too! There's a cute Coloris Christmas Tree freebie as well.


The wonderfully imaginative Jo at Serendipitous Stitching is hosting her annual Online Advent Calendar Blog Hop again this year! The image above is one of my favourite finishes of Jo's, from her very first 2011 Online Advent Calendar 😃 This is such a great event, where stitchers share some holiday themed projects from years past and a bit about their own traditions. Make sure to hop along for some Christmas stitching and finishing inspiration! I look forward to it every year ❤


Finally, if you're looking for a super quick little ornament to whip up in a hurry, why not try my free Blackwork Poinsettia Ornament? It's two-sided, easy to customize, and doesn't need any backing fabric! I also have a full tutorial for the easy Whipped Chain Stitch Edging. This was my contribution to Jo's 2013 Online Advent Calendar.


In February, my friend Shannan from Bobbin & Fred stitched this gorgeous variation, and I had the pleasure of interviewing her about her finish for the blog! This remains one of my favourite patterns and can easily be made in a weekend. If you do stitch up a version, I'd love to see it, and feature you here on the blog if you like! 😊


Are you making like Santa Claus and doing any gift making this year? I don't have mine all lined up yet but I'm thinking about projects - unfortunately, they're all Super Secret!

❤ Whatever you're making for the holidays this year, may your Christmas be Merry & Bright, and may you Jingle All The Way ❤

Wednesday, December 4, 2013

Advent Calendar Hop 2013 - Door #4!


Welcome, And Come On In!

I'm so pleased to have you visit today and very excited to be participating in my first Blog Hop! Many thanks to Jo from Serendipitous Stitching for hosting this super fun seasonal event :) In honor of this momentous occasion, LOL, I knew that I wanted to do something special! So I designed this little double-sided blackwork ornament:


Blackwork Poinsettia Ornament

If you have any trouble downloading this file, please let me know!
My e-mail is in my sidebar at right, under the pretty postage stamps :)

I stitched my ornament on 14 count Aida using three strands of DMC for everything but the hanging loop. The finishing method I used is one that is entirely new to me, and I'd like to share a tutorial here in case you'd like to try it too! The braided-look edging is adapted from an article on beaded trim in an old issue of Just Cross Stitch magazine and consists of chain stitch border outlines joined together by whipstitch.

Now, The Whipstitch is a noted Stitchy Foe of mine, and I did have some trepidation about trying this technique. It took me a while to get into the rhythm of it, and I had to unpick a few of my stitches and redo them as I went, but I was surprised at how easy this method of joining is! It's so much easier to pick up the chain stitches than it is to pick up backstitches, and the trim looks very much like cording when finished!

A note about the size: when stitched on 14 count, this little ornament is just over two inches square, including the trim. I kept the design small because I wanted something quick to stitch, that would make an easy gift, and could be used anywhere on the tree.

Also, please be advised that there are a few Specialty Stitches in the design - Smyrna Cross Stitches fill in the green squares, the "arms" of the yellow stars are long stitches taken over two threads as are the large blue diamonds in the frame, and the little yellow diamonds in the corners and at the centers of the flowers are filled with very simple Upright Cross Stitches :) If you have any questions, please just ask away!!!


Happily, this method of joining could be adapted to ANY ornament, where the front and back stitched motif is the same size :) Here's how I made my ornament:

Please click on any picture in this post to see a a larger version!


I stitched the front and the back on two separate pieces, since I was working in hand and I found it easier to hold the smaller pieces. You may want to try cutting a larger piece of material and working in a hoop - whatever you're most comfortable with :)


And here's the back of both sides! I wouldn't normally show this, but here's a helpful tip for anyone who hasn't stitched coloured blackwork before: try borrowing the "travelling" trick from embroidery, and running your thread under the back of other stitched sections to get where you need to go! I stitched all the red (the flowers) first, which gives a good foundation for anchoring travelling threads all around the square.

Then I stitched the yellow stars, which fills in the space between the flowers, which allowed me to then add the green, travelling across the stars from leaf to leaf. Finally, I stitched the blue last. And I kept the lettering on the back close together and simple so that it would be easy to travel from the closest points between letters :)


And then it's time to stitch the Chain Stitch outlines!!! The point where I started is marked on the chart with a black dot, to the left of the topmost petal on the topmost poinsettia flower. Because each Chain Stitch goes over two threads, if you start right at the mid-point of the pattern, the count will be off. I placed my border two stitches away from the edge of the motif on all sides of the front (and mirrored that spacing on the back). If you'd like some extra space around your design, just remember to add your stitches in increments of two so that your Chain Stitch will work out right :)


I found it really helpful to hold the working thread taut with my forefinger and loop the thread over my finger, as shown, before going back down through the fabric. This kept the thread out the way so I could see clearly where to come up for the next loop!


At first, I thought I had to end the chain with a tacking stitch to turn the corner, but then I realized all I needed to do was turn the loop and keep stitching ;)


And ending the chain is super easy - just loop your thread under the bottom of the first stitch, as shown! I repeated the border on the back side, and trimmed the edges:


And cut two small squares of quilt batting, to fit the space within the border. This batting helps to keep the threads on the back of each piece from showing through the other side! It also fills out the hollow left when the edges are oversewn, and so it doesn't add any extra bulk. For a puffier look, you could try adding a smaller third square sandwiched in the middle. Conversely, you could leave the batting out.

Now for the tricksy part, LOL:


I used my fingers to fold the sides down, folding top and bottom and then left and right, and pinned them in place. Make sure the pins are on the right side so you can remove them easily - to keep from leaving marks in the Aida I used thinner pins and used the Aida holes as a guide :) The corners stick up a lot but you'll be holding the sides tightly together in your hand as you whipstitch and they gradually flatten out.


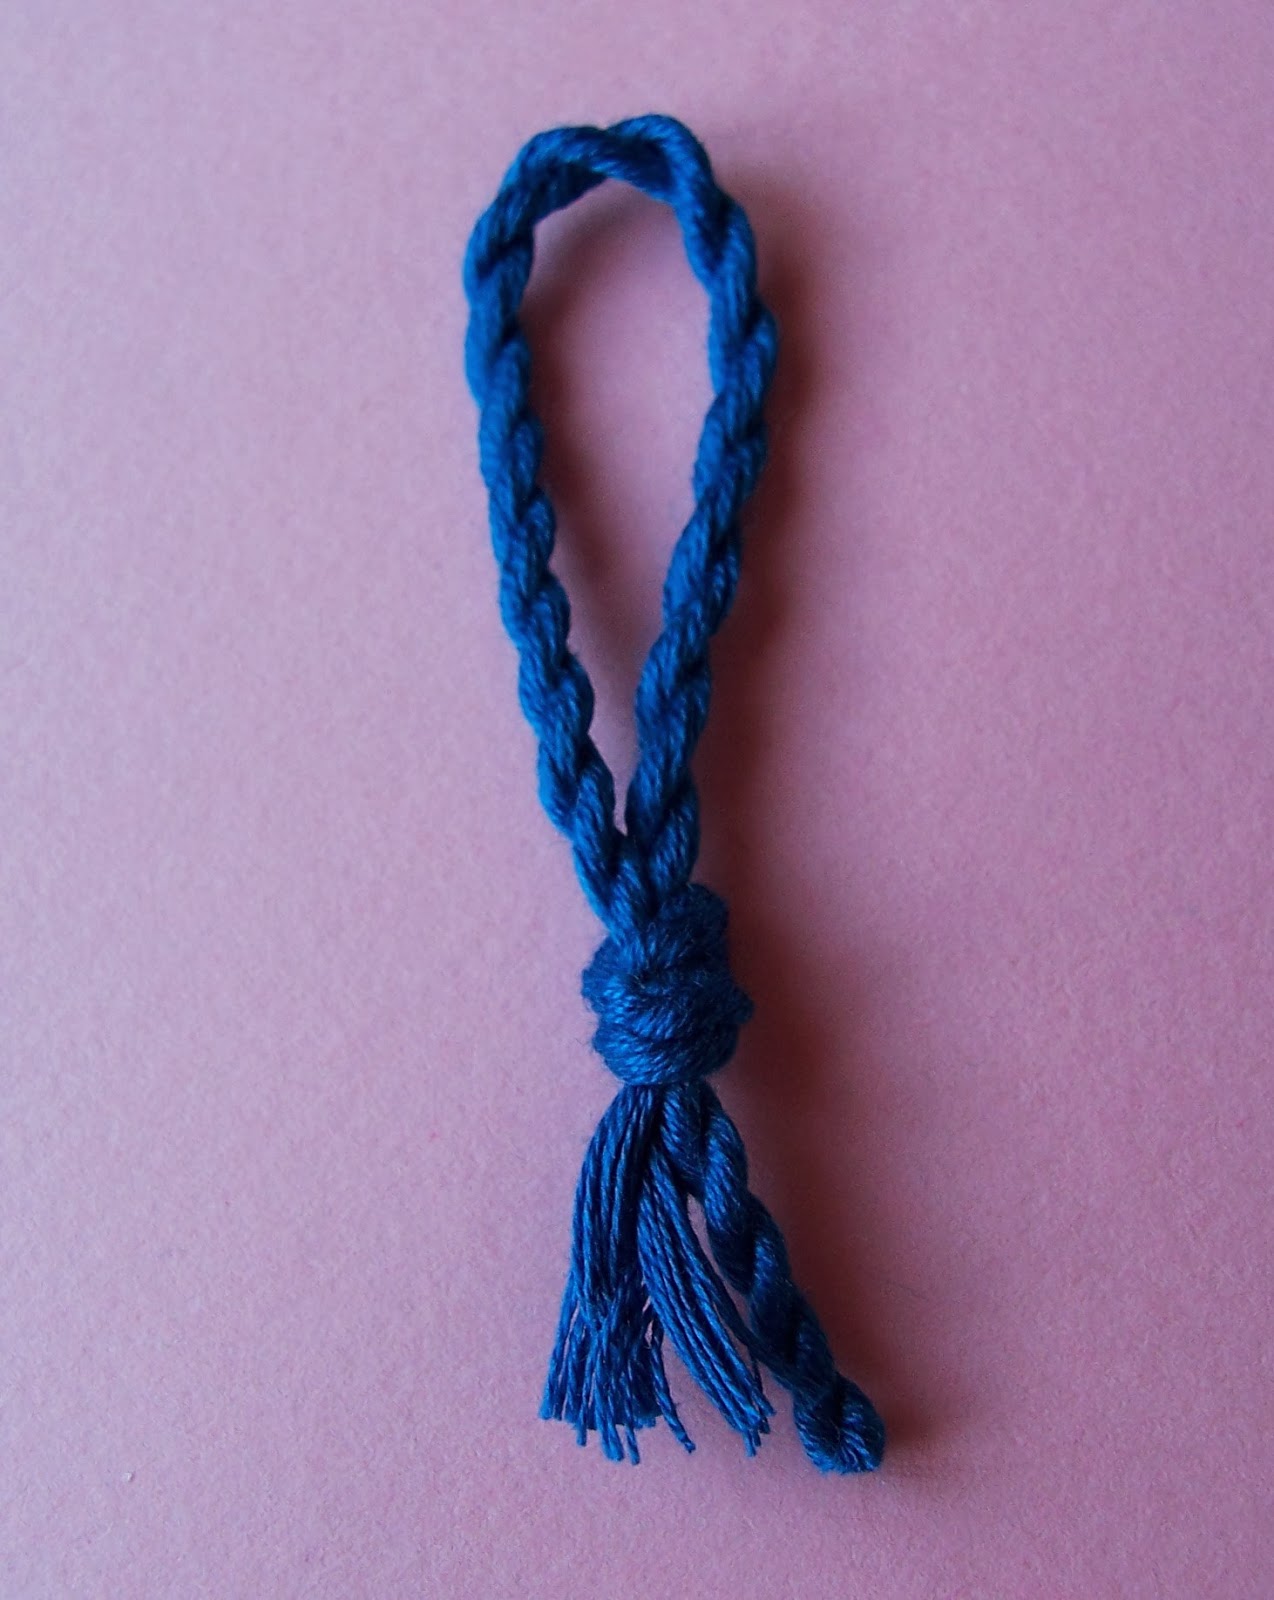
For the hanging loop, I made some cording using two long lengths of matching floss doubled over (4 strands). Tie a knot where the strands fold over and clip the knot to something sturdy, like a drawerpull. Pull the floss very taut and twist the strands tightly together; when they visibly vibrate to the touch (pluck the cord to test), hold the middle of the floss with the fingers of your left hand and fold the bottom of the strand to the top with your right hand (or vice versa, if you're left-handed). The cord will start to twist together; smooth your fingers over the coils to smooth out any bumps. Tie a new knot, double over, and knot again. Trim the ends if needed. Voila!


I chose to hide the knot in the top of my ornament, placing pins through both pieces on either side to hold it. This does leave a bump that you can't see but you can feel, so you may want to leave your knot at the top, especially if you're not using padding.


For the Whipstitching, I cut a long length of floss, divided into three strands, so I wouldn't have to worry about joining threads! I started by darning the end of my thread in the fold at the top of my ornament, and then I made a few stitches through the knot of my hanging loop to secure it in the center top of the ornament. Then it's just matter of passing under pairs of loops! At first, my stitches were too loose - you really need to tug gently with every stitch, just enough to pull the sides together.
____________________________________________

EDIT: When Shannan from Bobbin & Fred stitched this design, she asked a great question about stitching the edging.

When you put your back and front together, using this method, you end up with two lines of chain stitch next to each other. Which loops do you go through? That depends entirely on the look you're going for. I chose to go over both of the loops, but you can also go underneath the pairs of loops, which leaves the tops of the Chain Stitches visible. The original magazine article I adapted this technique from also suggested just picking up the inner arm of each loop pair for beading, but the seam would be significantly weaker, which is important to keep in mind.

I created a very rough, simple sketch to show you what I mean:


If you have any questions, please don't hesitate to e-mail me :)
____________________________________________

If your stitches are too tight, then the loops of the Chain Stitches distort and you lose the pretty braided effect. Don't panic if you make a mistake - I made plenty LOL ;) - it's very easy to unpick the whipstitch and try again! I took an extra stitch through every corner to cover the bulky folds of fabric there. When I reached the top again...


I went around the side of the hanging loop to pass through the last pair of loops, and then took a few extra small stitches to secure the opening.


I darned my thread in this join, and then buried the tail in the ornament, pulling my needle out through the side and snipping the floss close to the trim.


And that's it! Although there was a large learning curve with this technique for me, I think it would much easier for anyone who is more familiar and comfortable with The Whipstitch :) It's definitely something I intend to try again!!!

Here's a close-up of the edging:


You can see that my stitches are a little uneven, but overall I'm pleased with it ;)

And here it is at home on my tree, put up especially for the Advent Hop:


Honestly, I usually never get my tree up until the middle of December, even though decorating it is one of my very favourite things about Christmas :) Which brings me to Jo's great question about Festive Food Traditions during the Holidays - I love to bake, but only much closer to Christmas Eve. So I have nothing to show you LOL!

We do have recipes that are traditional in my family, but it's also become something of a tradition for me to try baking at least one new recipe every year. So I thought I'd share three recipes I've bookmarked as possibilities to try out this year:

Peppermint Cream Cheese Chocolate Cupcakes


This would be a wonderful way to use up left over candy canes! They're melted to flavour the icing as well as being crushed to sprinkle on top :) Yummy!

Chocolate-Cherry Cheesecake


Chocolate, cherry pie filling and cheesecake - what's not to love?! The cherry filling adds a festive pop of red. Or at least that's my excuse :) Mmm.

And last, but not least:

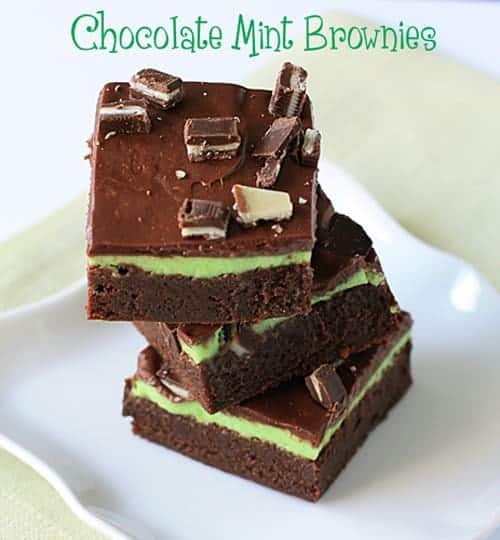
Chocolate Mint Brownies


I love LOVE brownies :) Everyone in my family does! There are tons of recipes for mint brownies but most of them use store bought chips, candy or chocolates and this one just uses plain peppermint extract, except for the optional garnish on top :)

Thank you so much for joining me for Door #4 in The Advent Calendar Hop!

May You Have A Very Merry Christmas :)


Many thanks again to Jo for hosting! Remember to visit the Advent Calendar Hop daily at Serendipitous Stitching for more treats throughout the Holiday Season :)

UPDATE: Thank you all for the lovely comments! I'm entering this post in the Link Party at Dream A Little Bigger this week, please click on the photo for more info:

Dream a Little Bigger

Friday, November 15, 2013

Site News + Jo's Advent Blog Hop!


Sorry for the delay in posting recently, it's been very busy :) Unfortunately, I've fallen behind in my blog reading and e-mail again and that, coupled with the fact that most of the news last month was about Hallowe'en which has passed, I've decided not to do an October edition of Stitchy News. I'm very sorry for any disappointment!

Also, since Christmas is a very busy time for most stitchers, I've decided to do a very special double Holiday Edition for November and December, to be published in late November! There's so many wonderful craft ideas out there, and I'll be looking for gift ideas myself :) If you have any items to submit, please e-mail me (>>>)!

In other blog news, I've *finally* gotten a page up for all the information about the ES SAL - see my top header (^^^), under "ES SAL" (creative, I know). Many thanks again to the wonderful SAL Participants for their enthusiasm and support!!! Over the next few weeks I hope to add another page with links to make finding things easier.

And finally, some Very Exciting News - I had so much fun with Jo's Hallowe'en Blog Hop that I've joined her Annual Advent Calendar Hop this year!!! Sign Up is now ongoing, so head on over to Serendipitous Stitching to join in too :) I hope you do!

Each person who enters gets a "door" on a given date, and on their day they "open house" to the blogosphere with a special post showing off some festive stitching!

This is the first time I've ever been involved in anything like this, and I'm really looking forward to it. When a was child, I always had a chocolate Advent Calendar, but we all know that stitching is the best thing in the world next to chocolate ;) LOL!

I haven't decided what stitching I'm going to show yet. There are a few ornaments that I'd really like to get final-finished this year, but this afternoon I pulled out my Christmas stitching magazines and happily started thinking about some new starts ;P

Thanks for your patience, and hope to see you at the Advent Hop :)