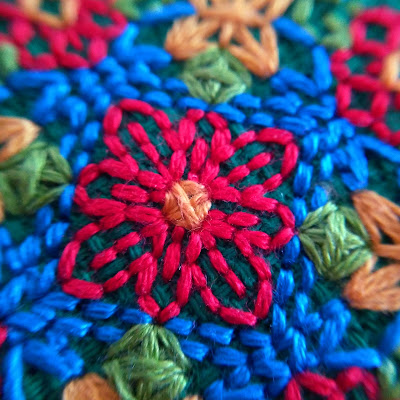
My free Blackwork Poinsettia Ornament stitched by Shannan of Bobbin & Fred
I'm absolutely thrilled and delighted to introduce you to Shannan Grierson, a new stitchy friend I've met on Instagram (@bobbinandfred)! She is a very talented designer specializing in needlepoint who blogs about her adventures with trusty French bobbin spool (Bobbin) and Fred (Bobbin's goat friend), at Sewing With Bobbin and Fred 😊
Shannan's cute logo, showing Bobbin on the left and Fred on the right!
Shannan kindly wrote an introduction for you too, so in her own words:
Hello Happy Stitchers! I'm Shannan, the author of Sewing with Bobbin and Fred and designer of needlework projects. My aim in life is to cover as many things as possible in hand stitch. I love all styles of needlework and so my designs span across embroidery, needlepoint and counted canvas.
I'm very passionate about turning flat hand-stitched fabrics into 3D pieces as I find the construction process fascinating and I like to create things we can all use on a daily basis.
I love trying new techniques and I love Christmas so I was very happy to find Aurelia's blackwork ornament design. I hadn't tried blackwork before this and I found it a wonderful introduction into a new way of sewing... and my Christmas tree's going to look so pretty this year!
You may remember this little free Blackwork Poinsettia ornament pattern and finishing tutorial that I shared a few years ago (for Jo's 2013 Advent Calendar Blog Hop!):
When I shared it again on Instagram for Throwback Thursday (#tbthursday), Shannan told me she liked the pattern, and I was absolutely thrilled when she started stitching her own variation, sharing her progress as she went. If you have a quick look at her website or social media, you will notice that Shannan has a super fun, vibrant sense of colour and I absolutely LOVE the new colour combination she came up with, along with her decision to stitch it on pretty green Aida:
Isn't Shannan's bright and cheerful colourway beautiful?!
She also followed my finishing tutorial (which you can find at the bottom of the pattern post), which is super easy and can apply to any ornament. It's a modified version of Whipstitch Edging, worked over Chain Stitch (instead of the traditional Back Stitch), which makes picking up the stitches with your needle so much easier!
Here's a photo of the edging in progress, from my tutorial:
And here's Shannan's lovely, clear closeup of how the Whipstitch looks over the Chain Stitch - you can see the beautiful braided effect of the edging:
Shannan had a really great question about the edging too. When you put your back and front together, using this method, you end up with two lines of chain stitch next to each other. Which loops do you go through? That depends entirely on the look you're going for. I chose to go over both of the loops, but you can also go underneath the pairs of loops, which leaves the tops of the Chain Stitches visible. The original magazine article I adapted this technique from also suggested just picking up the inner arm of each loop pair for beading, but the seam would be significantly weaker.
I have added some more information about this and a quick info graphic to the post 😊
Many thanks again to Shannan for kindly stitching and sharing her version of my free Blackwork Poinsettia Ornament! When you pop over to visit her, be sure to check out her great Tutorials section, where she has a lovely free pattern for her gorgeous Turkish Jewel Needlebook, designed to match the Turkish Jewel Scissors Pouch and Minders recently published in Needlepoint Now magazine:
I've never tried making a needlebook, and I don't have much experience with plastic canvas, but I recently bought some to make this pretty project and I'm looking forward to learning this new technique. I have another project on the go at the moment, but I'm hoping to try my hand at stitching Shannan's needlebook soon!
I love designing and sharing projects with you, and if you stitch any of them up, I'd absolutely love it if you could send me some pictures to share! 💕


4 comments:
What a beautiful ornament. Nice clear colors and joining the back and front with the aid of Chain stitch is smart.
Hello Aurelia, thank you so much for making me your Stitcher Feature this week. It's super lovely to see my stitching on your blog. I thoroughly enjoyed making this ornament and learning how to finish it, it was great fun! Thank you again :) Shannan xo
Ahhh, I love blackwork that isn't black! This type of edging looks nice (and easier to see than backstitching!).
I've not done a needlebook either. I keep tossing around ideas but then never actually do anything with them! Too indecisive. I like the idea of the plastic canvas one and after visiting her site, the needlepoint belt looks awesome too! I have... a healthy supply of plastic canvas after a relative was like, here, take everything~. So seeing pretty, new ideas for it is always welcome!
@ Queeniepatch: Thank you so much! Shannan's version is beautiful, and her edging is so neatly stitched :)
@ Shannan: You are so welcome, the pleasure was mine and thanks again for stitching my little project and sharing photos of your lovely work with me ❤
@ Rosey: I love blackwork that isn't black too! Maybe we should call it colourwork? I have no idea. How awesome that you have a stash of plastic canvas to play around with! It seems to be having a moment again. I bought some that's more like perforated paper, a clear plastic with round holes. I like the idea of having a sturdy cover on a needlebook too :)
Post a Comment