Showing posts with label Gift. Show all posts

Thursday, October 29, 2020

๐Ÿงฉ Puzzle Review: Sewing Room ๐Ÿงถ


Continuing on with my current love of crafty jigsaw puzzles, this is Eurographics' Sewing Room, with beautiful artwork by fantasy artist Ciro Marchetti

Although they're really not at all similar, it reminded me of a Dimensions Gold kit I've always liked called Maggie the Messmaker (with artwork by the late Charles Wysocki):


Both feature a mischievous cat let loose in a craft room, lying next to a beautiful vintage sewing machine. I'm not a cat owner (fiercely allergic in fact) but cats and creative pursuits just seem to compliment each other - most of the crafters I follow online have feline "helpers" who adorably lend a paw (or two) in photos ๐Ÿ˜ธ

I absolutely loved putting this 1000 piece puzzle together, the colours are so vibrant:


I really liked the other crafts included: the patchwork pillows, the balls of wool and knitting needles, the pretty floral hats and the tatted lace doilies. The rolls and bolts of fabric were especially fun to put together. The portraits of two lady seamstresses were a lovely touch. And there are all kinds of cute little details - I especially loved this little mouse sneaking up on the sleeping cat:


The pieces are a regular grid design but fit together very nicely. I highly recommend this one, and it would make a lovely gift for that crafty puzzler in your life ๐Ÿ˜Š

Do you craft with help from a pet?

Tuesday, December 4, 2018

A Maple Leaf for a Canadian Traveler!


As Winter sets in and Christmas is coming just around the corner, I want to take a step back and bid a fond Farewell to Autumn! You may remember the Lolli & Grace Autumn Leaf SAL from October; if you do, this design will be very familiar ๐Ÿ˜Š My best friend loved the finished needlepainting project so much she almost took it home with her LOL

Although she's always generously supportive of everything I make, it's been a while since she so obviously fell in love with one of my projects. She mentioned it would make a nice bag - a tote, or a purse - and after some thought, I decided to stitch a "bag brooch".

She's not one for wearing pins or brooches on a shirt or coat, so I wanted a larger motif she could pin to any of the canvas messanger bags she usually carries. The pins make it removable, for when the Autumn season is over. She's also a globetrotter who loves to travel, and Canadians like ourselves often wear badges or pins with the Maple Leaf to find fellow explorers, so this colourful little brooch can also serve that purpose!

I hope it will be a fun reminder of home when she's off having adventures abroad ❤


Here's the brooch in comparison with the original project! For the hoop, I enlarged the pattern slightly; for the brooch, I used the original Maple Leaf sizing. The colours and technique are the same. If you would like to stitch your own, the pattern, stitch guide and incredibly helpful video tutorials are all still available on the Lolli & Grace site, and you can find all the direct links in my project post.

This was my first time finishing an oversized embroidered brooch, and it was very much a trial-and-error process! I stitched my leaf on felt, just ordinary acrylic craft felt, in a pretty turquoise colour. Originally, I wanted to cut the border following the outline of the leaf, but I was rushed for time and went with a simple circle. In the end, I really like the extra colour, and the way the felt picks up those beautiful blues Anne chose that make this project so unique ๐ŸŽจ


I did baste a square of sew-on stabilizer to the back, for extra strength:


The brand is Pellon, but I'm not sure which type. It is very firm. I bought it off the bolt at my local craft shop. It did require a little extra strength to sew through it, but it made sure the felt didn't stretch (which was extra likely since I was stitching in hand without a hoop!) and it really helped to make sure the felt didn't pucker under the weight of all that thread painting. All the different colours result in quite a few layers of thread!

When I was finished stitching, I removed the basting threads. Since I was going for an outline finish at first, I spent some time cutting the stabilizer close to the stitching but in hindsight I would have just cut it to the circle shape, as it would have added some extra support to the backing. And would've been so much simpler ๐Ÿ˜„


The main problem with finishing an oversize brooch is making it stiff enough to stand on its own and keep its shape. Although I don't have any pictures of the process, what I did was cut the top of a clean plastic salad container - the kind you get from the deli - to shape. This type of plastic is clear and somewhat flexible. I did not want a thick plastic that might get brittle, and so be more likely to break.

I cut the plastic circle about 1/4 inch smaller than the felt, to give me room for my Blanket Stitch Edging. I punched four holes in the middle of the plastic with a hole punch. Then I cut a circle of polyester quilt backing, and sewed that to the plastic, tacking through the circles. This gave me a stiff insert with batting on one side.


For the back, I cut out a matching circle of felt, and sewed two pinbacks on either side of the middle. I used two because the brooch is oversize, and I wanted some extra security. To assemble, I put the insert batting side up - to cushion to the back of the stitches - and sandwiched it between the embroidery (right side up) and the backing circle of felt. Then I sewed the edges with blanket stitch.


I'm very happy to say that that recipient is very pleased with her bag brooch! I really like that the brooch is removeable and can be pinned to anything fabric. I hope the finish holds up with wear, but only time will tell ๐Ÿ˜Š


✈ Do you have a traveler in your life? Have you ever stitched something for them? ๐ŸŒ

Friday, January 31, 2014

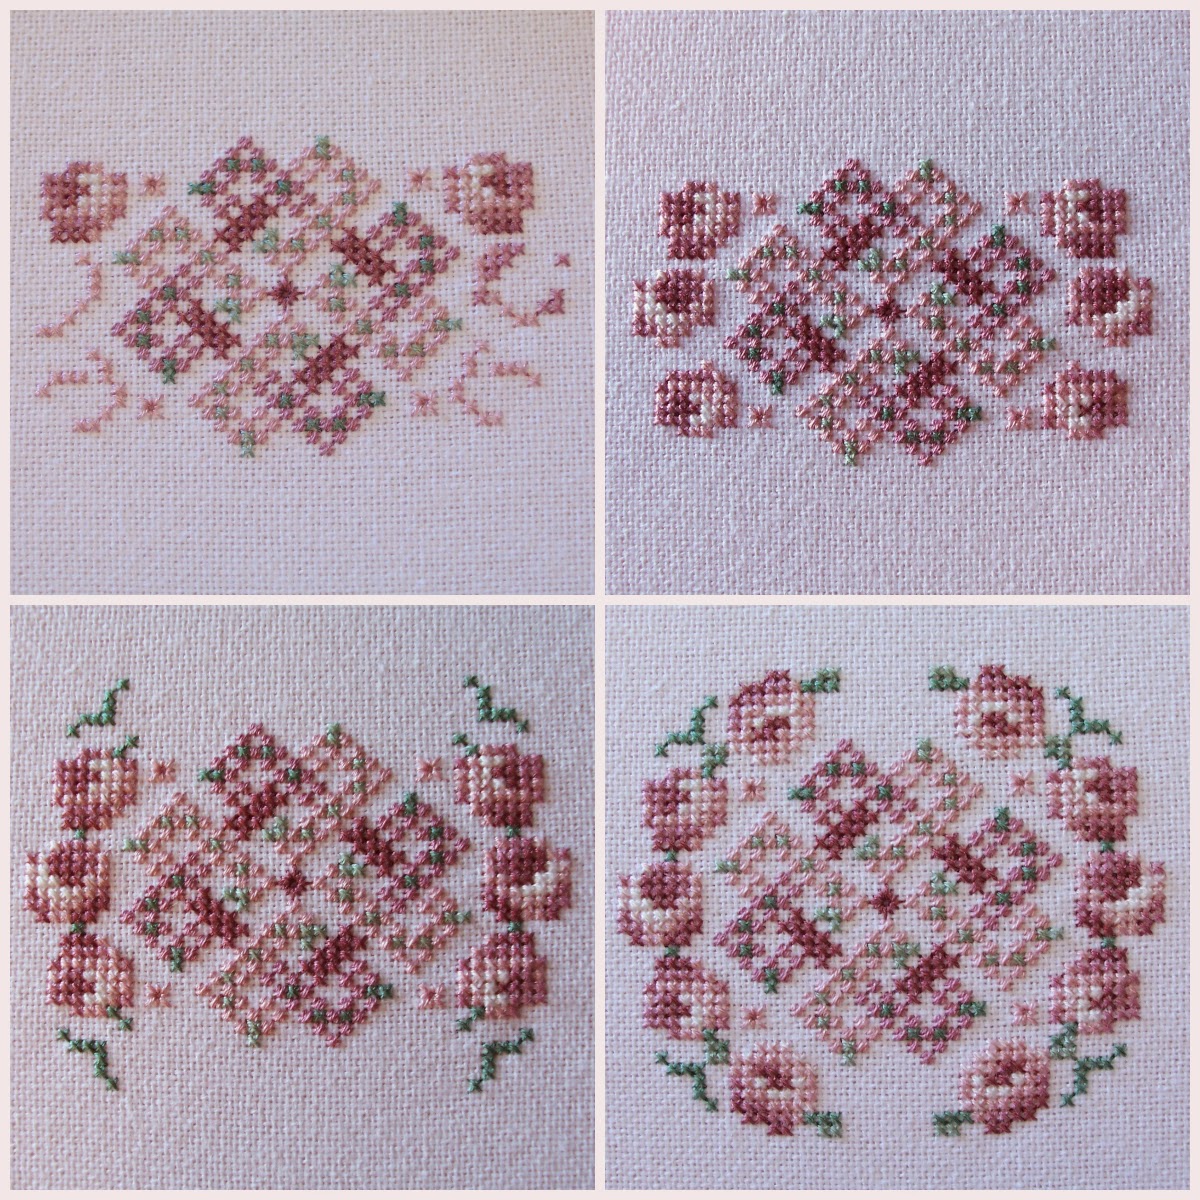
Just Nan SAL - Month #1: "Rosebuds"


I'm excited to introduce this project to you not only because this is my first entry into the Just Nan SAL but also because this is my first time stitching on Evenweave fabric!!! As you may remember, I was gifted this lovely pattern from Just Nan by Meggie, and it marks my first experience with this designer. Here is the leaflet:


I followed the colourway exactly, but mine turned out a little darker and leaned more toward the mauve than the pink. According to the chart, the model was stitched on "Zweigart 32 CT Antique Lavender Belfast Linen", which may have affected the way the colours photographed. Overall, I think mine has a more vintage feel but I like it :)

When it came time to choose my fabric, I was at a bit of a loss. Because the center is partially worked with a new-to-me Specialty Stitch called the "Mosaic Stitch"(which seems to be a smaller version of the popular Needlepoint favourite, the "Scotch Stitch") and there are Eyelets (a Diamond Eyelet in the center and Algerian Eyelets in the corners), the design cannot be stitched on Aida cloth. I couldn't find any 32 count linen here, but the design also gives measurements for 28 count.

After some fruitless hunting around in my local fabric store for some linen by the meter, I chanced upon a package of white 28 count Evenweave from M.C.G. Textiles at Michaels. This American family-owned business is new to me, and I am so very impressed with this product that - as I mentioned in my last post - I immediately went out and bought another package halfway through stitching Rosebuds :)


Here is the front and back of the package - the fabric is larger than I expected (20" x 27"), and retails here for $9.99 CA. Although the fabric is folded, the creases were light and easily came out when I sprayed them with water and let the fabric air-dry for about fifteen minutes. No ironing was needed! And that's a big plus for me ;)

The fabric itself is softer than Aida cloth, with a nice drape. And the colour is much brighter than it appears in these photos, a lovely true clear white with bluish tones rather than yellowy cream. But what impressed me most is the, well, evenness (for lack of a better term!) of the Evenweave! The threads are plump and close together...


...as you can see in this extreme close-up of the center area (before beading). This is a HUGE deal to me! I've looked at lots of other Evenweaves, in person and online, and while less "slubby" than Linen, the threads are seldom regular. And that drives me NUTS! Also, there were no flaws, bumps or loose threads in my package either.

Made of "100% Combed Cotton", the product descriptions on the packaging and the website also state: "Our fabric is a woven 3 ply yarn. Carefully woven in each direction which details a distinct box to hold for ease in stitching". This makes the strands easier to count, I think. It took me a while at first to adjust to working over two threads instead of one, but the regularity of the weave was incredibly helpful!

The 28 count Evenweave at M.C.G. Textiles is also available in a smaller 15" x 18" package and a larger 30" by 36" package. There are five neutral colourways in the range - White, Antique White, Mushroom, Khaki and Rose (more of a mauve) - and a really neat sample pack with 12" x 14" cuts is available. You can see the Evenweave options here, and the best part is that they're all currently on sale (site-wide too)!

The company also sells several other needlework fabric options, including pre-finished items to stitch on. And M.C.G. Textiles manufactures Aida cloth in a variety of counts and some beautiful colours (with sample packs too!), including a gorgeous opalescent line called Starlite Aida! They also sell Linen imported from Belgium.

This is definitely a product I'll be using again, and that I highly recommend trying! It's really disappointing that the lovely colours and the sparkly Starlite line aren't available here locally, but I'm considering trying tea/coffee dying to get a tan colour.

I'll let you know how that goes, if it goes (and if you have any advice, I'm all ears!).


Here's a few pictures of my progress on Rosebuds :) It was a very fun stitch and worked up quickly! Besides the Specialty Stitches, the rest is all in whole cross-stitches, and although there are a lot of colour changes in the flowers you usually have at least a two or three stitch block so it's not like working confetti (thankfully!).

The pattern called for two colours of beads by a company called SJ, which I think is SJ Designs. According to the site, they carry Japanese imports, and the colour numbers no longer match those given in the chart. One was a "White Pearl" and the other was a "Rose Blush", which is basically a pink pearl finish from what I can tell.

While I had equivalents in Mill Hill Beads, the white didn't show up against my fabric so I made some substitutions that - although I wasn't sure of at first - I'm now very happy with! The colours I chose were MH #02016 (Green: Crystal Mint) in place of the White Pearl, and MH #02024 (Purple: Heather Mauve) for the Rose Blush :)


The pattern states to attach the beads with a half cross-stitch using a colour to match the background, in this case white. That's what I'd usually do too. But since I was substituting iridescent transparent beads for opaque ones, the white just washed them out. Both colours were not-quite matches to my floss, as they were too pale.

So I used the dominant floss colour to attach each bead (in this case, 503 with the Crystal Mint, and 316 with the Heather Mauve) which showed through the glass enough that the beads then matched the floss near-perfectly ;) Neat trick, hey?!


You can see the beads with the threads through the holes in the top photo, and how the beads look from the front in the bottom photo. I also used a whole cross-stitch for bead attachment, as I normally do, but I made the stitch over only one thread of the Evenweave (just below the bead) so that the floss didn't show up on the white. I'll have to remember that in future ;) The beading around the Diamond Eyelet in the center is different that way - squarish instead of aslant - but I was okay with that.

Here's how Rosebuds look before and after the beading:


When I was first planning the project, I thought about leaving off the beads entirely (since I didn't realize using the floss colours would make the match so good!), but I'm very glad that I changed my mind because I think the embellishment adds a lot to the design. In fact, beading seems to be a design characteristic of Just Nan patterns, and if Rosebuds is any indication, the sparkle makes them lots of fun to stitch ;)

I'll leave you with a close-up of the lovely heart-shaped Celtic Knot in the center:


The Just Nan Stitch Along (SAL) 2014 is hosted by Zeb at Keep Calm and Cross-Stitch! Anyone can join at any time, including non-bloggers :) Come stitch with us!

Saturday, November 16, 2013

My Great Giveaway Win!!!

Some very exciting news to share this week - I recently won the absolutely fabulous "300 Followers Giveaway" hosted by the lovely Meggie of Cross Stitch Cottage!!! Unfortunately, Meggie has had to take her blog down for the time being, but I really hope life settles down for her soon and that she'll return to writing again :)

Before she left the online world, Meggie very kindly gave me her blessing to make one of the beautiful cross-stitch charts she sent a Travelling Pattern, and I'm thrilled to be able to share her generosity!!! I've never hosted or participated in a TP before, so I'm still working out all of the details. Since it's me, it'll likely be a little different ;)

I'll let you know ASAP! But for today, I just wanted to show you the amazing gifts:


It felt like Christmas when I tore into Meggie's package outside the post office ;) She had also wrapped everything wonderfully, but none of that survived to make it to the photos LOL! It's a little hard to see everything, so here's some close-ups:


Here is the card she sent, a great (and very useful!) heart-shaped magnetic needle-minder, beautiful Pink Ribbon scissors with beaded Fairytale fob (the charm is a cute little castle!), paper Bunting kit and "Live, Laugh, Love" sampler by Helen Philipps.


Just look at all these gorgeous overdyed DMC Colour Variations!!! I was SO happy to open these, and I've never even seen most of these lovely colours before ;) Here's a close-up of the label numbers in case you're interested in a particular colour:


From left to right: 4065, 167, 4090, 4220, 4245, 4250, 4042 (Christmas mix!!!), 4122 (Autumnal mix!!!), 4210 and 4190. I'm just starting to get into using overdyed threads, and I can't wait to work with these, especially the Christmas one ;)


Meggie very kindly included some extra Just Nan charts when I told her that the lovely little ornaments - "Rosebuds" and the Christmas-themed "Snowberries" - would be my first experience with the designer :) That was incredibly thoughtful and I can't thank her enough! The extra charts are the ornament "Primrose Path" (which I can't show because there is no finished image) and the magnificent "Harmony":


From what I can gather, "Harmony" was a special limited edition kit that came with unique overdyed silks and charms for each of the four seasons. While researching the design, I came across this great stitching finish, using the kit materials!


Finally, Meggie sent two other beautiful charts - "Love is a Garden" by Waxing Moon Designs - complete with a cute little butterfly button! - and "Geranium House" by Country Cottage Needleworks. Both designers are entirely new to me too :)

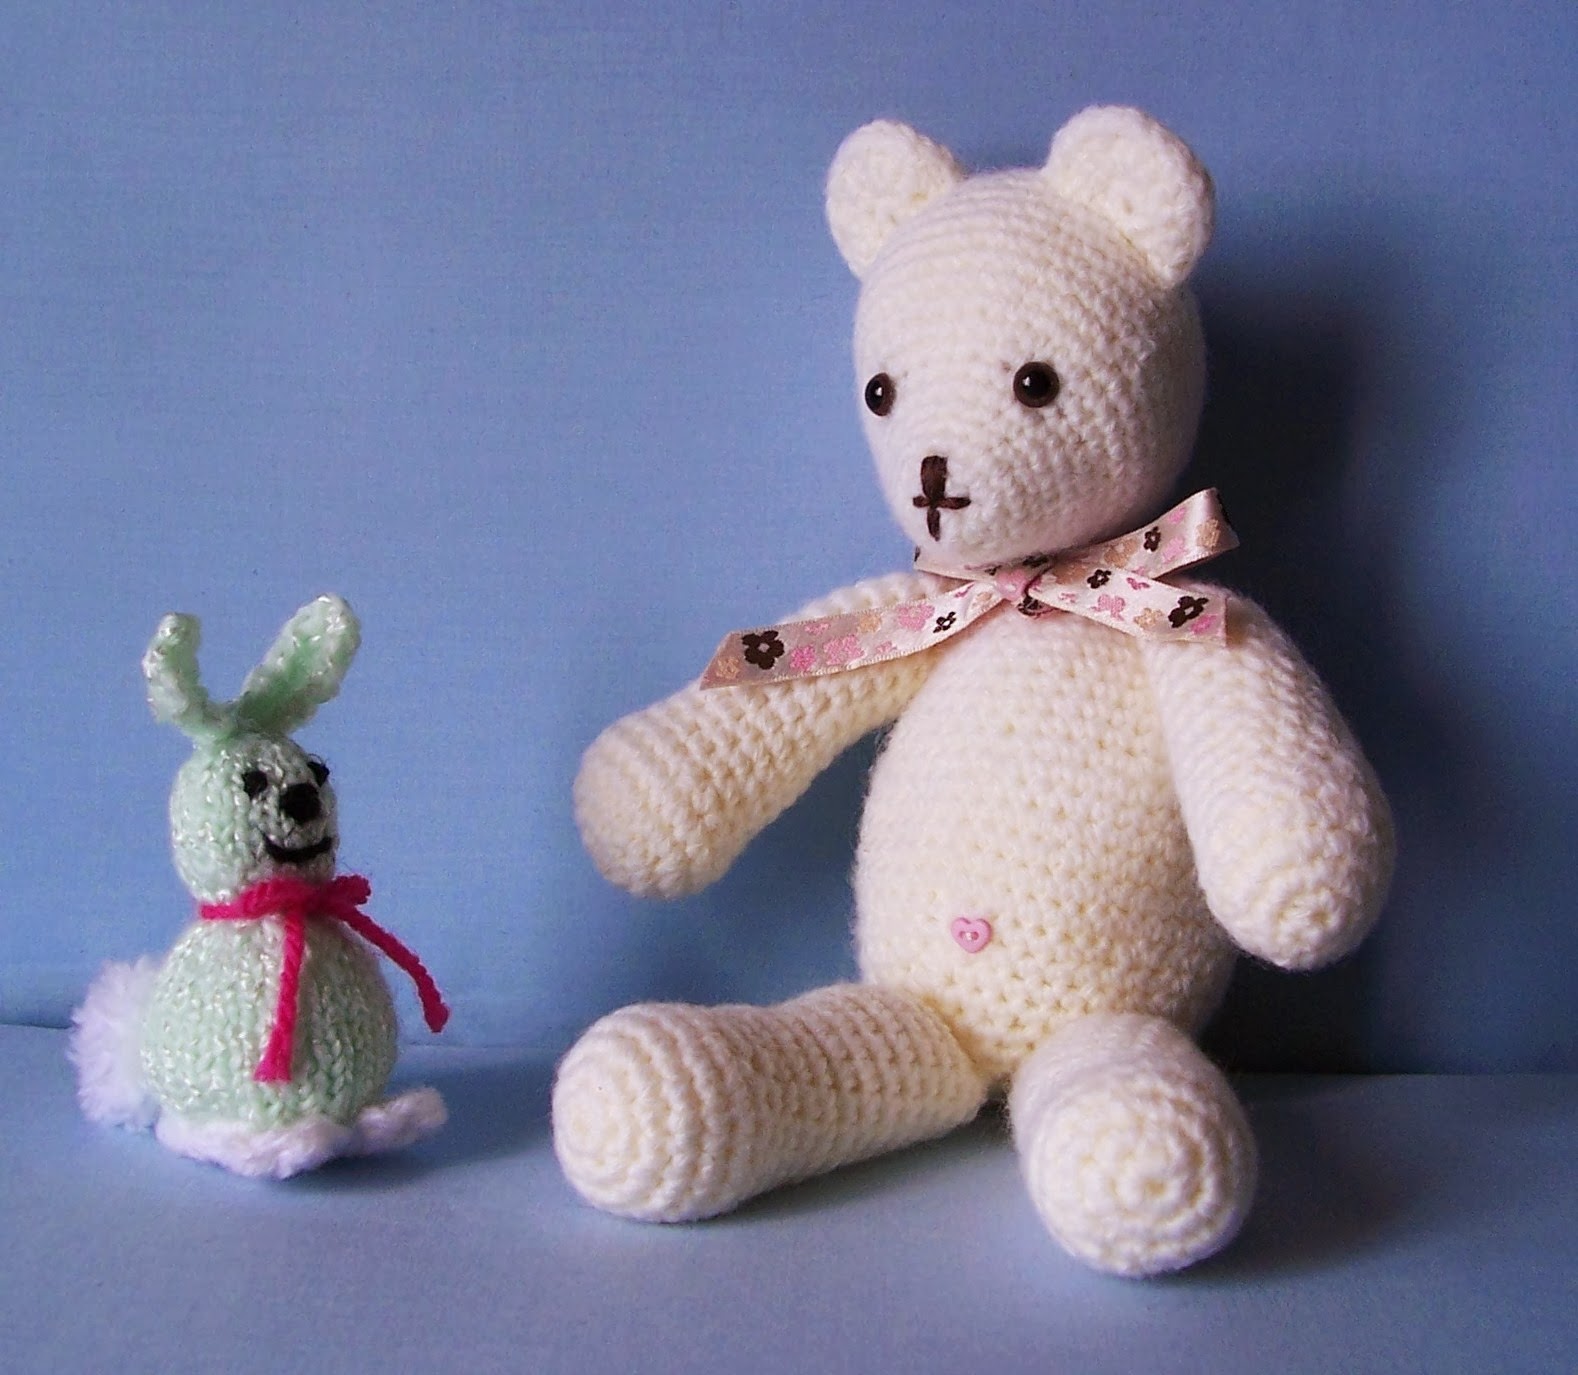
The Mascot for this Giveaway was the cute "Little Bear" Meggie crocheted, and she was a little bewildered when she was first unwrapped, after her long trip overseas...


But Mr. B. Floofy, being the gentleman that he is, hopped right over to say hello...


And now bunny and bear are the very best of friends :)


Little Bear is fabulously soft, carefully crocheted in some sort of wool blend, and is perfectly finished with a cute ribbon bow and little heart button on her belly!

I've been calling her Little Bear ever since I received her, and it works, but (like Mr. B. Floofy himself last Easter) I think she needs a special name :) Any suggestions?!

Many thanks again to Meggie, and to all the kind stitchers who share their stash :)

Wednesday, April 20, 2011

Happy News! A New Start and Finish!!!

Sorry for the unexpected absence! I can't blame my poor modem this time :) I've just been feeling a little under the weather. But I'm happy to report that I have lots of news to share, and I very much look forward on catching up on all the new stitchy blog happenings soon (although it might take a little while, so I'd greatly appreciate your patience)!

My Mother just passed a personal milestone and I wanted to make her something special to celebrate. I had a pattern that I knew she liked in my WTS (Waiting to Stitch) binder, and so last Thursday, I pulled together all the threads and went at it! And I am very happy to report that I finished it yesterday, and it has been delightfully received! It is not framed yet, but Mom likes to frame things herself (and is very good at it!), so I have gifted it as is with that in mind :) Hopefully she will find a special frame soon!

On to the stitchy goodness! This is the pattern I started with:


This pretty little design combines two of my favourite things - china and flowers, which happen to be two of my Mother's favourite things as well :) The great news is that this freebie is still available, at least for a little while! Cross-stitch designer Donna Vermillion Giampa runs The Vermillion Stitchery, and publishes a free series of designs annually, usually with a theme. For example, 2011's is "Teacup Posies" (flowers in teacups).

This simply named "Teacup and Doily" design is from the 2007 Design Potpourri Series, which is not typical of the VS series in that it had no overarching theme, and so the motifs are all very different. This is the only teacup in the collection. Now, on the VS website, all free series before 2009 are listed as "Formerly Free", but this chart indicates that the 2007 series has not been charted for retail and is not available for sale at this time. A simple Google search turns up the 2007 series, and all the links are still functional, so as far as I can tell this design is still a freebie for the time being. To download, visit this page.

I had originally downloaded this design in 2007 (!) so I was surprised and pleased to find it still available. The pattern is available in three formats: a black-and-white chart, a colour chart (the one I worked from), and a file for machine embroidery. All are .PDFs.

When I stitch, I tend to make alterations, and this design was no exception. My Mother was never keen on the doily, and although I started stitching with full intentions of adding the doily, I finished the teacup first and was glad I did. The longer I worked with the chart, I noticed more aspects about it that bothered me. The teacup is gorgeous! It is a small design, but is full of such detail and shading that it really has a three-dimensional effect. In contrast, the doily is flat and two-dimensional; the lack of draping or shading gives it the overall effect of lying stiffly over an invisible table, and I think that that is what was making me uneasy with it. Plus, it's charted off-center beneath the teacup. So, no doily in mine!

I also wanted to use a coloured fabric, to make the white of the china stand out. I had originally envisioned a buttery-yellow cream, and it did coordinate well with the colours; however, it also washed them out slightly when I laid my flosses against the fabric. So, I went dark! Navy blue, to be exact. And here is the finished work, that I call Floral Teacup:


While stitching this, I was a bit nervous as I had no idea if I had made the right fabric choice. At first I thought that the contrast was going to be too harsh, but I was really pleased (and, honestly, relieved!) to find that it really brightens up the colours, sets off the white, and really makes the gold metallic details shine!

Floral Teacup was also a stitchy first for me, in that I tried to take a lot of pictures of the work in-progress in order to try making a slideshow! So here is that little experiment:


I hope that it works for you! If you do have any problems, please let me know :)

Quick Stitching Review for Floral Teacup:

As previously mentioned, I worked from the coloured chart, which was very well-laid out and therefore very easy to read. I particularly appreciated the inclusion of a small picture of the stitched design in the lower right-hand corner; it was a nice reference to have.

Besides the elimination of the doily, most of my changes were minor ones. I backstitched the violet flowers in a deeper shade of the colour family, 552 (the flowers were 553 and 554). I found that this helped to give the flowers a rounder look, as the backstitching softens the edges of the cross-stitch. This is a neat trick I discovered while working on another project, and one that I use frequently when working with one-stitch blossoms.

I used Charles Craft Gold Standard 14-count Aida to work on, and so I worked my cross-stitches in 3 strands of DMC, rather than the recommended 2, which is my preference for 14-count for its thicker coverage. This is especially essential, I find, when working light stitches on dark fabric, as I did with this project. For backstitch, I used 1 strand.

The substitution that made the most difference was changing the gold. The pattern calls for DMC Gold metallic floss (5282, following the old colour system before the Light Effects numbering was introduced), and I do love this shade. However, it is a very brilliant gold with a slight greenish cast, and doesn't really have the softness of the 14-karat gold paint typically used for detailing on fine china. So I changed the gold out to something more reminiscent of real china. I had some J & P Coats blending filament that was a good match, and so this is what I used. Although you can use any brand, guided by your own colour preferences, I really do recommend using a blending filament. Although it is more fragile than metallics, and therefore requires more careful working, it doesn't spilt or fray apart as much as metallics do. It does stretch with heavy pulling, however, so I find that keeping your tension a bit lighter and tugging carefully helps a great deal.

Because blending filament strands are thinner than metallics, I used 3 strands of blending filament for the gold cross-stitches, and 1 strand for the backstitching. I also took the time to backstitch the gold cross-stitches with the gold, as the pattern suggests, which seems a bit redundant but does help to even out the edges. I made some other minor changes to the gold detailing: I took off the peak on the top of the cup handle and shortened the long overhang for a smoother look, and I backstitched the entire inner rim of the saucer in gold, as I found that the grey areas just split up the lovely detailing. And I omitted the gold French knot sprays on either side of the central floral medallion entirely, due admittedly to my loathing of French knots, but also due to the fact that three-dimensional gold embellishments are rarely seen on actual china, at least in my experience.

Overall, this was a very enjoyable project to stitch, and I was able to complete it in about five days. There is a great deal of fractional cross-stitches though, most of them combined 3/4s and 1/4s, and so if that is something that you are not comfortable with, I would not recommend this design. The gold leaf border at the lip of the teacup is particularly finicky. Also, the gold detailing on the outer rim of the saucer requires some long stitching (backstitching that stretches over 2 or 3 stitches instead of 1) that is a but fussy, especially since the chart does not outline the starting and ending points of each long stitch clearly.

Still, if Floral Teacup appeals to you, I encourage you to download a copy of the pattern for yourself. Even if you are not a lover of china, the small floral motif in the center medallion is a lovely little design that has a lot of shading for its size, making it look surprisingly realistic. It would be lovely worked on its own. I also think that this design would be easily adaptable, since you could change the colours of the flowers and the blue of the china easily (with a yellow rose on a pink cup, for example!) while retaining the shape and shading that makes this little teacup look so pretty and unique (in my opinion, at least!).

So there you have it! A new start and a finish all in one! ;) It's not often that I can say that.

I hope that you find this project as enjoyable to look at as I found it to stitch! I am still working on my Twilight Angel (Mr. Sun actually made an appearance yesterday! *gasp*) and will be posting some new pictures up soon.