Showing posts with label Product Review. Show all posts

Sunday, August 2, 2020

Review: Cobble Hill Jigsaw Puzzles


"Love Never Faileth" - one of my favourite details from Grandma's Buttons

The world has become really overwhelming since the last time I posted! I hope you and your loved ones are keeping well, as much as possible right now 🍀

One of the few perks of the pandemic is a renewed interest in jigsaw puzzling 🧩 In my family, we usually always did a puzzle together at Christmastime; often Santa Claus would leave a gift for "all of us" under the tree, and in the post-Christmas lull we would all put a few pieces in here and there. I have very happy memories of those times 💕

What I've never done, until now, is buy a puzzle for myself and put it together from start to finish alone - and I've discovered that I really love it! When I can't focus on anything else, or I'm feeling restless, anxious or upset, working on a puzzle calms me down. I love the bright colours, shifting the pieces through my hands, knowing that it will all fit together in the end - somehow 😆 I enjoy the process as much as the finished result.

As a consequence, I've discovered a whole new world of premium puzzle manufacturers and puzzling fans and reviewers! For anyone else getting back into the world of puzzles, I highly recommend having a look at brand websites, YouTube reviews that show actual puzzles in assembly to get a feel for a brand's design, and searching for puzzle blogs. I've only scratched the tip of the iceberg, but I was happy to find a thriving online jigsaw community that is currently growing by leaps and bounds!

A trio of helpful links to start with:
🧩 Jigsaw Junkie's extensive Brand Comparison
🧩 Karen Puzzles on YouTube, with helpful videos on all aspects of puzzling;
🧩 and My Jigsaw Journey, the blog of an avid puzzler!

First, I worked through my small pile of puzzles from Christmases past. My favourite was this one, Cobble Hill's Sewing Notions:


I bought this for us for Christmas 2016, but that was a very difficult time with a death in the family and so I didn't put it together until April 2019. The gorgeous image - which includes vintage needlebooks, needle packages, embroidery floss, wooden thread spools, crochet hooks, knitting needles, and many buttons! - is by amazing college artist Shelley Davies. My favourite detail is this vintage cross-stitch band:


And to my surprise and delight, when I posted about this puzzle on Instagram, Shelley told me that it's actually pillowcases that her Grandmother made! How wonderful is that?! One of the things I love about most needlework is the way it transcends generations and is often passed down in families 😊

Notice the beige edging on the box: this is the old-style Cobble Hill puzzle, starting with number 5 (it is now available in the improved new version, but this is something to be aware of as older stock may still exist in stores). They do not have a reference poster, so the corner with the logo is a mystery. Also, although I love the image so much, the cut on the pieces wasn't great, with a lot of "play" between them - you couldn't put small sections together and then move them to the board. It was also my first random cut puzzle, where all the pieces are different shapes, and it was very challenging at first! It's something I've really come to love though, you know for sure you have the right piece in the right place. And the unique shapes are interesting to the eye.

Recently, I treated myself to two more of Cobble Hill's crafty puzzles:


You can see these are the new number 8 series, with a green edging. The number 5 series puzzles had a sky-blue cardboard for the pieces, which didn't fit together as well as they could. I'm happy to report the new version - with a regular cardboard back - fits together beautifully! These new puzzles share the lovely matte linen finish of the last series. Both come with a "poster", which to my delight is an uncreased great quality print, suitable for framing for your craft room!


This puzzle was a delight to put together from start to finish!


It was so fun to look at all the different buttons! In my family, we have a tradition of button tins. I have fond memories from when I was very young of playing with my Great-Grandmother's button tin; I could spend ages shifting the buttons through my hands, marvelling at the different colours, shapes and textures. Not much has changed 😆 My Grandma has several small collections, mostly lost and orphaned buttons; my Mom has a large collection, mostly on cards from her sewing days; and I'm proud to have my own these days! Some of the buttons in the puzzle were similar to ones in our collections, and some - like the sparkler on top of this dish - I'd love to own!


With this puzzle, I found myself putting together each dish by colour, then doing the edges of the dishes, followed by the pretty vintage floral background.
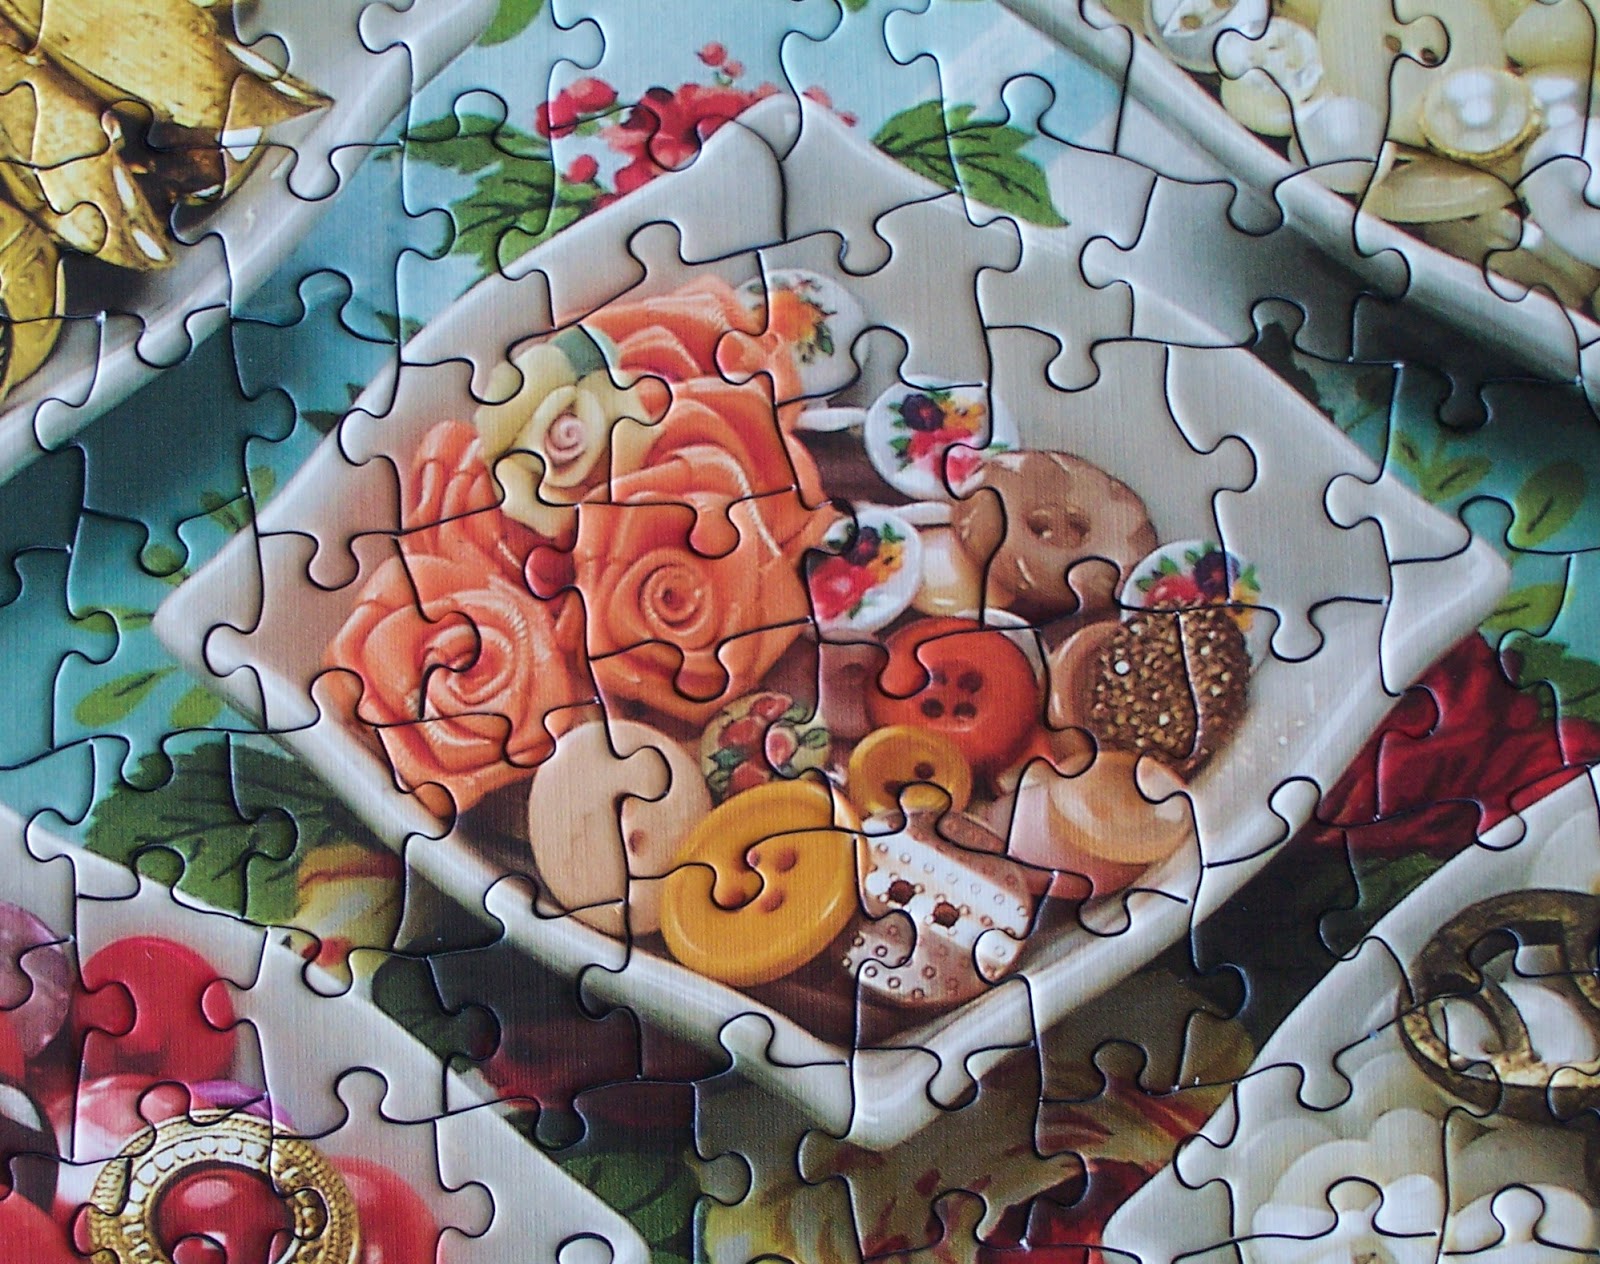

I love the little ribbon roses in this dish too!


And this single gold-rimmed dish reminds me of beautiful real Mother-of-Pearl buttons that were plentiful in my Great-Grandma's button tin, so long ago 😊

Since I was a young child, I've been fascinated by crazy quilts! The traditional rich jewel tone colours, the beautiful specialty fabrics like velvet and satin, all the different textures of appliques and ephemera, the intricate combinations of stitches - it all speaks to my stitchy soul and my magpie stashing instinct! I would love to make one of my own some day, and I have been collecting a few books on the subject for inspiration.

So I was thrilled to discover Cobble Hill's Crazy Quilt puzzle:


This was another puzzle I greatly enjoyed and would highly recommend, but it is definitely on the more challenging side! I had thought that I would enjoy following the stitches in the seam treatments, but the puzzle image is a painting by Helen Klebesadel (from her series Watercolor Quilts: Everyday Use) and up close all the stitches fragment so you can't really match them up. The colours are much farther ranging than the brights you immediately see, because the draping of the quilt necessitates lots of really dark shading. So I put the pieces together by colour!


It's a very fun effect, because while you're working close up with the pieces it almost looks like stained glass, and then when you step back from it, all the stitches finally come into focus and you see the quilting effect! Although the cover image is vertical I ended up putting together the puzzle horizontally, as I find it easier to reach that way.

I use a sheet of black foam board core and hold it in my lap, across the arms of a comfy chair; it's light and maneuverable, the dark colour makes the pieces show up, and it's easy to stow away under a couch or a bed while the puzzle is in progress. And, as you can see, it's just the right size for most 1000 piece puzzles!


My Some Day Crazy Quilt will definitely have a fan motif, I've always been drawn to them - so I was thrilled to discover this one in the puzzle (there is also a traditional cobweb too)! It was also very fun to try and identify the different embroidery stitches used. This is one of the most challenging puzzles I've ever done, and the most challenging puzzle I've ever done solo, but it was worth it and it's one I can see doing again and again.

Although Cobble Hill puzzles are in the pricier "premium puzzle" bracket, I think they give excellent value for money and are sturdy, to withstand repeated assemblies. I love both of these images enough to do the puzzles again, and they would make great gifts for a housebound stitchy friend! Although jigsaw puzzles have been nearly impossible to buy during the pandemic, due to renewed interest and manufacturer closures, Cobble Hill has recently reopened and is slowly restocking, and I've noticed that a lot of other puzzle companies are doing the same. I have bought all of mine on Amazon Canada.

Do you do jigsaw puzzles? Do you have a favourite brand or subject? In addition to crafty things, I love bright colours and also enjoy bird and flowers motifs - not unlike my stitching preferences, in fact 😉

Friday, September 11, 2015

A High-Flying End to Summer :)


I've always been a Disney girl, and Mary Poppins is one of my all-time favourite movies! I don't usually enjoy musicals, but the many catchy songs of this one have stayed with me over the years: "A Spoonful of Sugar", "Feed The Birds", "Chim Chim Cheree" and, of course, "Supercalifragilisticexpialidocious". During this project, it was the grand finale of "Let's Go Fly a Kite" that keep running around in my head ;)


Let's go fly a kite
Up to the highest height
Let's go fly a kite
And send it soaring
Up through the atmosphere
Up where the air is clear
Oh, let's go
Fly a kite!

(you can read the full lyrics here)

And you may see why I can't seem to get that uplifting ditty off of my mind lately:


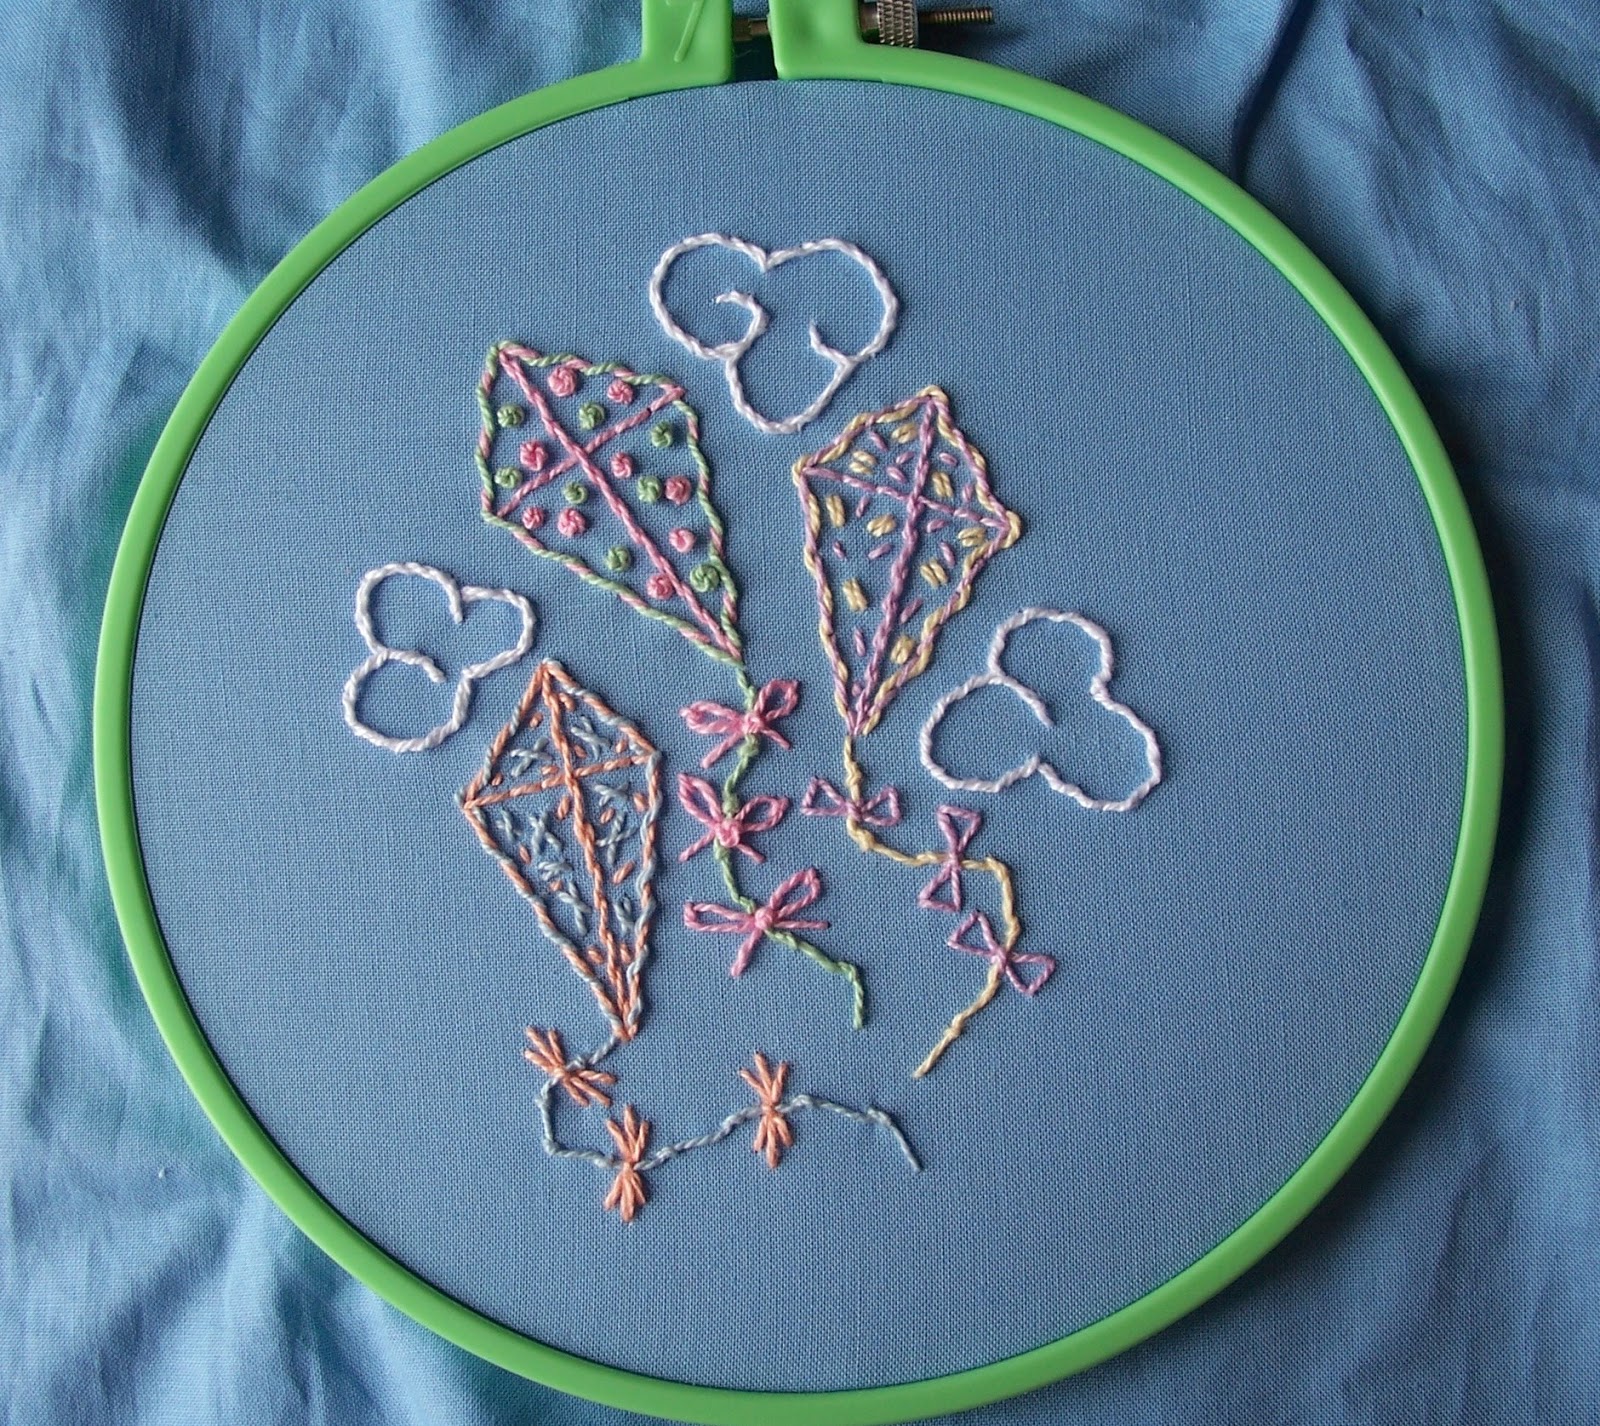
This little trio of kites started off as a sort of test project. Thanks to The Great Stitchy Karma Gods, I recently thrifted an interesting book called the Anchor Complete Embroidery Course by Christina Marsh. Mine is the original hardcover edition published in the UK in 1998 by David & Charles (no longer in business).


When looking for some information on the author, I learned that it was re-published in 2003, in a paperback, as The Beginner's Guide to Freestyle Embroidery. Also, according to Marsh's Author Page on Amazon, she wrote six themed cross-stitch design collections. Unfortunately, other than that, information is scarce.

This is a great book for absolute beginners to embroidery! Unlike most books, which are usually either stitch dictionaries or project books, this is indeed a "course" that starts with the simplest stitches and gradually builds in complexity and skill level.

It starts with basics, with advice on choosing materials and how to thread a needle:


And extensive information about patterns - how to read them, how to transfer them, how to resize them - and also directions for learning to read from a chart, since there are a few simple but attractive counted projects worked on Aida cloth.

There are interesting ideas for simple finishing methods right at the start...


...and then comes the first Chapter, Just Five Stitches - Backstitch, French Knot, Lazy Daisy (Detached Chain Stitch), Satin Stitch and Blanket Stitch - which is a bit of an unusual selection. I would have put Stem Stitch in place of Satin and Chain Stitch in place of Blanket, but it works. This is the first project, easy and cute:


And then comes five Chapters, with six stitches each grouped by function (Stems and Outlines, Knots and Dots, Chains and Loops, Solid and Open Fillings and Borders and Bands), for a total of 30 stitches (35 counting the 5 foundational stitches).

All of the stitch diagrams are large, clear and super easy to follow:


Each chapter has several projects at different skill levels, and the projects only use those 6 section stitches, plus the 5 Foundation Stitches.

So this neat pincushion from Chapter 2 uses only Stem and Outline stitches:


However, the idea could easily be adapted to include other stitches :)

The final chapter - Mix and Match - shows some designs with stitches from several chapter "sets". These are not necessarily the largest in the book either. In fact, my favourite is this very small Holly design that is shown stitched with three different levels of complexity, from simple outline to advanced full filling:


It is worth noting that all the patterns are only one diagram with a medium thick black outline, which serves as the transfer you copy as well as the stitching guide:


Since most of the designs are on the smaller side, this works mostly okay, but for large projects like this gorgeous goldwork floral - which reminds me of pretty blue-and-white china - it might be a bit tricky! Keeping the glossy pages flat is hard.

Another of my favourite projects is this quirky and fun Fireworks Display cityscape:


One blogger actually put the Fireworks idea to a great use on a landscape quilt! The round white firecracker is made with an intriguing stitch called a Danish Knot, which I hadn't come across before now and am hoping to try soon :)

The "showpiece" project of the book is from the same Chapter, Knots and Dots(3):


Called the Medieval Strawberry Sampler, this is a colourful and open translation of historial crewelwork, which was stitched much more densely with wool.

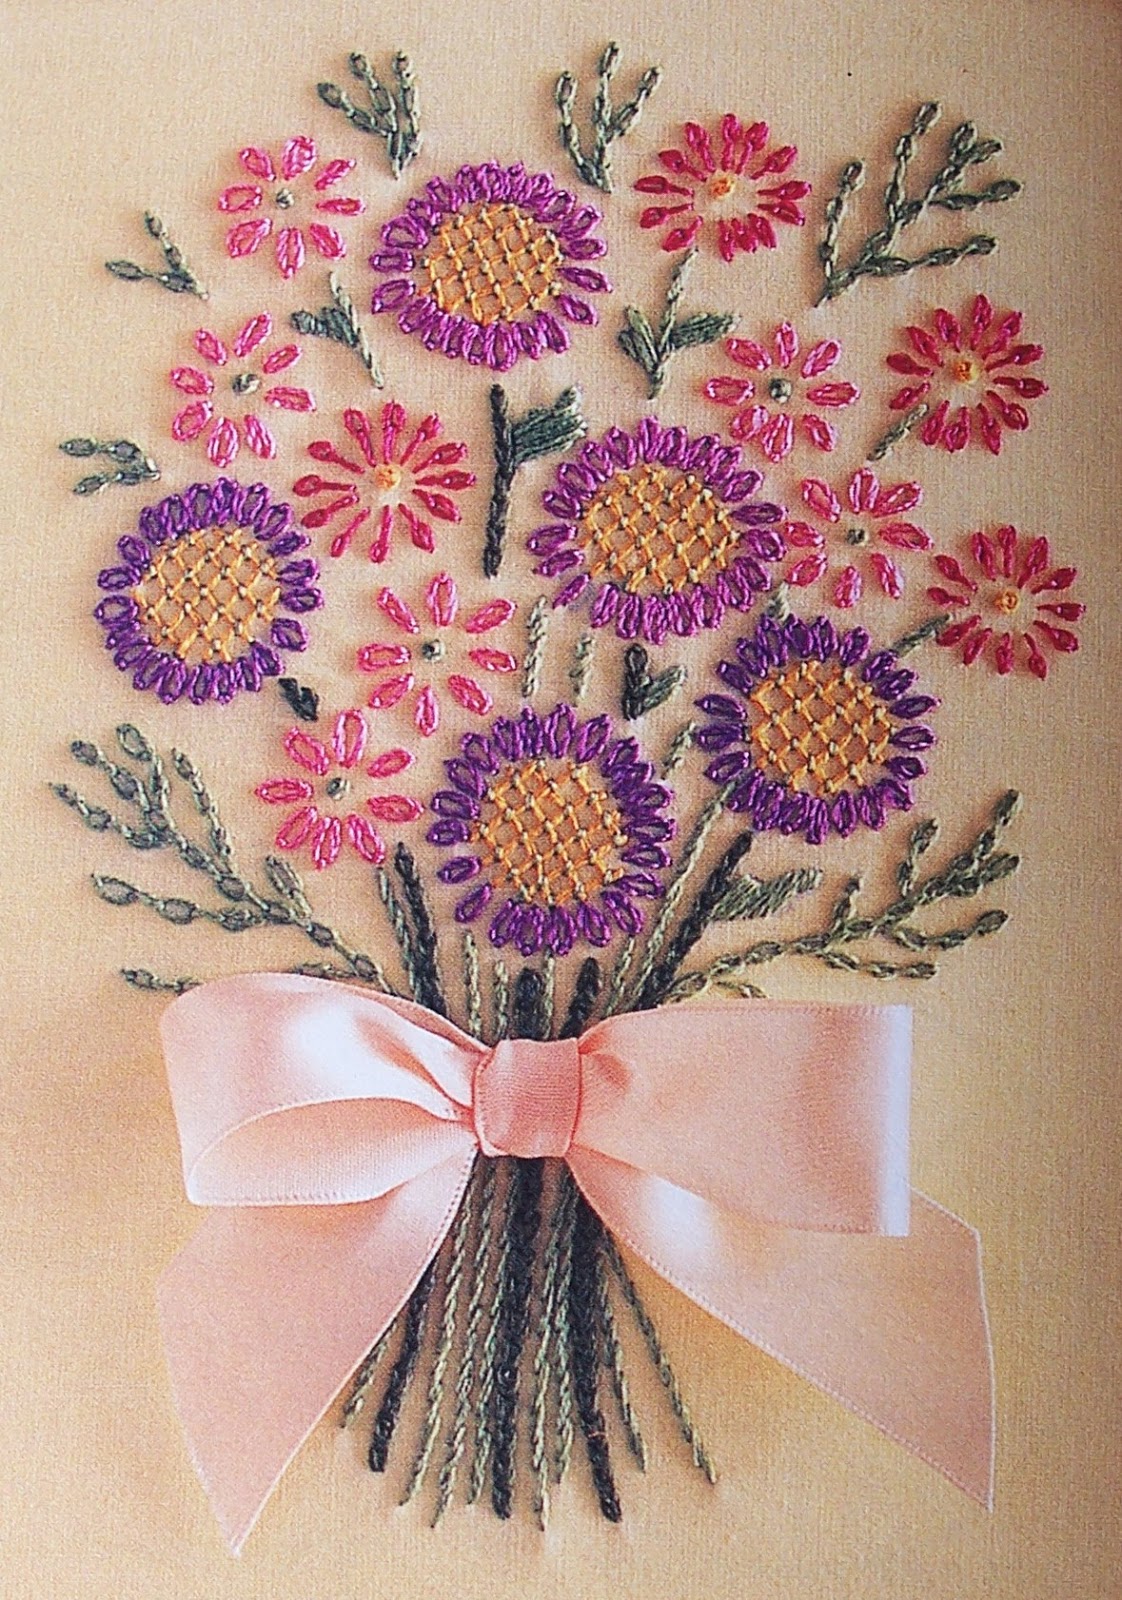
But my favourite project by far is this beautiful Summer Bouquet (Chapter 4):


I absolutely LOVE the pink ribbon tie! This project was the whole reason I bought the book and it was what I intended to stitch first - then I fell for the adorable kites:


This trio of kites is called High Fliers and is Project 2 in Chapter 2. I stitched it pretty much as written, although I did make a few changes as I went along ;)


Instead of my usual iron-on transfer methods, this time I traced the design directly from the book! I used the white Nonce Marking Pencil, and it worked wonderfully - the lines are visible but subtle and they did not smudge or fade at all while stitching.


This pencil is designed for marking on dark fabrics, and although it is water soluble, I didn't see any need to wash the work since the embroidery covered the lines well.

The lead is not like an ordinary colouring pencil - it's slightly waxy, and it traced a pretty fine and clear line with only light pressure. It's a very convenient, inexpensive tool and I'm really looking forward to experimenting with it more!

The fabric is my favourite sky blue 100% cotton :)

I started stitching with the lovely DMC PC #8 I recently used for my Happy Bluebird:


However, the stitches were too skinny compared to the project design, which uses all six strands of Anchor floss in the needle at once. I needed something a bit chunkier, so I took out what I had stitched (I had already removed some in this photo).

I found it quicker to cut right through the loops, and use the needle to lift up the short pieces. Although this wastes thread, it does help reduce strain on the fabric:


Then I remembered the Prism craft threads I last used for my Floral Umbrella, which was fully embroidered. I was interested in seeing how these threads would work for simple outline stitching, so I chose some pretty pastels from the "Sweets" collection:


This particular thread isn't mercerized so it's more fragile than other craft threads on the market. This is what gives it the lovely vintage look, and it's like a thicker single-stranded version of the matte Flower Thread flosses that used to be on the market.

I'm happy to report that it works great for outline stitching - much better than it does for heavy embroidery like my Floral Umbrella! For beginners especially, I would consider this a specialty thread, akin to working with metallic flosses in cross-stitch.

Just like metallics, it helps to use shorter lengths and you need to trim the ends often as they are prone to fraying, which makes the thread more likely to knot and tangle.


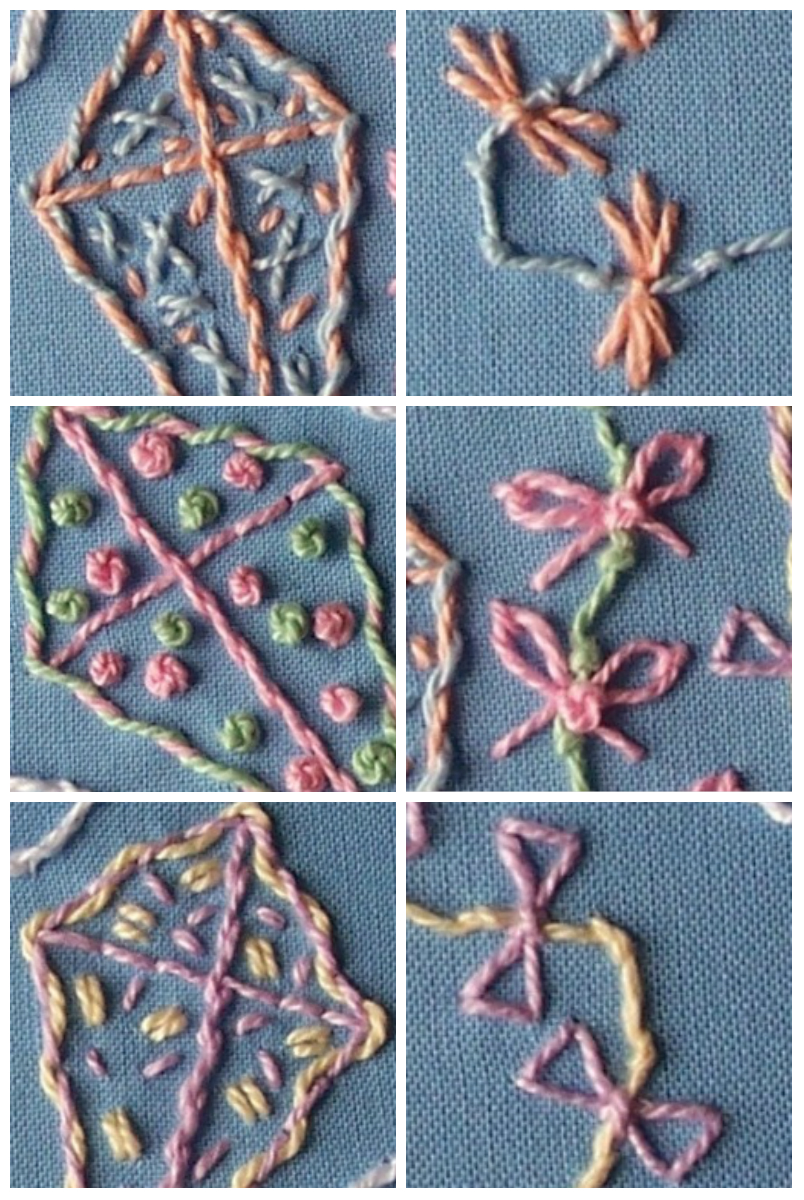
I had tons of fun stitching these kites! But I did change the stitches up just a little ;) I used the recommended Stem Stitch and Backstitch, and learned the Coral Knot for the tails and Whipped Running Stitch from the chapter diagrams. Instead of Couching, I used Whipped Backstitch and I added some ties to the kite tails using Lazy Daisy (Detached Chain Stitch), French Knots, Straight Stitch and Cross Stitch.

And since the kites looked a little bare, I added some quick fillings with French Knot polka dots, Oblong Cross Stitch, Double Seed Stitch and Seed Stitch :)

Here's a close-up of the fillings and the kite tails:


The chunky texture of the thread gave the stitches a wonderful lofty lift:


Finally, I decided my trio of kites needed some company, so I added some whimsical floofy clouds with Whipped Backstitch! This gave me the sunny sky feeling I wanted.


I just free-handed the designs, and although I was worried at first that they were too wonky, I've come to like them :) Although I love the funky, folksy look of simple outline embroidery, I find it very difficult to step back and stop trying to "finish" it off into something more complex. The imperfections are all part of the charm, and while I know that, it's hard to put that into practice.


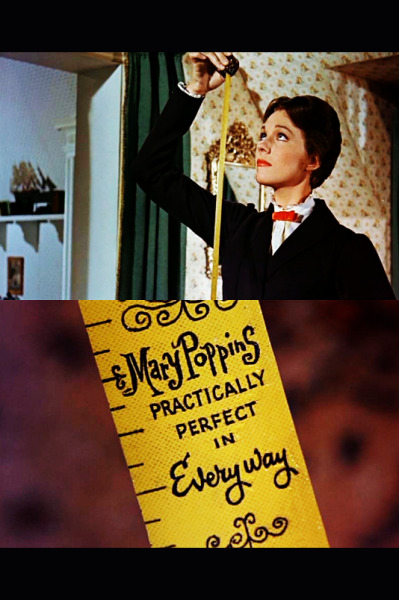
Following Mary Poppins, rather than thinking about these natural variations in stitching as "imperfect", I'm trying to think of them as "practically perfect" instead ;)

It's a struggle I think many stitchers who cross over from counted techniques to free-style embroidery must face! When you're used to stitches that are symmetrical and evenly spaced, it's an adjustment to have every stitch be slightly different, no matter how hard you try to keep them the same (which can be incredibly frustrating!).

But it is exactly this quality that makes embroidery so much fun to stitch, and I'm trying to let go and embrace the wonkiness :) All of the projects I've done to date have ended up being a surprise of sorts, because it's so easy to change up elements as you go, and I've had the best results when I don't try to plan things out much beyond the basic design beforehand and just "go with the flow" for the stitches themselves.

It's a totally different mindset, and I'm curious if others have this problem too?


Hopefully, your Summer is also coming to a happy end! As Autumn comes in, I'm letting my imagination soar with project ideas, although I can't quite bring myself to look ahead to Christmas yet as so many stitchers are doing. But that cute little Holly design from the book is calling out to me so I may change my mind soon :)

Thursday, July 23, 2015

The Wonderful World of DMC PC!


Hello, hello! And a very Happy Day to you :) It's so hard to believe that Summer has not only arrived, but that it's already half over. I know most stitchers are already thinking about Christmas, but I'm trying to hold on to flowers just a bit longer ;)

I'm still experimenting with Ribbon Embroidery, but I took a break to stitch up this cheerful little Bluebird of Happiness and it provided an excellent opportunity to talk about the absolutely brilliant thread that is DMC Perle (Pearl) Cotton!

But first, the pattern is a lovely vintage design from Workbasket magazine kindly shared by Love to Sew on Flickr in the Hoop Love Vintage Transfers group. If you're interested in these kinds of patterns, this is a great resource, but please be aware that you do have to sign up with a Yahoo! e-mail to view the image pool.


Available to Download in several sizes on Flickr here

It's a "tester" or "trial" pattern, which is a small motif usually included on an iron-on pattern transfer sheet for the purposes of testing the iron on the fabric. They usually matched the theme of the full-size pattern set. They were meant to be discarded after being used and were a practical way to make sure the transfers would work. I'm not sure if anyone actually stitched them, but they make wonderful stitch testers!


I traced over the pattern on thin notepad paper using my blue Sulky Transfer Pen (the same way I did for my Floral Umbrella), but this time I only put in little dots to represent the bottoms of the music notes and the ends and centers of the flowers. I find it very hard to get my Lazy Daisy loops to match up exactly to drawn ones, so this saved a lot of frustration and allowed some flexibility while stitching :)

And here's the back - isn't amazing how the flowers look like stars?! -


It's challenging to start and end so many colours in a pattern this small (the black was especially ornery) but I used the "travelling" method of winding new threads along the backside of old ones, and it made things considerably neater. I even find myself doing this for cross-stitch these days, and it's made a big difference!


Thanks to a very generous gift from a friend and to my Stitchy Guru Mother's Stash, I now - at very long last - have representatives of every size in the DMC Perle Cotton line!!! Although the "Perle" spelling is French, I've always heard it pronounced and sometimes spelled "Pearl", so that's how I think of it too :) I usually just call it PC.

I am a HUGE fan of this thread, as you may remember from my Floral Heart:


This project was stitched entirely in DMC PC #5, on gold velveteen

In my opinion, DMC PC is a criminally underutilized thread!!! Especially because it's absolutely perfect for embroidery! Unlike DMC Floss, which is six-stranded, PC is a single non-divisible strand of thread with a pretty twist and a lovely soft sheen.

It's actually that gorgeous luster that garnered it the name "Perle" (Pearl) in the first place! It not only makes stitching easier but it also, I think, shows off stitches better.

Mary Corbet at Needle N' Thread has some great posts explaining the differences in common embroidery threads that are well worth reading: Thread Comparisons, which covers PC, Floche and Floss; Thread Talk! Sizing Up Cotton Threads that goes into more detail, including PC sizing, and a two-part post Comparing Cotton Threads, Stitched and Embroidery Thread Comparisions which show stitch samples.

But as I was embroidering my little Bluebird of Happiness, I realized that I had never seen a picture showing all of the PC Sizes as they come, in Skeins and Balls, so I made this little chart to visually demonstrate the differences (feel free to share!):


That tagline, "The World's Most Beautiful Thread", is actually used by DMC online and in advertisements, and I really have to agree :)

Skeins: PC Skeins are probably the most widely available, with #5 being much more common in my experience than the larger #3, which seems to be mainly marketed for needlepoint use. According to the DMC Product Website for Art. 115, both are available in 292 solid colours with an extra 20 variegated hues made in #5.

The "How to Use" section of this page shows how to unwind and cut the skeins for use. Unfortunately, they are tricky to store as the thread is too large to be wound onto floss cards. I've used old ribbon spools and even small pill bottles for this purpose, but mostly just rewind the skein and tie the colour number onto one end.

There are also two metallics (Art. 315) - Silver and Gold - in #5, that I haven't tried.

Balls: Now, somewhat confusingly, PC #5 is also available in Balls! In the photo above, that green is actually a vintage ball from my Mom's Stash. I've never seen it sold this way, and I'd thought it was a discontinued line. But according to the DMC Product Website for Art. 116, there are still 5 solid colours - no wonder it's rare!

My Stitchy Guru Mother can remember a much larger colour range of these once, so that's something worth keeping in mind if you're thrifting or buying vintage threads.

Here are all the beautiful bright colours of PC #8 that I used in my little Bluebird:


According to the DMC Website, #8 Balls are available in 206 solids and 18 variegated shades! I also love using this thread for Blackwork on size 14 Aida cloth (like I did for my Metallic Monarch Variation). Unfortunately, it's availability seems to be limited. My local Michaels carries only White, Ecru, Black, Navy and a Burgundy.

So image my delight when a friend kindly sent me these wonderful COLOURS:


This was my first time embroidering with #8, and I am hooked!!! It makes a finer line than the #5, and although it is more delicate, this makes it ideal for fitting more stitches into a smaller area or working more detailed stitches.

This Bluebird is pretty small - I sized it to about 3 inches tall and 4 inches wide before printing my pattern - and the #8 PC allowed me follow all the fine curves of the back feathers while still mostly covering the permanent Sulky Transfer Pen lines!!!

Now, #12 Balls seem to be even less common than the #8! DMC says they make 40 solid colours, but I have only personally seen white retailed in this size.

DMC has a number of free projects for PC listed under Cotton Embroidery, mostly designed by Carina from Polka & Bloom (who has some more freebies here), my favourite of which is the Bird of Paradise :) There's a nice alphabet available too.

Here's a closer look at all four sizes of DMC PC together:


Although #12 doesn't look all that much finer, in person the difference is much more noticeable. Whereas #8 works well with size 14 Aida, #12 could be used on a size 16 or size 18 Aida! It's really too fine to embroider with, unless the design is very small or incredibly complex. But it is often used in combination with #8 for the accent details - like Wrapped Bars and Dove's Eyes - in Hardanger stitching.

#12 is also a great size for larger-scale Tatting - making lace with a shuttle (or, less commonly, with a needle) - which happily seems to be making a comeback. DMC also says that all four sizes of PC can be used for Crochet, but that would be an expensive proposition for anything bigger than a pair of earrings or a brooch!

PC is also very popular for Crazy Quilting, and there are companies like Colour Compliments that make gorgeous hand-dyed variegated versions of the threads.

I also wondered about the Colouring System for PC. All DMC Threads share the same Colour Numbers, but the difference in materials can affect the way the dyes absorb. PC is a little prismatic - because of the luster, the colour seems to shift slightly in tone depending on the direction that the light hits it. So I compared three of the brightest shades of PC #8 with their coordinating flosses, and you can see my results below:


The closest of the three was the pink (3689, which is a favourite of mine!), with the yellow (445) also being nearly indistinguishable. The blue (996) was actually further off than it looks in the photo - the floss was noticeably deeper. But in general I think it's safe to say that most Floss colours can be substituted for PC.


And finally, if you'd like to stitch your own little Bluebird, here's a Stitch Guide:


Please click to view Full Size to Save or Print

Of course, the really wonderful thing about small designs like this is how easy it is to experiment with them, so feel free to make your own substitutions!


I hope this overview of DMC Perle (Pearl) Cotton (PC) was helpful, and I really hope that you consider trying it out the next time you embroider, or experiment with adding it to your cross-stitch. It's a really beautiful thread that is so fun to work with, and if more stitchers use it and buy it, hopefully it will become more readily available in the future :) Or at least not get any scarcer LOL! What do you think of PC?