

Has there ever been something that you would absolutely love to stitch but have never been able to buy for some reason (or have bought but haven't had the time to start)?
Dimensions Gold's Fall Fairy has been at the top of my wishlist for years! I've loved it ever since I first saw it on the cover of a Herrschners mail order catalogue when it was released several years ago (unfortunately, I can't remember the exact year - if you do, please let me know! I'd really appreciate it).
Most of my stitching has been gifts for others, and I rarely do large projects - and never one for myself, as of yet, although I have several planned in my Stitchy Stash. They require a much larger commitment of time, energy and resources - and space!
And Dimensions Gold kits are expensive, because the designs are complex and intricate - in my opinion, they're the best mass-market cross-stitch kits available, although I've ever only worked one: my Twilight Angel (which is a smaller Gold Petites kit), which is still unfinished (but not forgotten - I'm still waiting on finding the perfect frame to finish stitching on the background scattering of stars and sequins and the embellishments).
To my surprise and delight, a very kind friend - who isn't a stitcher (yet!), but who happened to remember my love for this kit from a passing conversation - gifted me the Fall Fairy for my birthday this year, and I'm so excited and grateful to finally have a chance to stitch her! It's an amazing feeling to get your dream project in your hands 😃
This design is based on Ruth Sanderson's amazing artwork:

Although the cross-stitch version is cropped and simplified - the fairy is missing her butterfly wings, and the many little pixies and sprites have vanished - she retains the lovely joyful exuberance that I also feel for Autumn. You can almost feel the magic wind she's creating whirling the leaves and whipping her clothes!
And the Fall Fairy is part of an informal seasonal series of Dimensions Gold Sanderson artwork adaptations! I absolutely love designs based on the Four Seasons 🍂❄🌷🌻
There is also the beautiful Woodland Enchantress (Winter):

Thanks to my Stitchy Guru Mother, who gifted this kit to me a few years ago (she was looking for the Fall Fairy to give me but it was out of stock at the time), I also have the Enchantress in my Stash and she will make a wonderful companion for my Fall Fairy!
She's a kit I've put off stitching because, frankly, the design is very intricate and a little intimidating 😆 I also thought I would need a dedicated space to leave her set up - and an actual needlework stand of some kind - but I'm finding ways around both with my Fall Fairy. So if I can finish this kit, this will be the next big project I tackle 😄
Also, there is the delicate Spring Fairy, playing a flute (I love her wings!):

And finally, there is the charming Fairytale (Summer), which unfortunately seems to be out of production at the moment:

Although I don't think these were meant to be an official set, I do think they compliment each other perfectly! For anyone who has wondered what comes in a Dimensions Gold kit, I thought I'd do a quick run down. The kit contents come in clear plastic folder with a large full-colour photo on the front:

The charts have changed, and are now on shiny paper. I was concerned at first that this wouldn't take highlighter well (I mark off the stitches as I do them to keep track of my place), but thankfully it does. Both pages are double sided, with no overlap. There is a small inset for the detailed backstitch on the face. The symbols are large, clear and multi-coloured. There is an additional page with instructions in several languages, a legend for floss and materials, and stitch diagrams and order.

My favourite part of Dimensions Gold kits are the presorted threads!
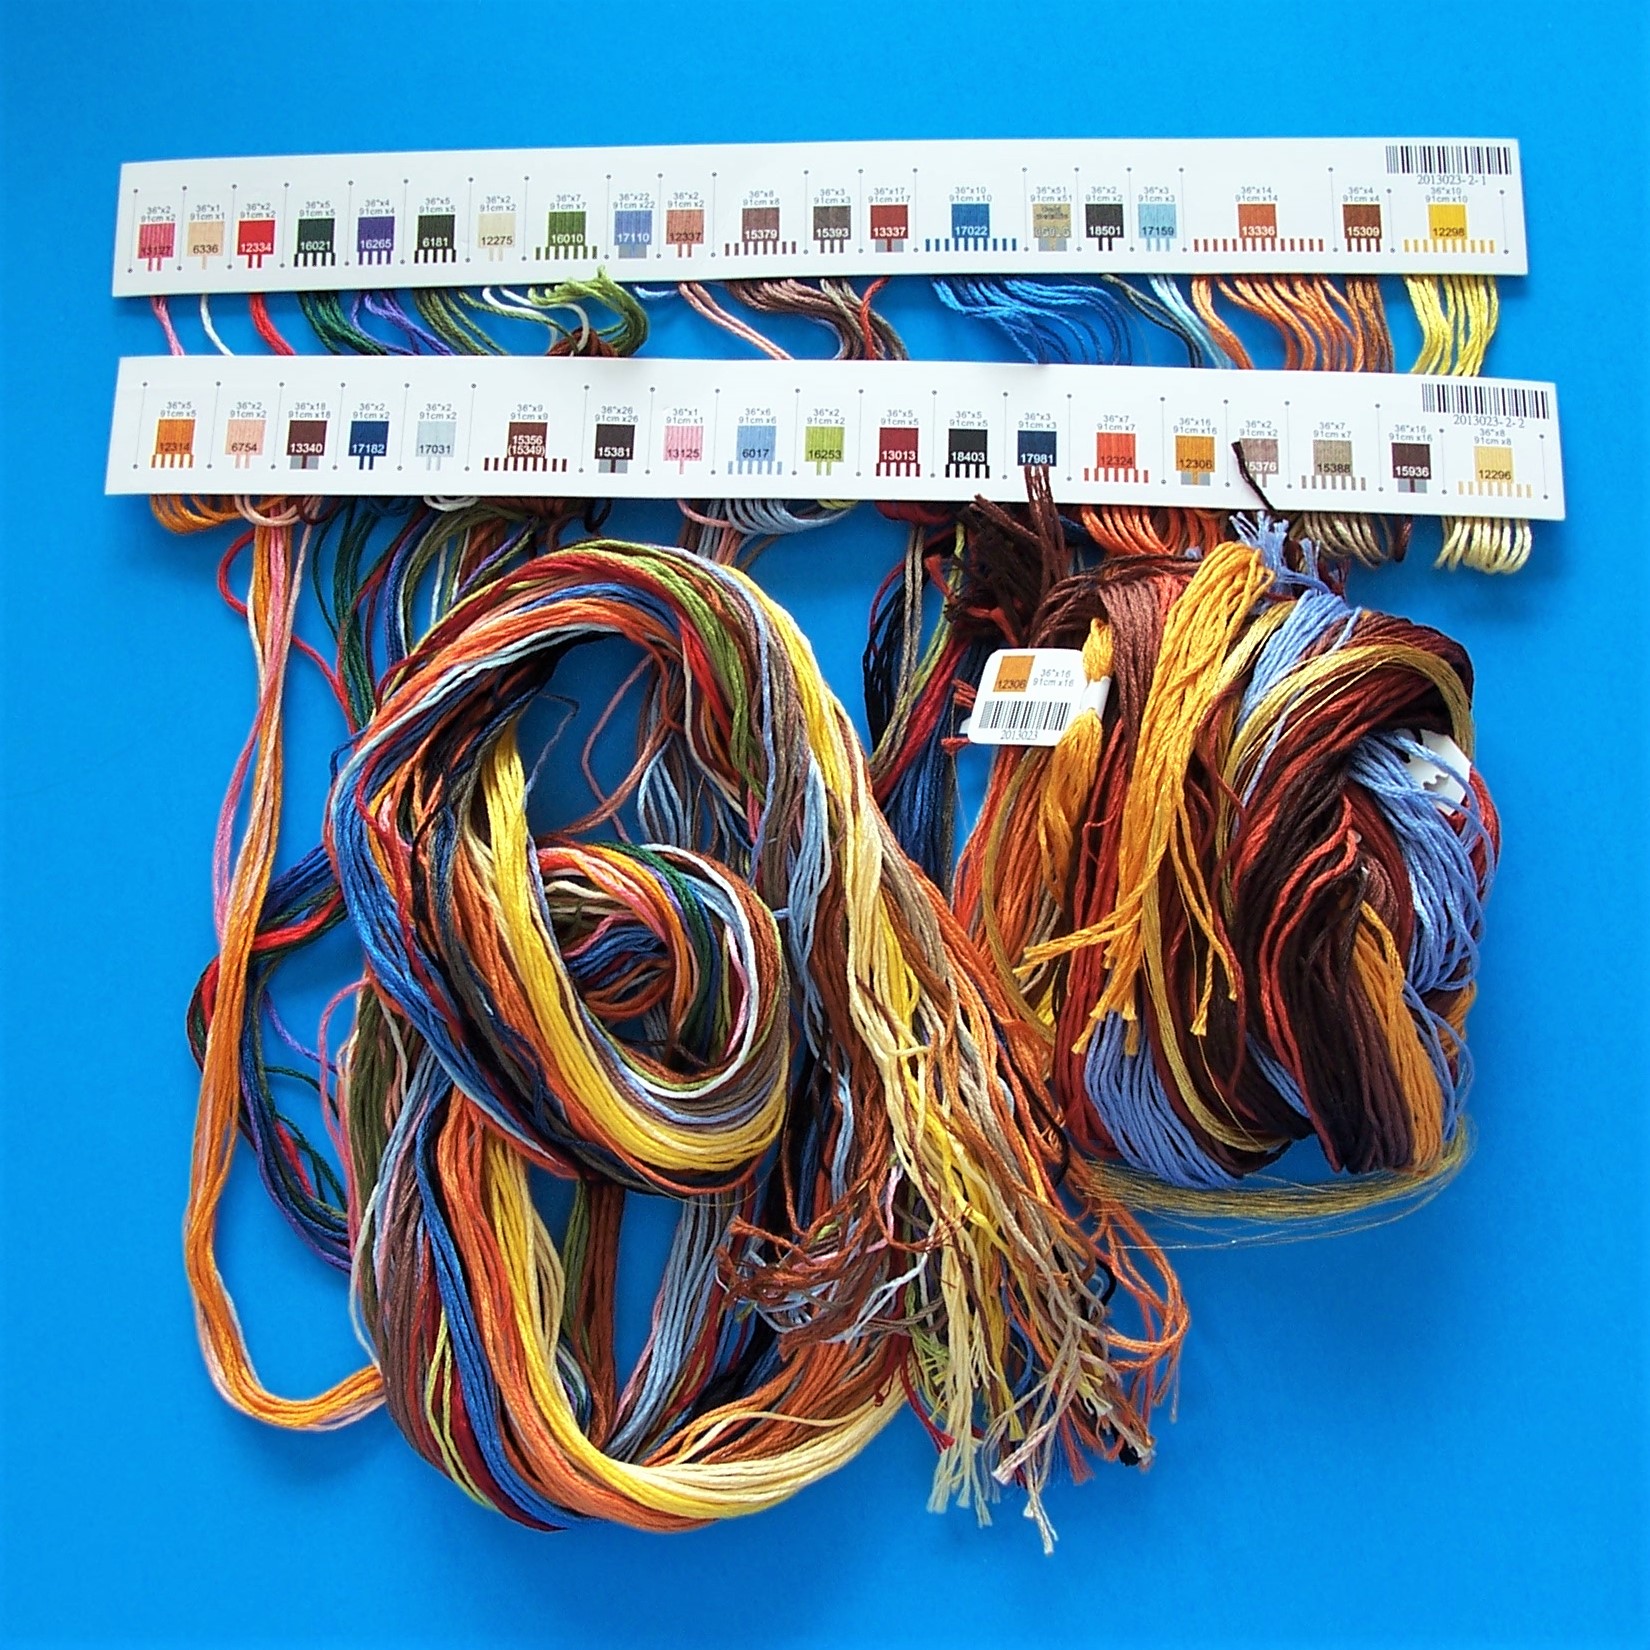
There are 38 colours (with 8 blended colours) and a single-stranded gold metallic. They come already affixed to two cards with a small image of the colour and the colour number. Extra threads for some colours come in additional bundles labelled with the colour number only. I love these, and I make my own versions for nearly every project.
The only thing that could be improved is including the stitch symbol by each colour! I try to draw my own on, but they're always wonky 😂 I also use a hole punch to add a parking spot for each thread colour on the opposite side, in the white space. For the blended colours, I'll be making my own little thread card to keep them tidy.
The kit comes with a gorgeous blue-gray 16 count Aida - the colour of a blustery Autumn sky - and gold beads. There are also two needles, one tapestry and the other crewel (for beading, I think, although it's a little thick). I'm using a 17x17 Q-Snaps style frame (mine is made by Unique / H. A. Kidd) instead of a hoop.
For this project, I decided to do something I've never done before: I gridded the fabric!

Although I've seen gridding recommended for larger projects, I've never tried it before. Because the design is fully stitched (also a first for me!), I wanted to make the counting easier. It took some time to set up but I'm so glad I did - it's really helped!
There are many different ways to stitch a grid pattern on your fabric, and several different special materials available, including guideline threads. Most tutorials recommend an easy-to-see colour not used in your project (frequently bright red) and a stiff thread, like fishing line or monofilament.

Since I was impatient to start my Fall Fairy, I used sewing thread to grid, using the Over 8, Under 2 method to make 10 stitch squares. I chose this design because it keeps the majority of the thread visible on top the fabric, so it's easy to adjust the tension and there's less chance of getting the gridding thread caught up in my cross-stitches. I only gridded the vertical lines, and that works well for me - again, less gridding thread to catch in my stitches, but a great guideline for positioning them.
As you can see, I started the threads on the front side of the fabric from the bottom, gridded up and over and then back down, in a U shaped pattern. I let the ends dangle so they are easy to adjust and hopefully easy to pull out once my stitching is finished!
The blue star pin is marking the middle of my fabric, the point where all four sections of the pattern converge. I later changed it out for a less pointy (and therefore less thread-catchy) green heart pin. I left the gridding threads a little slack so they float over the cross stitches; it's easy to make them tighter or looser by pulling them out with your needle, and I just nudge them aside when stitching close to them.
It took a bit of time to adjust to working in this new way and it was awkward at first but I'm only sorry I never tried it before! It really does give you a way to double-check your placement and avoid counting errors. I've made a few small ones but the grid has made me catch them much faster than I would have otherwise.

Here's my start so far! I'm really enjoying stitching my Fall Fairy during her Season, it makes it extra-special 🍂 What's your dream stitchy kit or project? And do you enjoy seasonal stitching? I hope you'll follow along with me on this new stitchy adventure!