Monday, December 19, 2016


This Beautiful Vintage Peace Angel is a free digital download
from The Graphics Fairy that you can use in crafting!

This year is ending with the biggest challenge of my life to date. I've been extremely fortunate to be very close to my maternal Grandparents in my life. Unfortunately, my Grandpa - who has survived three different types of cancer over the last ten years - has recently been diagnosed with terminal cancer and is very ill. The blog will be on hiatus for the foreseeable feature. Thank you very much for your understanding.

Merry Christmas from Eglantine Stitchery - Best Wishes for Health, Happiness, Love, Laughter and Good Fortune in the New Year!

Please try to make as many happy memories as possible with your family and loved ones; time is, sadly, always shorter than you think

Wednesday, May 18, 2016

GG SAL: Silk Lovebirds Final Finish!


I'm so happy to report that I realized my goal from April's Gifted Gorgeousness SAL and final-finished my Silk Lovebirds off into this pretty diamond ornament for the merry month of May! Although I struggled a bit with the finishing process, I am very pleased with the result :)

For the full project details, please read my last GG post here. A quick summary:

~ Pattern from Cross Stitch & Country Crafts magazine, Sept/Oct 1990
~ Worked on gifted 14 count Aida in a pretty buttercream yellow
~ Stitched with gifted overdyed silk floss, the gorgeous Airlie (#95) by Dinky Dyes
~ Stitched using the Mirror Technique for Variegated Threads

Recently, I've been experimenting with ornament making methods! One of my long-standing stitchy ambitions is to get better at final-finishing so I'm pushing myself to try new things :) My usual go-to method is using a quilt batting insert with fabric backing and corded edging, such as I did with my Blackwork Snowflake.

Although in the past I greatly preferred store-bought cording, like the navy cording I used in that tutorial, I'm hand-twisting my own lately, which is harder to attach but has the great advantage of being a perfect colour-match to the stitching!

For this ornament, I used two squares of mat board and wrapped them each with a piece of quilt batting, which I hot-glued to the back of each mat board square.

I used a beautiful dusky blue 100% cotton for the backing fabric:


Then I laced each side around a mat board form, and sewed the two halves together. Because of the padding, and the stiffness of the mat board, both sides turned out to be rather thick and it was difficult to sew them together. I ended up using a curved upholstery needle for the first ladder stitch pass, stitching about 1/4 inch in from the edge, and then did a second pass close to the edge like usual.

The first pass brought both sides together loosely while the second pass tightened the seams and brought both sides together fully, giving me a more even surface for attaching the cording. Although this was more time consuming, it worked well!

Tanja Berlin of Berlin Embroidery Designs has a great photo tutorial showing how to lace work onto mat board, and there is a close-up look at lacing small squares here.

Vonna at The Twisted Stitcher calls this style of mat board finish a basic Flat Ornament and has a few interesting variations (the Layered Flat Ornament and the super cute Layered Felt Mounted Ornament) on her popular finishing blog.

Mary Corbet of Needle N' Thread finished a goldwork embroidery ornament much the same way back in 2008 and had the same troubles with extra thickness that I did! She greatly reduced the thickness by remaking the ornament with a thinner board.

This great tutorial, with a style similar to my ornament, suggests using comic book boards instead of mat board, as it is much thinner but still stiff and of archival acid-free quality, and that's something I'm definitely going to check out :)

You can see the thickness mostly at the corners, like this:


Thankfully, the cording mostly covers it and it's not really noticeable at all once the ornament is hanging up! I do like the nice, crisp corners that mat board makes.

I also added some small squares of batting in the middle of the ornament to fill in the lacing gaps and make sure the center was flat and even:


This photo also shows the cording join at the bottom left, right above the start of the tassel. That was the single most troublesome part of the finishing, sinking the end of the cording back into the ornament and making it look as seamless as possible.

You can definitely see the join, obviously, but it was the neatest I could make it (and I redid that part over a dozen times!). Eventually, I reached that dangerous point where I needed to stop fussing with it and let it be or take it apart altogether and start over, and I am glad that I decided to stop and take a step back.

I really find that when you're working closely with little details for a while that they can overwhelm you with dissatisfaction, but if you take a break and then look at that detail in larger context, it may not be nearly as big of a problem as you thought :)

Here is a close-up of the tassel, which is my favourite part:


I love tassels! As I mentioned, I made the cording by hand, and I also made a smaller corded hanging loop and the cording loop that was the basis for the tassel. In all, I used 6 full skeins of DMC 3803 - 3 skeins for the cording, 1 skein (split evenly) for the two cording loops, and 2 skeins for the tassel. I wanted both the cording and the tassel to be extra thick, and I really like the way it turned out :)

I tied the tassel with a bit of the silk floss I had left (amazingly - and sadly LOL - this project used nearly all of the 8 meter skein of Airlie silk!) and simply wrapped it around the tassel, securing it in the back with some stitches through the wrap:


I love the rainbow effect, and the sheen of the silk against the cotton floss!


Initially, I had planned to use a metallic gold cording, and I'm really glad that I went with a simple floss instead. When I first decided on floss, I was thinking of a light buttercream yellow to match the Aida but I couldn't find an exact match.

Although the burgundy 3803 is not actually used anywhere in the stitching, it's a darker match that is close to the deepest mauve in the overdyed silk and I think it really sets off the lighter colours and subtle tone shifts in the variegated thread.

My Stitchy Guru Mother has a rule for colour-matching a sewing thread to fabric - when in doubt, go with a darker thread instead of a lighter one - and I think it applies to choosing finishing trims like cording as well :)


What is your favourite way to final-finish stitchy ornaments? I'd love to know! If you're reading this post in your e-mail, please visit the blog to leave a comment :)


Gifted Gorgeousness is a monthly SAL hosted by Jo @ Serendipitous Stitching! It is a fun and relaxed way to thank those who have given us Stitchy Gifts and show off what we've made with those generous gifts. It's never to late to come and join us!

Tuesday, May 10, 2016

UT Contest Update: Winners Chosen


Update: Official Winner Announcement @ Urban Threads

Just a quick note to say a HUGE and heart-felt Thank You! for all your support - your votes and kind comments - for my entry in the Hand Embroidery category of the Urban Threads "Craft Is Art" Contest. Your encouragement means the world to me, and although I didn't win, I'm still happy to have been a Top 5 Finalist and have garnered 19% of the popular vote, with an astounding 298 votes! Wowzers!!!

Given that I'm not connected to social media, and that the poll seemed to register only one vote per computer, that means that not only did a lot of my stitchy friends vote for me, but quite a lot of total strangers must have voted for me too.

Although there is only winner for each technique, I came in at third place in my Hand Embroidery category which I think is pretty good for a contest this size, which is by far the largest I've participated in to date.

So I'm going to consider my project the winner of an invisible bronze medal LOL ;)


As I mentioned in my project post, this was the first time I've tried Crayon Tinting the background of my embroidery, and it was so much more fun than I expected.

It's definitely something I'd like to try again, so keep watch for future experiments!

Thanks again to everyone who generously supported my entry, and most especially to my family! My Stitchy Guru Mother and my Groovy Grandparents are awesome and thankfully they appreciate all my creative endeavours, small and large, even when they seem to come out of nowhere like this project did :)

I honestly do believe that Craft is just as good as, if not better than, Art! It's an age-old debate and is a very complex issue that affects the way society and culture view creative projects, but I believe that all pursuits of creativity and imagination are wonderful and worthwhile! Go out and make something new, just for the joy of it :)


Like many of the things I've made, this project was really just a whole series of Happy Mistakes that in the end created something totally unexpected but amazing :)

In all honestly, it's a little different to enter something you've stitched in a contest precisely because it is a competition that invites criticism and comparison in a way that sharing that same project with stitchy friends on your blog does not. It was a bit nerve-wracking, and I almost didn't enter because I knew winning was such a long shot, but I did so much better than I ever anticipated thanks to your support!

Here's a nice quote that applies to both Craft and Art LOL:

Source (Chalkboard Sign)

P.S. In case you didn't know, Urban Threads regularly offers a free pattern, in formats for Machine Embroidery and as a simple outline for Hand Embroidery. 


Currently, the freebie is this cute piece of cake with spirit! Free until May 22nd :)

Thursday, May 5, 2016

Please Vote For Me in the UT Contest!


MOST WONDERFUL NEWS!!!

I made it to the Top 5 in the Hand Embroidery Category of the Urban Threads Coloring Contest! You probably already know Urban Threads (UT) as the designers of amazingly cool machine and hand embroidery patterns, and may remember their last Coloring Contest held 2013 with the Create theme.

Although I'm fairly new to embroidery, and this is my first time doing an embellished piece like this, when I saw the theme of this contest design - which is "Art is Craft" - I was very inspired by the sentiment and decided to try a version of my own. 

I deliberately chose to use more "crafty supplies" - craft thread, buttons, beads and sequins - to enhance the message. All of them were inexpensive, and pretty common.

The two satin butterfly appliques and the fanciful peacock-inspired Feather were added to symbolize Creativity, and the idea of "Letting your imagination soar!"

The coloring method I used was Crayon Tinting (learned from this tutorial with a very cute pair of pears on the UT site), and the outline was entirely hand-stitched using a variety of stitches, and heavily embellished with beads and sparkle :)

There are two categories in the contest, the first is Machine Embroidery which has 10 Finalists and Hand Embroidery, my category, which has 5 Finalists. I'm so thrilled to be considered as a Finalist, and I would really love to win the amazing prize pack. 

Please - pretty pretty please! - consider visiting the contest and voting, as there is so much talent on display and all the interpretations are very different!

To see all the entries and to vote, please visit this page:

Voting is open to everyone and takes only seconds - and you do not need to sign-up or enter any personal information! The winners will be chosen entirely by popular vote, so I'd really appreciate your help :)

Voting closes May 10 at Noon, Central Time

As a stitcher, I always enjoy learning more about the maker's creative process and reading about how a project develops! So I'd like to share some more information about my entry, including materials and stitches. First, here's some detailed photos:


Here's a view from the side to show the dimension the beads add to the design


Here is a close-up of the fanciful Feather, filled with beads and sequins and an acrylic heart gem, which is super sparkly! This ended up being one of my favourite parts :)


And this is a collage showing my stitching progress, from Crayon Tinting to Stitching to the start of Beading to the Final Embellishment. I learned so much along the way!

This project has been a marvelous experience for me, and it wasn't easy. I had to totally rethink my approach several times. I started off with the idea to invert the design colors and stitch a white outline on black fabric, and color it with sequins, but that didn't work out. It's so hard to transfer an embroidery design onto dark fabric!


So by necessity I needed a light fabric to trace the design on, which finally lead me to using a basic white polycotton. Because it was a little thin, after tracing I backed it with iron-on interfacing from Pellon. This made it sturdy enough to stitch on!


After pondering many different ideas on how to add color, and nearly giving up all together a few times, I remembered Crayon Tinting and looked up some tutorials online. In addition to the UT tutorial, which was my main inspiration, I found some others at Wild OliveLittle Dear TracksPimp Stitch and A Girl In Paradise. All the tutorials say that you should use light pressure, so you can build up the color, and short strokes to keep it even, and there is an interesting video showing this here.

There is also an alternate White Background or Foundation method developed by Crabapple Hill Studio for quilts with embroidered blocks, which is illustrated in photo tutorials at Blueberry Backroads and Sew Mod. A video for this is here.

Both methods use a hot, dry iron to set the wax, which then seeps into the cloth. It is semi-permanent, and so Crayon Tinting is not recommended for washable items.


Here are some testers I made: White Background at top, Just Color at bottom


After Ironing: White Background on left, Just Color on right

As you can see, I found that the White Background method did not work for me. The white wax seemed to saturate the fabric, making it difficult to color over and leaving streaks, and when it was ironed, the coloured wax bled badly outside the lines and made the fabric very stiff. It also faded the color and made it look blotchy.

So I recommend coloring directly on the fabric, though coverage will depend on the materials you are using so doing quick testers like these might be a good idea. The one thing everyone seems to agree upon is the superiority of Crayola Crayons.


So I dug out my trusty old 64-pack tin; I was gifted this new in 1993! I collect tins, and I've always loved this one. It's been years since I've done anything with crayons, but the smell of the wax immediately took me back to my childhood :)


After some scribbles on scrap fabric, I chose some colors to match my thread:


I used Loops & Threads Craft Thread (the Michaels Brand), which is like a coarse version of Perle (Pearl) Cotton. I loved the fun, bright, vibrant colours and they were easy to work with with! In the end, I didn't use the Lavender in the photo above but added a Dark Green J. P. Coats Craft Thread, so I used 12 different colours in all.


The seedbeads I used to outline the letters - which was done by mostly by Couching - are inexpensive large "E" glass beads, with a pretty transparent AB (Aurora Borealis) finish. As you can see, I actually bought them at the dollar store :) I used all of the colors (7 total) except the gold at the bottom right.


I really love the extra dimension these beads added, and the way the variations in the AB coating shimmer with different tones of color, and they seem to glow in the sun! They are so sparkly in real life that the photos don't really do them justice.


Close-Up of Buttonhole Wheel (Yellow) Flower Center

Hand Embroidery Stitches Used Include:
1. Back Stitch
2.  Stem Stitch
3. Long Stitch
4. French Knots
5. Blanket Stitch
6. Buttonhole Wheel
7. Detached Fly Stitch
8. Chain Stitch
9. Heavy Chain Stitch (used on the Feather outline, learned for this project)
10. Scalloped Buttonhole Picot Trim (also learned from this project, variation of this trim by Mary Corbet worked over Back Stitch instead of Chain Stitch)
11. Cross-Stitch (used to sew on the buttons)
12. Couching (the majority of the beading)


Close-up of Scalloped Buttonhole Picot Trim Flower Petals

Finally, after the stitching and beading was finished, and I had filled in the fanciful Feather with sequins secured with smaller coordinating seedbeads and bugle beads, I added some embellishments. I used three colors of basic shirt buttons as accents. 

Then, a serendipitous thing happened: while sifting through the tin where I keep my sequins and fancy trims, a little bag of puffy satin butterfly appliques fell out! And I suddenly remembered buying these appliques many years ago when I was about eight years on, a trip to Florida to visit my Grandparents. 

Butterflies have always symbolized creativity to me, and when two of the appliques just happened to match perfectly, I just couldn't resist adding them!


To sew them on, I used coordinating Craft Thread and took Long Stitches over the wing joins and then made antennae using Long Stitches and French Knots! I hope they bring me a little luck in the Contest :)

So there you have it! My Craft Is Art embroidery from start to finish. Overall, the best thing about this project is that once it got going, it was FUN. Working with the bright colors of the crayons and the chunky threads all brought me back to the many very happy hours I spent coloring and crafting when I was a child ;)

I know Adult Coloring is a huge trend right now, and I even bought a book to try, but I don't think it's for me. But this method of "coloring" embroidery with threads and embellishments is something I can get behind, and I may try it again in the future!


Please consider voting for me!
I would greatly appreciate your support :)

If you have any questions about my entry, feel free to ask away in the comments! What do you think about Crayon Tinted Embroidery - would you try it?

Sunday, April 17, 2016

Gifted Gorgeousness: Silk Lovebirds


Thank you all so much for the lovely comments you left on my last entry (the first this year) into Jo's Gifted Gorgeousness 2016 SAL, my Floral Blackwork Variation :)

I forgot to mention in my post that the designer, Elizabeth Almond, also generously offers many freebies - mostly in Blackwork but with some other techniques too - on her Blackwork Journey website (which is also linked on my Free Patterns page, but that section needs updating ASAP). She is currently running a free multi-technique SAL called "Pandora's Box", and I've considered doing a small version of her cute and clever "Box of Delights" - inspired by chocolates! - for a while now.


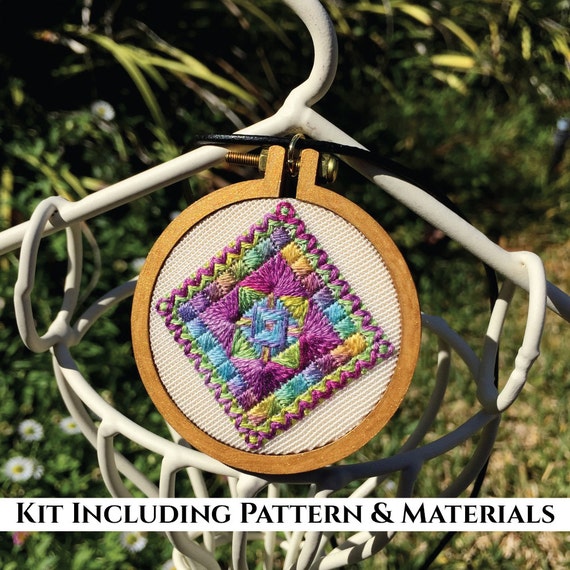
This month, I tried something I've never done before - I worked with silk floss! And it was an AMAZING experience!!! The pattern as it was designed is the angled square you see above, but I will final finish it into an upright diamond like you see at the top. The pretty dusky blue fabric in the photos is the 100% cotton I've chosen for the ornament backing, and I'm hoping to make some floss cording for the edging.

I was, of course, hoping to get the final finishing done before this post, but the best laid plans often go astray, as they say ;) Maybe next month! Here's the pattern:


This little pair of lovebirds is a charming old-fashioned monochromatic design, part of an unnamed trio of traditional Scandanavian motifs (the other two squares are roses and tulips) featured in the "Focus on Evenweave" section in a vintage Cross Stitch & Country Crafts magazine. It's from the September/October 1990 issue.

The three patterns were designed to fit into squares on a (then) new pre-finished afghan product, called Lady Elizabeth from Coats & Clark. My square is done in blue on the white afghan at the front and in red on the afghan folded on the stool at right.

Afghans like this with the special Aida panels for stitching seemed to be very popular from the early to mid-1990s but then died off. I've never understood how you could make the back neat and secure without adding on some kind of backing fabric, so despite the many patterns I've seen for them, I've never been tempted to make one :)

Anyway, this might seem a strange pattern choice, but I deliberately chose a design that was monochromatic with simple motifs to highlight the Star of the Show:

*drumroll please*


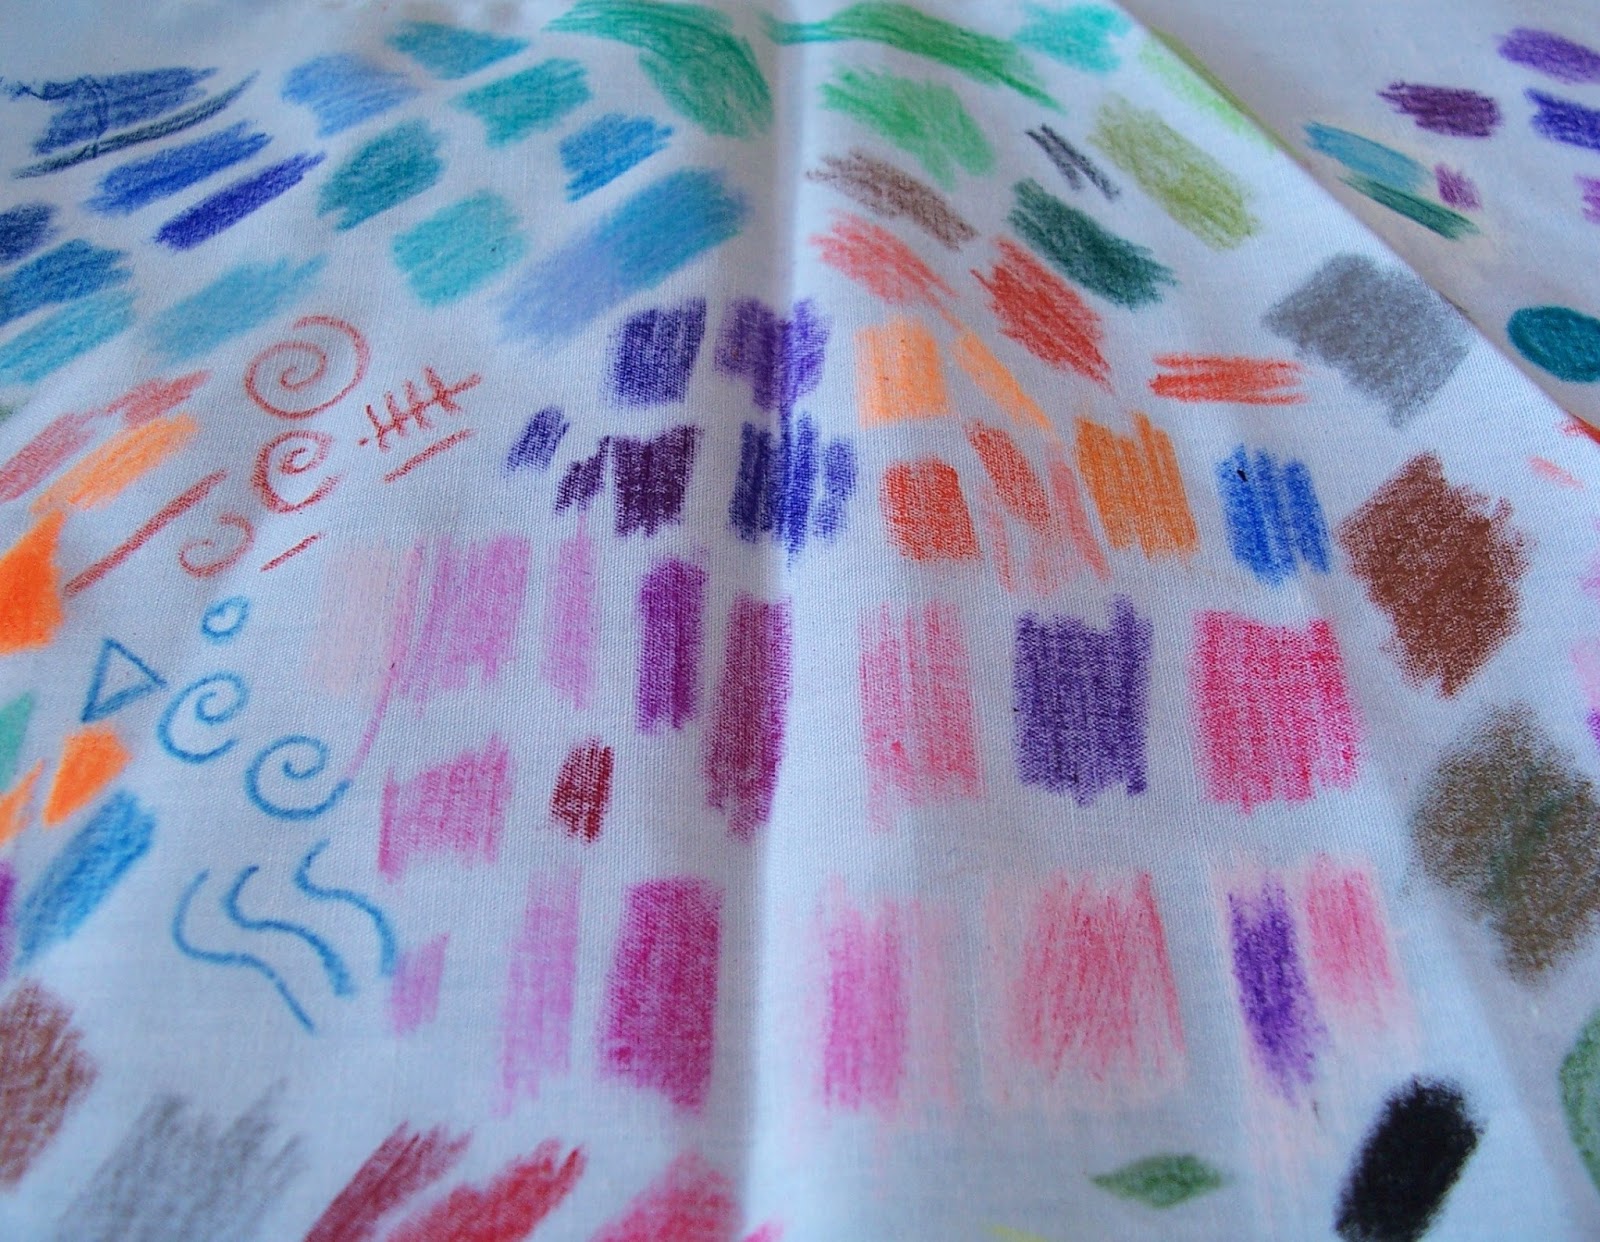
It is my great pleasure to introduce you to Airlie, an absolutely beautiful overdyed silk floss from Dinky-Dyes, an Australian brand now located in the US:


#95 in the product line, Airlie is still in production according to the DD website.


Airlie was a wonderfully generous gift from my friend Karen, and she also sent me the lovely buttercream yellow 14 count Aida that you can see I used to stitched the Lovebirds on. It was part of a whole roll of ornament cuts (a great and incredibly useful gift idea for any stitchy friend who likes smalls!), and it happened to match the light gold in the overdyed thread perfectly. Stitchy Karma was at work here :)

It is so hard to capture how luminous this thread actually is in real life.

Here's a closer view:


The silk has this indescribable sheen to it, a little bit like a perle (pearl) cotton but somehow softer, if that makes sense? And it feels entirely different from regular cotton floss too! It's spring-y, with a bounce that makes each stitch plump, lofty and round and in the very rare instance that it does knot, it is easy to untangle.

Here is my attempt to show up some of the special shine in the silk:


The silk floss is six-stranded just like DMC cotton floss, and I used three strands to stitch with. I did consider using two strands to save on thread use, but I prefer the fuller look of three strands of cotton for 14 count Aida and with the overdyed I think this extra strand helped make the colours more vivid, especially in the paler sections.

This also had the bonus of creating a pair of twinned strands with the same colours - as the colourway changes are closer together and more random than those in variegated cotton threads - which I then used to "mirror" the design as I stitched.

At first, I was changing out the needles and switching from side-to-side until the bright idea hit me to use two needles, which made everything so much easier:


I effectively split the pattern down an imaginary axis in the middle, and when I had stitched so far laying out a "thread trail" in the pattern on one side, I would put that needle down and replicate that trail on the other side before switching back. This way, I had one thread that was a "trailblazer" and one that was a "follower".

Switching back and forth enabled me to replicate the same sequence of stitches which is what creates the colour reflection. To get this mirror effect, I had to make each cross stitch individually, so even though the design is small and simple the stitching was sometimes complicated and very involving and it took a while to finish.


It was also unexpectedly FUN - the only way I can explain it is to say that it was like the stitching equivalent of putting together a jigsaw puzzle where the only image you had to work from was a blur of colours and you had no idea what the image actually was until you had finished putting it together.

I mean, I could obviously see the colourway of the floss, and make some general guess as to how it might work out and even manipulate the colours in small ways (for example, I started with the hearts and stitched from the end starting with a bright pink so that the hearts would definitely have some pink in them) but it was a total mystery to me exactly how it would work out in the end.

That not-quite-knowing was sometimes nerve-wracking but incredibly addicting :)


I also learned another very valuable lesson from this project. It was not something I had planned to start. At the time, I was having a very difficult week and I just wanted something to concentrate on and cheer me up a bit.

So I looked through my Very Special Stash - all the pretty things that I've saved for that Special Project that has very rarely ever happened - and chose the brightest, most Spring-iest thread that I had, which happened to be Karen's wonderful gift.

In all honestly, my fingers had been itching to stitch with it ever since Airlie first came to live with me many months ago. But Airlie is Silk, and I had never stitched with Silk. Indeed, I've always seen Silk as the Most Exulted and Elegant of all the Specialty Threads and I have been intimidated by it's beauty, it's rarity and it's expense. I have been afraid that I am, frankly, Not A Good Enough Stitcher for Silk.

Silly, I know. Sound familiar? If it does, please rest assured that you're not alone!

Saving treasures for Very Special Projects is certainly valid and often very wise, but somewhere along the line I also started pushing the very idea of any Special Projects far, far away off to Some Nameless Day Yet To Come when I would be Good Enough to Stitch With Them. Or have a Better Project to Use Them With. And so forth.

And I just realized that that Day is never going to come ;) I learn something different, be it for good or ill, with every little project I stitch and the work I'm so proud of today will no doubt embarrass me with its obvious flaws at some time in the future.

It's totally reasonable, in my opinion, to be concerned about wasting your Stash on projects you don't totally love (there are some treasures you will never get again) but when that leads to not using your Stash at all - then there's a problem. Right?

So I have made a resolution to myself to Have More Stitchy Stash Adventures :) None of us will be around forever, and time and Stash wait for no Stitcher LOL!

P.S. I searched Google for Stitchy Stash, and this came up:


The Dowager Countess, Lady Violet, from "Downtown Abbey"

Very sage advice, I must say ;)

You might also like this freebie by Kincavel Krosses which reads:

"Money can't buy happiness
But it can buy
Stash
And that's kind of
the same thing"

Have you ever worked with silk floss before? How did you like it?
If you're reading this post in your e-mail, please visit the blog to leave a comment!

Gifted Gorgeousness is a monthly SAL hosted by Jo @ Serendiptious Stitching! It is a fun and relaxed way to thank those who have given us Stitchy Gifts and show off what we've made with those generous gifts. It's never to late to come and join us!

Friday, April 1, 2016

Etsy Treasuries: Becoming a Curator


In all honesty, I am completely hopeless at Social Media. After all these years, I still refuse to join Facebook, only have a vague idea of what Instagram does, and have absolutely no clue what that Periscope stuff is all about. It's all a mystery to me!

Back in my day (which wasn't all that long ago, oh the irony!) we didn't have a 150 character limit, and tweeting was something only cute little cartoon birdies did.

I am, to put it mildly, wildly behind the times. And I'm mostly okay with that LOL ;P

However - a friend of mine is really getting into home decor lately and we've been doing a lot of window shopping in real life, just checking out different ideas.

I truly think when it comes to finding your own style in anything - be it throw pillows for your couch or paintings for your wall - it really helps to just browse around! If you keep an open mind, I guarantee that you will find inspirations that will help you narrow down and refine your vision so that you can go looking for what you actually do want, and it greatly increases the probability that you will find what you want.

These days, the best way to find unusual and nifty things is online. Now, I much prefer to shop locally, and I don't have much experience shopping online, but I have been doing a lot of virtual window shopping this week and it's super FUN! I think the biggest platform for this is Pinterest, but the site is so huge that it's overwhelming.


So I decided to start off a little smaller, and joined Etsy instead. My Profile is under AureliaEglantine. There isn't a "Friends" function that I can see, but you can Follow other users. The main advantage of having an Etsy account, if you aren't a Buyer or Seller, is that you can become what they call a "Curator".

This means you can "heart" or Favourite items you like. These are automatically saved to an "Items I Love" list, but you can set up other lists with your own titles and sort listings your own way. Setting up categories makes it easier to find things later.

And you can collect up to 16 such items into a little collection called a Treasury!

Most Treasuries have some sort of theme, usually indicated in the title, and include items from different shops. Although you could have all 16 listings come from one shop, it seems to be frowned upon, as is self-promotion (which is linking to an item in your own shop if you are a Seller). Treasuries are fun and easy to make, and the best part is that the thumbnails of the images take you directly to the full listing.

So if you see something you love and really want you can actually buy it, if the listing hasn't expired. This is very convenient, especially compared to Pinterest where you can end up spending a lot of time trying to trace an image back to its source and often hit dead ends. And Etsy is also great for thrifters, as there is a lot of Vintage (you can filter your searches by Handmade or Vintage) too, although the values vary widely.

The Treasuries look a little different on the Etsy site, and you can view a list of all of them on my Profile here (or click on the titles below to go directly to that specific Treasury). But thanks to a neat free tool from Toastie Studio, you can also add Treasuries to your blog, so here are three full of interesting stitchy treasures:

Stitchy Goodness: Light & Lovely

Soft, lovely colours perfect for Spring stitching!
Modern quote Cross Stitch KIT-Be Happy Be Brave Be Kind -Floral Happy Modern Funny typo graphicCOSMO Sparkle Embroidery Thread Floss Set of 5 Colors | Metallic Embroidery Floss, Metallic ThreadNeedlework Silk ThreadsDMC Embroidery Floss 6 Stranded Cotton Embroidery Thread cross stitch bright vibrant red pink fuchsia Hand dyed embroidery thread variegated
10y Antique French Early Flat Pink Metal Metallic Embroidery Thread Floss Restoration Ribbonwork NeedleworkHand-dyed Silk Embroidery Threads with short colour changes14 Count Cross Stitch Kits ;Victorian Heart (Pastel Pinks) ; A sampler with a Twist! Beautiful Kits By Maggie Gee Needlework StudioHand dyed, hand painted cotton thread for embroidery, cross stitch, point de croix - 'Rainbow'
Pack of 4 Mettler Poly Sheen Multi Variegated Threads Pinks Plums Lipstick Gems Girlie Girl Brights Quilting Embroidery Thread PaintingDIY Crewel Embroidery Kit Gift Pouch zinnia flower heart on blue tealOne Off, Thread Selection, Hand Dyed Thread, Embroidery Thread, Cotton Thread, Viscose Thread, Canvaswork, UK Seller, Colour No 39 PistachioSilk Ribbon Embroidery - Miniature Wreath of Silk Ribbon Flowers - Full Kit
Embroidery kit, DIY kit, Hand embroidery - Circle of flowers - Embroidery hoop art, Broderie, Modern hand embroidery, Craft kit, Tamar nahirSleepy Fox - Cross Stitch KitFloral Garden 1 collection - Perle No. 12Cottage Garden 4mm Silk Ribbon Collection

Powered By Toastie Studio - Etsy Tools

Stitchy Goodness: Bright & Bold

Strong, gemstone colours perfect for dramatic stitching!
Vintage Metallic Embroidery Thread in Green Merry-go-round Horse Candy TinDIY Kit  Crewel Embroidery Kit butterfly butterflies on a white wash boardSilk  Embroidery Thread for Needlework, Embroidery, Stumpwork hand dyed in BriannaSix Strand Embroidery Floss | 127 - "Bifröst" | Hand-Dyed | 100% Cotton | 9 yds
October Silk Fiber Collection #9Rainbow mix - 21 metres of 2mm variegated silk ribbonHand Dyed Embroidery Thread Pack (10 colours) - Brights CollectionMediterranean, Hand Dyed Cotton Machine Embroidery Thread, Machine Quilting Thread, Tatting, Crochet, Creative Embroidery/Quilting
Rainbow Pear Cotton Set - Finca Presencia Perle Cotton - Red, Orange, Yellow, Green, Blue, PurpleSpool Rare Antique French Ombre Pink Copper Gold Grn 4-Ply Twist Metal Thread Metallic Embroidery Sewing Thread Ribbonwork MillineryBlackwork Lovebirds Embroidery Kit - Just the Two - of Us Beginners Hand Embroidery KitHand Dyed Embroidery Floss, Embroidery thread, Cross Stitch Thread, hand embroidery, cotton floss, sewing thread, needlepoint, quilting
Pack of 4 Mettler Metallic Thread Quilting Embroidery Thread Painting Turquoise Sapphire Lime PurpleHand Dyed Fabric & Thread Collection: Chakra Colors - 7 Fat Eighths + 7x10yds Perle Embroidery ThreadSet of 8 DMC Satin Floss Radiant Treasures Collection Embroidery Cross Stitch NeedlepointNorthern Expressions Needlework - Twisted Rainbow Sampler

Powered By Toastie Studio - Etsy Tools

Spring Flowers: Needlework Kits

Stitchy kits and patterns perfect for Spring! The designs use all kinds of different needlework techniques but all feature pretty flowers :)
Hand Embroidery Pattern, Flower Embroidery Hoop Pattern, Embroidery Supplies, Beginner Hand Embroidery, Flower Embroidery Design, Flower ArtMaud (Brights) ; Discovering Woven Stitches **TRY SOMETHING NEW!** Beautiful Embroidery Kits From Maggie Gee Needlework StudioSilk ribbon embroidery Garden flowers - full kitFloral Monogram Embroidery Kit - Personalized Gift, DIY
Textile Heritage Floral I Cross Stitch Needle Case Kits in a Variety of Designs-Violets, Tudor Rose, Orange Blossom, Poppy MeadowSpring Flowers Needlepoint Kit – vintage Sunset Designs Jiffy Basket Full of Daffodils, Betty Miles printed canvas 80s pattern, small 4 x 5”Silk Ribbon Embroidery Pendant Kit, pink rose necklacePDF Spring Garden Silk Ribbon pattern
Floral Finch cushion cover modern cross stitch kitGarden Gate Canvaswork PatternTime for Tulips Mini Cushion Cross Stitch KitKIT Floral Heart Cross Stitch Sampler - Modern Heart Cross Stitch - Retro Feel - Contemporary Palette - Perfect Gift for Mother's Day
Needlepoint Dimensions Kit FLORAL Splendor Bouquet Flowers 14x14 NEW -Free US Shipping!!!Ox-Eye Daisies Beaded embroidery, beading on needlepoint kit, DIY beadpointDIY Crewel Embroidery Kit Gift Pouch daisy heart on blue tealOrchid Silk Flower Needlepoint Complete Kit

Powered By Toastie Studio - Etsy Tools

Also, is this not amazing?


This is the "Canvaswork Embroidered Minihoop Pendant No. 2 Kit" by the shop Beautiful Stitches, which is located in Australia. It looks like an interesting project.

The amount of creative talent on Etsy alone is just awesome! And very inspiring.

Hope you find something to enjoy here, and if you curate some Treasuries of your own I'd love to see them! Feel free to leave a link in the comments :)

Are you a Buyer, Seller or Curator on Etsy? Found anything that you love lately?!