Saturday, December 21, 2013

Stitchy News: Special Holiday Edition!


Wow, the time has just flown by this year! I can't believe that it's Christmas already - and I'm so behind on everything this year that I've decided to go back to basics. I'm just looking forward to spending time with my family and having a nice quiet holiday! This post is coming to you a little later than intended, but there's some exciting news, including two great year-long Stitch Alongs (SALs) in 2014, that I hope you'll enjoy :)


Stitch From Stash (SFS) SAL 2014, Hosted By Epic Stitching


Mel from Epic Stitching is inviting stitchers to join her in sticking to a strict stitching budget - of under $350 dollars - this year. Each month - if you post your total spent and projects made - you will be eligible for Giveaways, and if you make 11 out of 12 months, then you'll get an entry into a very generous Grand Prize Giveaway for a $100 voucher for an online stitchy store of your choice!!! Isn't that great incentive?!

I've joined in on the fun, and I'm very excited to have that extra motivation! Now, I usually do stitch at least a little bit of every project from my stash, but over the last few months I've developed a burning desire to use some of the "treasures" I've been hoarding for ages! I've seen some challenges in the past that allow no spending on extra supplies which wouldn't work for me - there's always something I've run out of, or need in order to finish - and SFS's monthly budget of $25 is very reasonable and flexible. And you can "bank" your budget! Non-bloggers are welcome to join too.

You can read the full details here, and the sign-up deadline is January 2nd, 2014!


Just Nan SAL 2014, Hosted By Keep Calm And Cross Stitch


And in more exciting SAL news, Zeb from Keep Calm And Cross Stitch is devoting next year to her favourite needlework designer, Nan Caldera! There is a monthly posting schedule with specific post dates, and each month you make you'll be eligible for a very special Just Nan-related Giveaway :) Non-bloggers are welcome too!

I've joined in with the fun, and you can jump in at any time! See this post for the full rules and contact information. Wondering what designs to choose? Zeb's wonderful Just Nan Design List is a great place to start! Also, Zeb kindly shared a link with me for a beautiful freebie called Christmas Hearts (scroll down right to the very bottom of the page), which is a lovely small seasonal stitch perfect for sharing in January ;)


Other Notable SALs for 2014

The SFS and JN SALs will be a first for me, as I've never participated in a year-long SAL before! I'm not sure if I'll be able to keep up, so I don't want to try too many at once. But there are lots of other great SALs out there, and here's a few I've noticed:

2014 Smalls SAL, hosted by Stitching Lotus: For finishing smaller starts or WIPs, 1st check-in date is January 29th;
2014 Theme-a-Licious, hosted by It's Geek To Me: For having fun stitching themed projects each month: check-ins on the 1st of every month;
2014 Totally Useless SAL (TUSAL), hosted by It's Daffycat: For sharing thread ends, aka "Orts", sign-up post for this year coming soon;
2014 Turtle Trot SAL, hosted by BAP Attack: For finishing WIPs/UFOs; check-in dates are before the 10th of each month
2014 WIPocalypse, hosted by Measi's Musings: For finishing Works In Progress (WIPs), join anytime, 1st post date is January 16th;

And finally, for embroidery, Sharon B. of Pintangle has just announced that although she's cutting back on blogging, she will be hosting Take A Stitch Tuesday (TAST) in 2014! This is a challenge I have always wanted to join, and if the flexible rules from 2013 stay (you can share any stitch from the list on any week!), I may try and join as this year may be the last run of TAST. Beginner and experienced stitchers alike are welcome to join, and I've heard it's a great way to learn about new stitches!


Quick Stitch: Quilt-Inspired Felt Pincushion or Coaster


Thanks to CraftGossip, I found this great tutorial for cute hand-stitched felt squares in the classic "Orange Peel" quilt pattern at Craft Snob! Makes a great gift idea :)


Make A Winter Snowglobe, in Cross-Stitch and Felt!


Over at Bugs & Fishes, felt artist Laura (Lupin) Howard has an excellent series of tutorials that started with a free cross-stitch pattern for a wintry alpine snowglobe! She has a wonderful tutorial for sewing the cross-stitch onto felt (as seen above), and a great tutorial for making an all-felt version (with cute beaded snowflakes!) too :)

And that's not all - Laura also recently shared some very cute and festive embroidery designs, perfect for quick ornaments: Snowmen, Christmas Pudding, and Penguin. And she also has two patterns with tutorials - a lovely Angel (also in felt, in two styles - with backing and without) and an elegant Mistletoe Sprig! And you can view all her holiday patterns and tutorials (including these sweet Felt Vintage Baubles) here :)


Stitch Up A Simple But Sweet Vintage Christmas Tree!


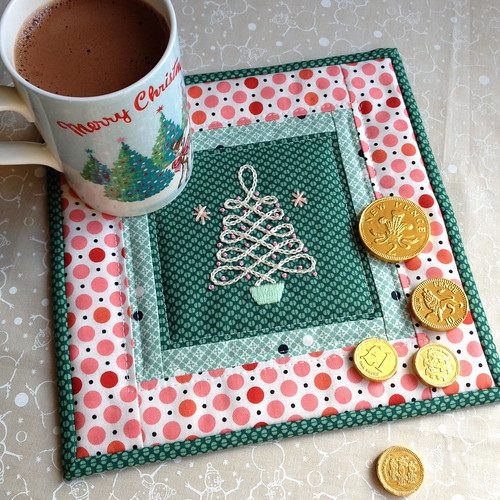
Laura at Bugs and Fishes also hosted The Crafty Christmas Tutorial Linkup, with lots of festive projects. My favourite was this lovely little vintage Christmas Tree design, made up of loops of chain stitch, revamped into a "mug rug" (with tutorial) by Julie at Button, Button! It would also work up quickly on felt for ornaments :)


25 Crafts of Christmas @ Wild Olive


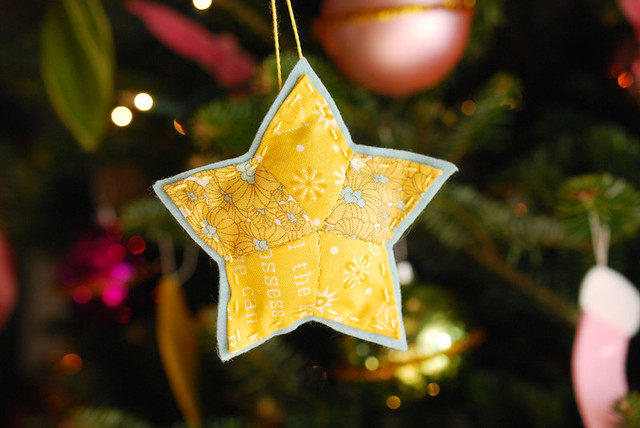
Mollie always does something special for Christmas, and over at Wild Olive, she's counting down her favourite craft supplies! It's more than a list though - there's inspiration aplenty, in the form of links, ideas and patterns. My favourite so far is this lovely English Paper Piercing Star, which comes with a wonderful tutorial too :)


DMC's 12 Weeks of Free Holiday Gift Ideas!

For the last two months, Emma Broidery at the DMC Threads blog has been sharing festive ideas and tutorials, which are all listed here! The projects run the gamut from kids crafts to quick crafts, but my favourite is the North Star Ornaments from Week 8, done in embroidery :) Emma also has a great round-up of Needlebook tutorials!


Embroider A Pair of "Starry Night" Ornaments!


Anna Scott is a very talented embroidery designer whose work I greatly admire. I first spied these gorgeous ornaments on her Flickr feed, and was thrilled to discover (via a Feature at Feeling Stitchy) that Anna is sharing the pattern! The floral star is fun, and the filigree one is so elegant. There was also a Giveaway, which has closed.


Designer Spotlight & Sale: Urban Threads


Urban Threads is a cute and quirky company best-known for their contemporary machine embroidery designs, but they also offer patterns in line-drawn versions for Hand-Embroidery! And they do so at unbeatable prices. Hand-Embroidery pattern versions are only $1.00!!! And the beautiful "Delicate December" Collection - which features elegant festive motifs perfect for last-minute holiday stitching - is now on sale, with Hand-Embroidery patterns only 50 cents! Wow, right?

But you'll have to hurry - the sale ends on December 22nd. Now, I don't normally post about sales, but this one is too big to miss, especially since all orders over $10 (until December 25th) also receive a special bonus design.

I've been subscribing to the Urban Threads Newsletter for a few months now and I definitely intend to try stitching one of their amazing patterns in the New Year! And the StitchPunk blog regularly features interesting tutorials and fan works.


Urban Threads also posts a freebie that changes every two weeks, along with some other goodies. Stitch up this lovely Let It Snow pattern, which is a FREE download (in Machine Embroidery and Hand- Embroidery formats) until December 29th!

You do have to create an account to order, but check-out is very easy :) For quicker stitching, you could leave out the swirly background, and you could try working the elements - lettering, holly and snowflakes - in different colours too ;)


Blackwork Snowflakes - Free Patterns!

As everyone knows, I love blackwork, and the characteristic geometric lines lend themselves beautifully to wintry snowflake motifs! CJ at Imaginesque just shared a lovely Snow Crystal (UPDATE: CJ has just posted a gorgeous embroidery pattern for snowflakes too!), and here are some other patterns that have caught my eye:


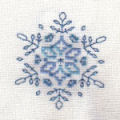
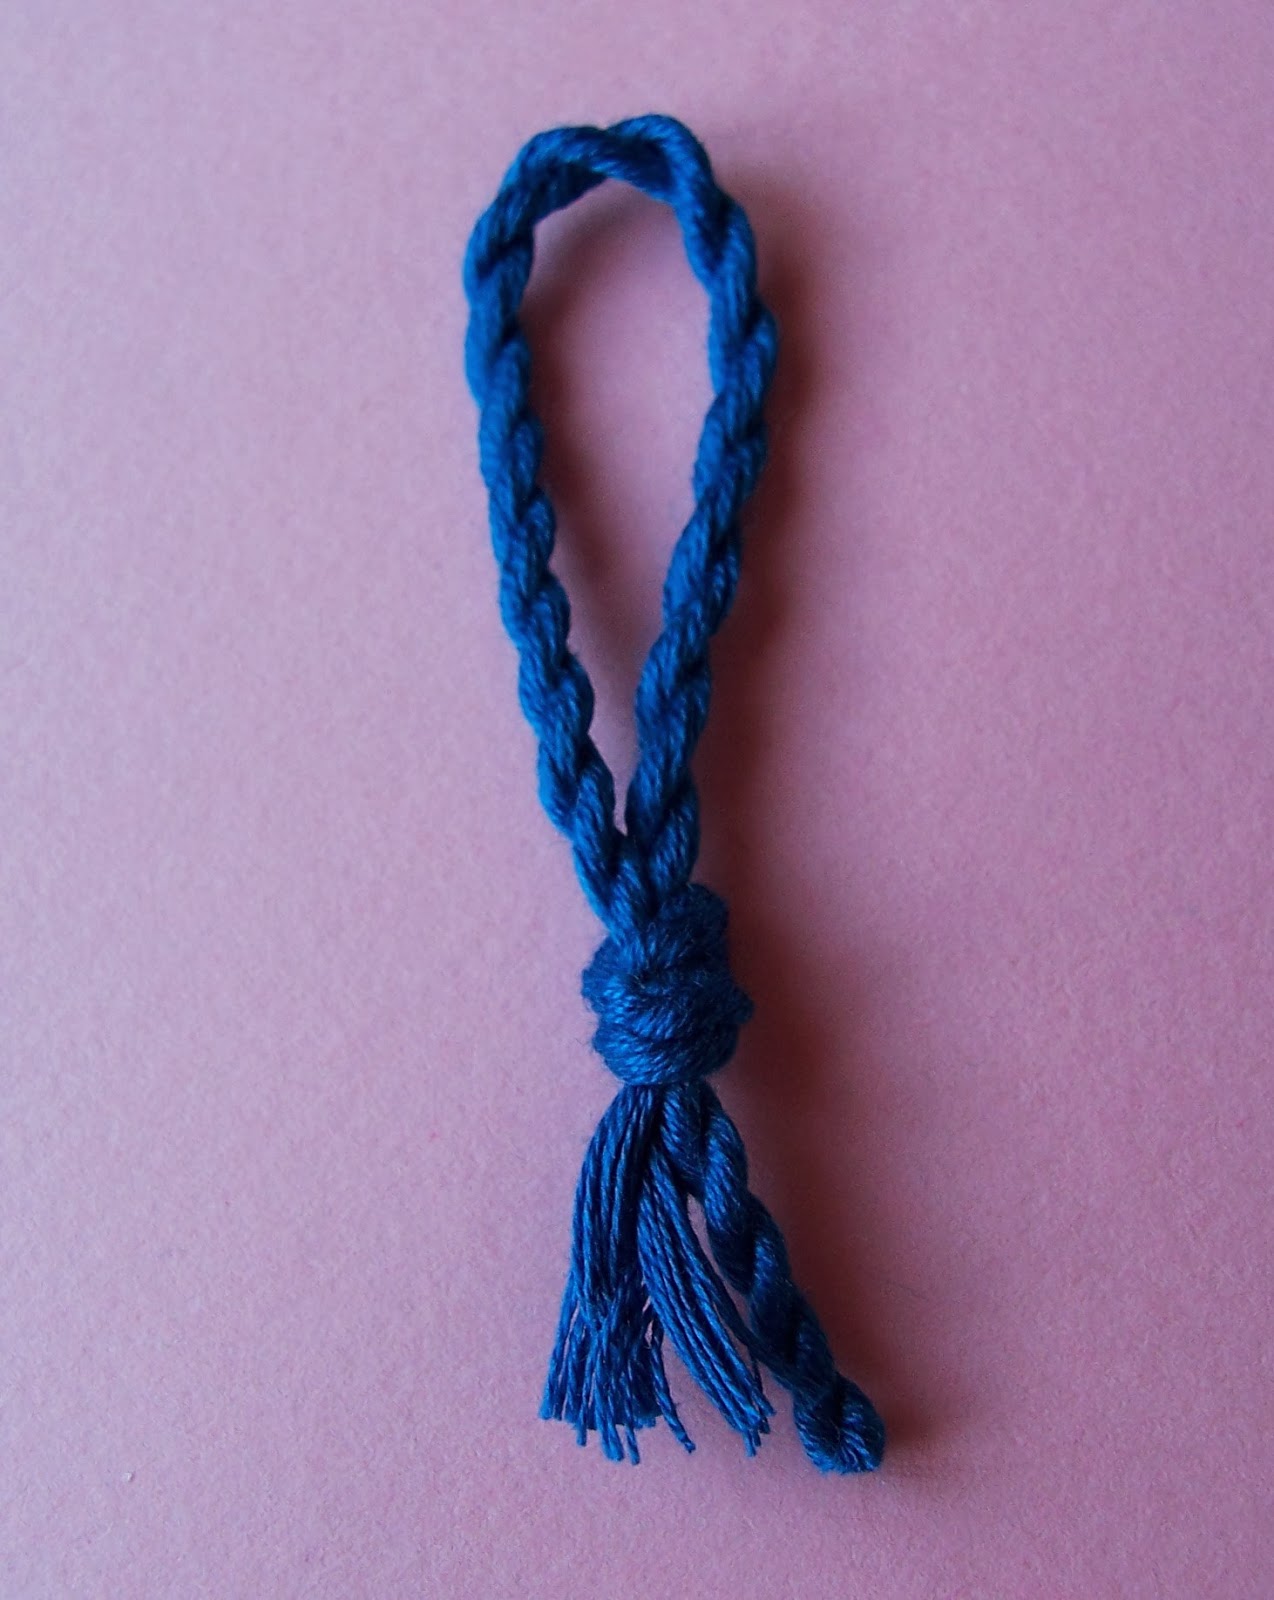
This lovely design is the 2011 Snowflake at Tor Rhuann Designs, second item down (after a very lovely holiday Holly and Ivy pattern!) on this list. And over at The World According To Agi, Agi has shared a large Blue Beaded Snowflake and a pair of Snowflake Biscornu (shown stitched here) and Bookmark with blackwork elements.

Also, the gorgeous design from Jeanne Dansby at Byrd's Nest that I used for my Beaded Blackwork Snowflake is still available on Jeanne's Blackwork Smalls page!


Thank You For Reading!

I'm going to be taking a little break until after Christmas, probably until mid-January or so. I'm hoping to resume regular editions of Stitchy News in February, but I hoped you enjoyed this special Holiday Edition :) As usual, if you have any news you'd like to see featured on SN, please leave a comment on this post or e-mail me.

Wherever you are, and whatever you've planned for the festive season,
Best Wishes for a Very Merry Christmas and a Stitchy New Year!!!

Monday, December 9, 2013

News: CS Sampler Featured @ DALB!


This has been a wonderful week for ES!!! Not only did I participate in my first Blog Hop - Jo's Advent Calendar Hop (please click the door in the sidebar for more info!) - but I was also invited to my very first Link Party too! Not only that, Allison kindly featured my Chicken Scratch Sampler in her awesome Link It or Lump It! Party:

Dream a Little Bigger

Here's a little preview, you can hop on over and read the full post at DALB:


I'd like to share a little information about the Link It or Lump It Party! because Link Parties aren't that common in the stitchy blog community. They tend to be hosted by lifestyle bloggers with the real business benefit of generating blog views and gaining brand exposure. But, as this Party shows, these events can also be a very fun way to find new projects, meet new bloggers and help your projects find a larger audience!

Which is why I'm absolutely thrilled that Allison chose my Chicken Scratch Sampler post instead of another project! CS is a wonderful traditional needlework technique that is in very real danger of being forgotten, and if this simple little pattern inspires even just one other stitcher to try Scratchin' (like the way that Karen's lovely family heirloom tablecloth - now finished! - inspired me) then I'll be very happy indeed ;)

Dream A Little Bigger is a wonderfully quirky craft blog hosted by the very creative Allison, who makes all kinds of interesting things and tells great stories about them too :) I've been subscribed to her newsletter for a few months now, and have watched Link It or Lump It! grow bigger every week. Sign-ups are super easy, and are now open for the 17th Party. By entering, you have a chance to be featured on DALB as well as the blogs of the two DIY lifestyle co-hosts: Delineate Your Dwelling and Two It Yourself. Each blog has their own picks and their own feature buttons!

All crafts are eligible - if you made it yourself for personal use (not for sale), you can submit. I think this is wonderful because there's a real mix of projects every week, ranging from edibles to home improvement projects. Be sure to read the full rules at the bottom of the Party post for more information and link buttons :)

I enjoyed this experience so much that I've just entered my Blackwork Poinsettia Ornament in for next week's Link It or Lump It! 17, and I hope you'll consider joining in the fun - it would be great to see more stitchy projects and tutorials in the Party ;)

Thanks very much to Allison for inviting me to the Party!

I'm still working on the special Holiday Edition of Stitchy News and hope to have it posted sometime this week. If you have a project that you would like featured, or a great link for SN, please e-mail me, or leave your suggestion in the comments :)

Wednesday, December 4, 2013

Advent Calendar Hop 2013 - Door #4!


Welcome, And Come On In!

I'm so pleased to have you visit today and very excited to be participating in my first Blog Hop! Many thanks to Jo from Serendipitous Stitching for hosting this super fun seasonal event :) In honor of this momentous occasion, LOL, I knew that I wanted to do something special! So I designed this little double-sided blackwork ornament:


Blackwork Poinsettia Ornament

If you have any trouble downloading this file, please let me know!
My e-mail is in my sidebar at right, under the pretty postage stamps :)

I stitched my ornament on 14 count Aida using three strands of DMC for everything but the hanging loop. The finishing method I used is one that is entirely new to me, and I'd like to share a tutorial here in case you'd like to try it too! The braided-look edging is adapted from an article on beaded trim in an old issue of Just Cross Stitch magazine and consists of chain stitch border outlines joined together by whipstitch.

Now, The Whipstitch is a noted Stitchy Foe of mine, and I did have some trepidation about trying this technique. It took me a while to get into the rhythm of it, and I had to unpick a few of my stitches and redo them as I went, but I was surprised at how easy this method of joining is! It's so much easier to pick up the chain stitches than it is to pick up backstitches, and the trim looks very much like cording when finished!

A note about the size: when stitched on 14 count, this little ornament is just over two inches square, including the trim. I kept the design small because I wanted something quick to stitch, that would make an easy gift, and could be used anywhere on the tree.

Also, please be advised that there are a few Specialty Stitches in the design - Smyrna Cross Stitches fill in the green squares, the "arms" of the yellow stars are long stitches taken over two threads as are the large blue diamonds in the frame, and the little yellow diamonds in the corners and at the centers of the flowers are filled with very simple Upright Cross Stitches :) If you have any questions, please just ask away!!!


Happily, this method of joining could be adapted to ANY ornament, where the front and back stitched motif is the same size :) Here's how I made my ornament:

Please click on any picture in this post to see a a larger version!


I stitched the front and the back on two separate pieces, since I was working in hand and I found it easier to hold the smaller pieces. You may want to try cutting a larger piece of material and working in a hoop - whatever you're most comfortable with :)


And here's the back of both sides! I wouldn't normally show this, but here's a helpful tip for anyone who hasn't stitched coloured blackwork before: try borrowing the "travelling" trick from embroidery, and running your thread under the back of other stitched sections to get where you need to go! I stitched all the red (the flowers) first, which gives a good foundation for anchoring travelling threads all around the square.

Then I stitched the yellow stars, which fills in the space between the flowers, which allowed me to then add the green, travelling across the stars from leaf to leaf. Finally, I stitched the blue last. And I kept the lettering on the back close together and simple so that it would be easy to travel from the closest points between letters :)


And then it's time to stitch the Chain Stitch outlines!!! The point where I started is marked on the chart with a black dot, to the left of the topmost petal on the topmost poinsettia flower. Because each Chain Stitch goes over two threads, if you start right at the mid-point of the pattern, the count will be off. I placed my border two stitches away from the edge of the motif on all sides of the front (and mirrored that spacing on the back). If you'd like some extra space around your design, just remember to add your stitches in increments of two so that your Chain Stitch will work out right :)


I found it really helpful to hold the working thread taut with my forefinger and loop the thread over my finger, as shown, before going back down through the fabric. This kept the thread out the way so I could see clearly where to come up for the next loop!


At first, I thought I had to end the chain with a tacking stitch to turn the corner, but then I realized all I needed to do was turn the loop and keep stitching ;)


And ending the chain is super easy - just loop your thread under the bottom of the first stitch, as shown! I repeated the border on the back side, and trimmed the edges:


And cut two small squares of quilt batting, to fit the space within the border. This batting helps to keep the threads on the back of each piece from showing through the other side! It also fills out the hollow left when the edges are oversewn, and so it doesn't add any extra bulk. For a puffier look, you could try adding a smaller third square sandwiched in the middle. Conversely, you could leave the batting out.

Now for the tricksy part, LOL:


I used my fingers to fold the sides down, folding top and bottom and then left and right, and pinned them in place. Make sure the pins are on the right side so you can remove them easily - to keep from leaving marks in the Aida I used thinner pins and used the Aida holes as a guide :) The corners stick up a lot but you'll be holding the sides tightly together in your hand as you whipstitch and they gradually flatten out.


For the hanging loop, I made some cording using two long lengths of matching floss doubled over (4 strands). Tie a knot where the strands fold over and clip the knot to something sturdy, like a drawerpull. Pull the floss very taut and twist the strands tightly together; when they visibly vibrate to the touch (pluck the cord to test), hold the middle of the floss with the fingers of your left hand and fold the bottom of the strand to the top with your right hand (or vice versa, if you're left-handed). The cord will start to twist together; smooth your fingers over the coils to smooth out any bumps. Tie a new knot, double over, and knot again. Trim the ends if needed. Voila!


I chose to hide the knot in the top of my ornament, placing pins through both pieces on either side to hold it. This does leave a bump that you can't see but you can feel, so you may want to leave your knot at the top, especially if you're not using padding.


For the Whipstitching, I cut a long length of floss, divided into three strands, so I wouldn't have to worry about joining threads! I started by darning the end of my thread in the fold at the top of my ornament, and then I made a few stitches through the knot of my hanging loop to secure it in the center top of the ornament. Then it's just matter of passing under pairs of loops! At first, my stitches were too loose - you really need to tug gently with every stitch, just enough to pull the sides together.
____________________________________________

EDIT: When Shannan from Bobbin & Fred stitched this design, she asked a great question about stitching the edging.

When you put your back and front together, using this method, you end up with two lines of chain stitch next to each other. Which loops do you go through? That depends entirely on the look you're going for. I chose to go over both of the loops, but you can also go underneath the pairs of loops, which leaves the tops of the Chain Stitches visible. The original magazine article I adapted this technique from also suggested just picking up the inner arm of each loop pair for beading, but the seam would be significantly weaker, which is important to keep in mind.

I created a very rough, simple sketch to show you what I mean:


If you have any questions, please don't hesitate to e-mail me :)
____________________________________________

If your stitches are too tight, then the loops of the Chain Stitches distort and you lose the pretty braided effect. Don't panic if you make a mistake - I made plenty LOL ;) - it's very easy to unpick the whipstitch and try again! I took an extra stitch through every corner to cover the bulky folds of fabric there. When I reached the top again...


I went around the side of the hanging loop to pass through the last pair of loops, and then took a few extra small stitches to secure the opening.


I darned my thread in this join, and then buried the tail in the ornament, pulling my needle out through the side and snipping the floss close to the trim.


And that's it! Although there was a large learning curve with this technique for me, I think it would much easier for anyone who is more familiar and comfortable with The Whipstitch :) It's definitely something I intend to try again!!!

Here's a close-up of the edging:


You can see that my stitches are a little uneven, but overall I'm pleased with it ;)

And here it is at home on my tree, put up especially for the Advent Hop:


Honestly, I usually never get my tree up until the middle of December, even though decorating it is one of my very favourite things about Christmas :) Which brings me to Jo's great question about Festive Food Traditions during the Holidays - I love to bake, but only much closer to Christmas Eve. So I have nothing to show you LOL!

We do have recipes that are traditional in my family, but it's also become something of a tradition for me to try baking at least one new recipe every year. So I thought I'd share three recipes I've bookmarked as possibilities to try out this year:

Peppermint Cream Cheese Chocolate Cupcakes


This would be a wonderful way to use up left over candy canes! They're melted to flavour the icing as well as being crushed to sprinkle on top :) Yummy!

Chocolate-Cherry Cheesecake


Chocolate, cherry pie filling and cheesecake - what's not to love?! The cherry filling adds a festive pop of red. Or at least that's my excuse :) Mmm.

And last, but not least:

Chocolate Mint Brownies


I love LOVE brownies :) Everyone in my family does! There are tons of recipes for mint brownies but most of them use store bought chips, candy or chocolates and this one just uses plain peppermint extract, except for the optional garnish on top :)

Thank you so much for joining me for Door #4 in The Advent Calendar Hop!

May You Have A Very Merry Christmas :)


Many thanks again to Jo for hosting! Remember to visit the Advent Calendar Hop daily at Serendipitous Stitching for more treats throughout the Holiday Season :)

UPDATE: Thank you all for the lovely comments! I'm entering this post in the Link Party at Dream A Little Bigger this week, please click on the photo for more info:

Dream a Little Bigger