Just a quick note to let you all know that I'm going on vacation, visiting with family, for the next week or so. While I may try to sneak in a post or two, I suspect that I'll probably wait until I get back home to write, especially since I haven't packed any stitching! None at all! *gasp* I know, I'm surprised at myself too :)
Best wishes to you all with your own projects, and I greatly look forward to catching up with all your stitchy news when I return! Will be talking to you again soon. ~ AE
Honestly, this is not the post I meant to write tonight! I was hoping to have some more progress on my Twilight Angel to show you, but I honestly haven't put a single stitch in her this week! The weather has been miserable; it's rained all week, and today the temperature soared up and it was actually too hot to stitch! *rolls eyes*
So instead, I'm going to talk a little bit about the hoop that I used for my Bluebirds Test Piece. I promise that this will be the last time I talk about this project, LOL :)
Usually, I use wooden hoops for working my cross-stitching, as I find that they are light and comfortable to use. They also have the benefit of being inexpensive and readily attainable. I worked Bluebirds in a 10" inch wooden frame.
However, when I was looking for a smaller hoop for another project, a new product caught my eye - the Hoop-La, by Susan Bates, which is part of the product line of Coats & Clark, the U.S. company that makes Anchor embroidery floss.
They are available in a range of bright colours and sizes. I chose a 6" inch hoop in yellow (it was either that or neon green, which is a bit hard on the eye, LOL) to try.
Prices vary by store that is retailing the item, but I paid less than $3.00 CA for mine.
Here is the front view:
And here is the back view:
Sorry that the top screw is cut off in this picture; I had meant to take different pictures for the product review, but found that photographing both parts of the hoop separately didn't really give a clear idea of how it worked.
The Coats & Clark product page states that the Hoop-Las:
"...feature our exclusive "Super-Grip-Lip" which is designed to maintain consistent tension without distorting or snagging your fabric or threads. Incredibly durable and flexible, our hoops make it easier for the needle to pass through the fabric, allowing your stitches to form evenly."
This "Super-Grip-Lip" is actually a tongue-and-groove system. The inside (bottom) hoop has a small raised line that runs along the middle of the outer part of the hoop, and the outside (top) hoop has a small recessed line running along the inside of it; when you place your fabric over the bottom half of the hoop and place the top of the hoop over it, the two parts of the groove "lock" together, helping to hold the fabric in place. In addition, the outer (top) hoop is very slightly extended on the inside to help keep the hoop from sliding to the middle or back of the inside hoop during working. These raised edges are very slight, and I found that I did have to readjust the fabric in the hoop occasionally. So I would call it a "Good-Grip-Lip" :)
The feature that most impressed me about the Hoop-La isn't actually mentioned in any of the product guides I've read. It's the unique screw top mechanism!
Here's a close-up of the screw on a regular wooden hoop, for comparison:
And here's a close-up of the Hoop-La screw:
As you can see, it's a much heavier design, with a nut at the left end and a large grooved bolt head on the right. This is so much easier to tighten, I can't even tell you! I find the small screws on the wooden hoops hard at the best of times, and I can imagine that they must be torture for anyone with weakness in their hands.
I also find that once you get the screw on a wooden hoop tight, it seldom stays that way. I've had to resort to taking a pair of pliers to some of mine on occasion. Not only does this make unscrewing the screw very difficult, but the pliers can strip the threads of the screw overtime, necessitating the purchase of a new hoop.
Not only is the Hoop-La screw mechanism much larger, but it is much heavier, with deeper screw threads. The large bolt, with it's grooved edge, is actually very easy to turn and tighten! It is also very easy to unscrew, which is great when you need to loosen the tension. One of the things I really dislike is losing my tension, when I've finally gotten it to the drum-tight level I like working with. Unfortunately, I find that the wooden hoop screws rarely keep the same tightness for long and it's hard to get back to that level if you loosen the hoop for any reason, and so I often leave my hoop drawn tight for the entire duration of a project.
Common Stitchy Wisdom holds that you should loosen the tension on your hoop between stitching sessions, to avoid hoop marks and unnecessary stretching of the fabric. But this is something I'm not able to do very often.
With the Hoop-La mechanism, ratcheting the tension back to a drum-tight level is easy and achievable - you can actually count the turns if you like, and therefore if you know you like the 5-turn tension level, you can reach that level again with ease. This is remarkable to me, and definitely the main benefit of this product!
The only drawback that I noticed is that the Hoop-La is significantly heavier to hold than a wooden hoop. Charlotte Kuchinsky has a two-page product review on Associated Content from Yahoo!, a user-contributed articles site, that states:
"Hoop-La is made from heavy duty Luxite. That means the hoop is sturdy, long lasting and not prone to easy breakage. Luxite is a form of Lucite that is highly durable. It is used in some craft supplies; most notably those supported by Susan Bates. These include embroidery hoops, knitting needles and crochet hooks."
I was not aware of Luxite previously. The Coats & Clark site has a product listing for Luxite Crochet Hooks by Susan Bates and Luxite Knitting Needles by Susan Bates, which verifies Kuchinsky's claim that the company uses Luxite extensively.
However, I think that Luxite must be a patented material owned by the Susan Bates company, as I was unable to find out anything else about the material. The name is also used by Luxite Industries, an automotive company, and Luxite Hoisery, an old business famed mostly for its advertisements.
The extra weight, which would be a little of a drawback while stitching, was actually surprisingly helpful for embroidery. The thicker frame of the Hoop-La sets easily and evenly on a small cushion. When trying to work the French knots in the middle of some of the test flowers, I found that it was helpful to bring my thread through to the front of the fabric, set the hoop down on the cushion in my lap, and then use my two hands to do the thread wrapping necessary for the stitch.
Once I had my loops on, I placed my needle where I wanted it to go with my right hand, lifted the top edge of the hoop slightly with left hand, gave the end of the needle a tap with my thimble, and then picked up the hoop to slide the needle all the way through. It worked perfectly. It helped me conquer my Stitchy Foe! The Hoop-La and my Clover Thimble are entirely responsible for my victory, I believe :)
For that alone, I consider it favorably! LOL. Overall, I think that the Hoop-La is a great product, although it might be a bit heavy for large works done holding the hoop in one's hand, and is probably more suitable for smaller works. It is a definitely an interesting alternative design worth adding to your Stitchy Stash, and I hope to see more hoops with such easy to use screw mechanisms on the market in the future!
Have you used one? What do you think? I'd love to know!
I'm hoping to have some WIP progress to post the next time I see you :)
EDIT: Sorry if this has shown up multiple times for you! I had a lot of trouble trying to post this up today; images kept going missing, text disappeared...ARGH! So this is shorter than I intended. Thanks in advance for your patience! :)
Lots of interesting things today!
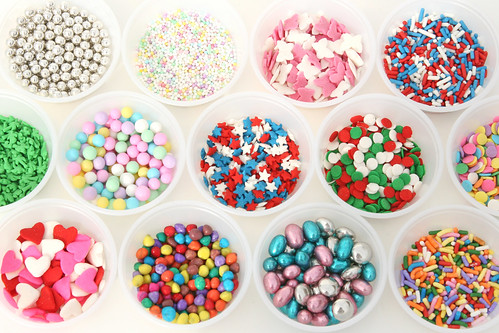
Keren, who runs the vintage graphics blog Free Pretty Things For You (which is actually where I got the background for my Stitchy News logo, coincidentally), recently posted a photograph of an absolutely awesome embroidery cake! White icing was used for the base, and then coloured straight sprinkles were used to make 'stitches' on the surface, in a pretty pattern of flowers and vines! I bet that it would be really fun to do something like that, adding in regular round sprinkles, specialty sprinkles - like those little silver balls - and little candies perhaps :) I was also super excited to find out, while searching the Wilton cake decoration website for sprinkle pics, that there is now such a thing as edible glitter! Yummy bling!!!

Good ES Friend CrazyStitcher has an absolutely gorgeous blackwork card finish posted up! You may remember her first blackwork card she completed a while ago. This time, she used one of designer Jeanne Dansby's free Blackwork Smalls patterns - Rosa - and worked with red, black and gold on a white background. The perfect finishing touch is the gold thread couched around the border, which she kindly states was inspired by my Stitchy Adventures in Couching! CS has also put together a phenomenal slideshow presentation; you can really follow the progress of each stitched element from start to finish. Bravo CS! Wonderful work!!!
Speaking of Jeanne Dansby and WyrdByrd Designs, Jeanne recently posted an excellent pictorial tutorial (I love saying - er, writing - that!) of the basics of blackwork called Back to the Beginning. I've seen quite of few instructions on how to work blackwork stitches in my time, and this is by far the most clearest and concise.
I honestly wish I had seen instructions like this back when I first started cross-stitching, quite a few years ago. Back then, before the stitching community took off on the Internet (I'm talking like mid-1990's, not 1890's, LOL), my only pattern guide and stitchy technique references came from stitching magazines. At that time, blackwork was quite exotic, and not often included. When I was lucky enough to find a pattern I liked, the instructions were for finishing, not for stitching.
This leads me to a bit of a stitchy confession, I'm afraid: I'm a blackwork fraud! No, really! Because I never knew the difference when I started, I stitched the few small blackwork patterns I liked in backstitch, which I was familiar with from outlining cross-stitch, naturally. I'm ashamed to say that I never discovered that there was a proper way to stitch blackwork until many years later, and by that time, I liked working with backstitch, and so I kept at it. And I still do! ;)
Speaking of different ways to do something, another good ES friend, Rainy Day Crafter, of the always-interesting Dancing in the Rain, has a very cool new post up about the Being Creative project, which is completely new to me (and might be to you, too!). Run by UK artist Julia Crossland, the Being Creative project provides inspirational themes each month, and encourages participants to post up their creations, in virtually any medium. The whole idea is just to make whatever moves you, in any way that you want, which is a very good idea, I think.
Most of us get stuck on one project, or on a certain project we want to do, or on a certain technique. The idea of taking a general theme and just creating something - for just the joy of making something - with no pressure, no need to be "perfect" is neat. Participation is free! There is also a Newsletter you can sign up for, and a free e-book with tips on being creative if you do; you don't have to commit to the project right away. I signed up for the Newsletter, and look forward to seeing future mailings. You can see all the July entries in this post on Julia's blog.
While surfing along aimlessly on the Internet last night, I stumbled across a really neat free photo manipulation site called PhotoFunia. com. Intended as an App for cellphones, Photofunia was launched in 2007. The website is free to use and doesn't require any software download or membership registry. It lets you upload any photo of your choice and inserts that photo into one of many very unusual templates. And one of those templates, called Fancywork, lets you render your photo as a virtual cross-stitch, in progress between a model stitcher's hands! For example,
Recognize these flowers? They're the Victorian Roses from the ES banner!
Here's a before and after, featuring some real-life roses (copyright free image):
Isn't that neat? You can upload any photo smaller than 10 MB (megabytes), and you can save your file - in various formats, from low quality to high - and even send your image as a postcard, directly from the site. Lots of fun things to play around with!
I'm also quite taken with the Vintage Stamp set:
(Again with the ES Victorian Roses; only the top two change. Clever, yes?!)
Also, you can do the reverse, and upload photos of your stitching!
For example, this Antique Book effect:
(Can you guess the work? It's Floral Teacup!)
I can foresee lots of experimenting with some of these effects in the near future :) Although it's really intended to portrait photography (faces) and some effects have Facial Recognition technology, the effects can be adaptable to other images as well.
Before you leave PhotoFunia, make sure that you go to one of the effects and bring up the Choose File box and click the line of text at the bottom left that says "Delete All Images" to clear your photographs from the site, just to be safe :)
If you decide to have a go, feel free to leave links to your creations in the Comments!
I have a stitchy confession to make: I simply must wear a thimble while stitching :)
It's very funny to find myself saying this now, as when I first started cross-stitching, many many moons ago, I actively resisted the thimble. And the hoop! I wanted to work in hand, and I wanted to work with nothing on my hands. But that didn't last too long after my very first project. I think I was ten or twelve when I did my first stitchery, and the truth is that hands that small (even though mine have always been on the large side, lol) are easily frustrated by simple things like trying to grip a hoop. It takes a ton of practice, but once you get the hang of it, you never go back!
My Stitchy Guru Mother, who taught me to cross-stitch, is of the opinion that the thimble is a necessary tool for any stitcher, and therefore one must spend the time and energy required to get used to the thimble from the very beginning - in other words, you should wear a thimble, whether you want to or not, right from the very start. Before it's too late, and you've worked so long without one that you just cannot make yourself get used to wearing one. And she was right (naturally, lol). Although it feels so alien and weird to have this thing on your middle finger while you're stitching, if you make an effort to wear it, it eventually starts to feel natural. I'm so comfortable with mine these days that I sometimes forget to take it off!
But that was not always the case. Unfortunately, I have a bad reaction to the base metals used to make regular thimbles. I'm one of those people who can't wear base metal jewellery, because it turns my skin green. Greenish-black, actually. Believe me, this was a most terrible disappointment when I was younger and mood rings came back in fashion :) And so, metal thimbles became the bane of my existence, a necessary evil to put up with. When I was doing the occasional project, I didn't mind too much - I'd get a green finger, sure, but it would fade a few days after I'd finished the stitching. However, when I started working larger pieces, it didn't fade at all.
Nope. In fact, the green turned black, and only got blacker the longer I worked! And no matter how frequently I washed my hands, I couldn't get rid of the colour or the unpleasant metallic smell that persisted in clinging to my poor middle finger. And to the sides of my fore finger and ring finger, wherever the thimble chanced to touch!
I tried to work around this various ways, most of which I can't even remember now. I used to put coats of clear nail polish on the inside and let it dry, a sort of varnish that worked as a barrier against the tarnish, until it wore off with use and I had to re-lacquer the thimble. Unfortunately, this added a semi-permanent strong acetone smell on top of the metallic odor! But this was my main means of dealing with it, as the various little cloth and leather linings and other inventions failed to work out.
My metal sensitivity gradually got worse, and I started turning the needles, as well. If I took pains to use a new needle and a new thimble, on average I would have them completely ruined about two hours into a serious stitching session. Not only was this expensive, but it was terribly inconvenient. It took the joy right out of stitching for me. I scoured the market for alternatives, both locally and via a few mail-order catalogues, and found nothing to suit. I tried different thimble styles - the plastic seamstress thimbles, the leather quilter's thimbles, and the brass ring thimbles - all to no avail! I tried using a wooden thimble for a while; it was meant to be painted decoratively, and was hard on the skin, but at least it didn't turn my finger black!
There were a lot of different factors that went into my long hiatus from cross-stitching, but this bit of not being able to find a comfortable and useful thimble, or needles I didn't turn, was definitely a contributor. For a short time, I did try to work without a thimble. It took only a few painful needles-jabbed-under-the-fingernail mishaps to cure me of going "au naturel" :) Years passed, with no stitching.
And then, one night while browsing through the craft department at Walmart, I was blessed by The Stitchy Karma Gods and happened upon these most wonderful things:

These are the Unique Flexible Thimbles made by Canadian notions giant H. A. Kidd and Company (they do not sell directly to the general public, but distribute so widely to stores that chances are, if you are in Canada, and seeking to purchase any type of sewing notion, it will be made by this company)! They come only in the three pack, with one each of Small, Medium and Large. When I first started buying them, I had thought they were colour-coded by size, but that turned out not to be the case. The colours are completely random, and there is now a vibrant lime green mixed in with the white, orange and blue. They retail for $2.00 to $3.00, depending on the store. I have no idea what they're made of - some type of plastic, obviously. The package just states: "Soft, pliable, lightweight thimbles are comfortable and fit most finger sizes" and I found that to be true. You can bend them. You can twist them. You can drop them and step on them and squish them (multiple times, in fact!).
They are very lightweight and extraordinarily comfortable to wear, and completely changed my stitching life, inspiring me to seriously pick up my needle again. And I haven't put it down since :) Although you can't see it well in the picture, all the sizes are printed with little raised flower designs over the side ribbing, and one flower in the center of the top. The top of the thimble is rigid, and if you chance to jab it hard with your tapestry needle, the needle will bounce back and the plastic reseals itself.
I had found my Perfect Cross-Stitch Thimble!!! All was well with my stitchy life!
This was several years ago. Several years I spent in cross-stitching bliss.
And then I had to go and try embroidery *rolls eyes*.
Turns out that the sharp embroidery needles, with their lethally pointy ends, do not do so well with plastic thimbles. Indeed, as I painfully learned from experience, they can pierce right through plastic and stab right on under one's fingernail. Le ouch!
So, having had this occur towards the beginning of stitching Bluebirds, I then was forced to go thimble-less, and had lots of holes in my fingers to show for it when I was finished. I had managed to maim myself so badly with some of them that I had to put the work down and leave it for a while, lest I bleed all over my pretty sky blue fabric. I expected this to be a temporary problem, as I really didn't expect that I could embroider my first design, and so wasn't anticipating moving on to a second.
But a funny thing happened. I found out I quite liked embroidery. And that I may, in fact, might want to stitch some more of it in the near future. Now what was I to do?
Fortunately, The Stitchy Karma Gods looked kindly upon me, again! Perhaps for finally having the courage to best my long-time Stitchy Foe, the French knot. Perhaps they approve of Bluebirds of Happiness. Perhaps they were bored that day.
For whatever fateful reason, I went to Michaels one night, in search of a certain item for another project. An item I had saved a coupon for. An item which, it turned out, they did not have. Wandering dejectedly down random aisles, I chanced to look up and find myself in the Quilting section, a place a rarely bother to go. And, lo!:
My Perfect Embroidery Thimble appeared! It is the Clover Protect and Grip Thimble. Clover is a US company that retails widely, including overseas. The retail price on the website is in US dollars; I paid nearly $15.00 Canadian for mine (which is where my unexpectedly freed-up coupon came in handy!).
The Clover Website for the product states: "Protect and Grip Thimbles offer the perfect combination of soft, elastic material with the safety of a metal thimble cap. The scallop design offers breathability, keeping your finger cool. Its excellent elasticity helps the thimble form naturally to your fingertip for a light fit. Safe and smart, the ridged and dimpled metal cap holds the needle tip in place and pushes needles in safely. This new thimble provides comfort and lightness."
Oh, at first, I was a tad bit dubious, I admit. For one thing, I probably could do with the Large, but as they only had the Small and this Medium (and it's pink! PINK!; the Large, sadly, is yellow), Medium it was. The fit is snug, but not uncomfortable. The silicone sleeve is full under the cap - there is no place where the metal touches skin, which is wonderful! I had thought, at first glance, that the metal cap might make the rest of the thimble top heavy, but the silicon used for this thimble is much thicker than the plastic in my Perfect Cross-Stitch Thimble, and is ridged vertically, instead of horizontally, which means that it "hugs" the finger and so doesn't fall off.
When I found my thimble, I had embroidered every element on Bluebirds but the centers of the flowers, and was half-way through doing the flowers and leaves on my Bluebirds test piece, trying to figure out what kind of centers I wanted to put in. This thimble made everything so much easier, and I firmly believe that it is part of what made my conquering of the French knot possible - once I had the thread looped, I gave the needle one firm tap with the top of my thimble and the needle slid through the fabric perfectly, bringing the thread neatly together in the French knot stitch!
In the past, I struggled with trying to pull the needle through in the middle of the stitch, and I think that's part of why I had so much trouble. So I am officially giving all the credit of my French knot success to my Perfect Embroidery Thimble, and my Perfect Embroidery Hoop, which was different than my usual wooden ones and which I will talk about in detail in another post, as this one is getting rather long :)
Oh, and the needles? Well, I still have trouble with them, although I've found that using gold-plated tapestry needles slows the tarnishing significantly. Embroidery needles, which as far as I know do not come in gold-plated form, are going to be problematic. But that's another quandry for another time! ;)
May The Stitchy Karma Gods smile upon you, whatever your stitching needs, today!
I wasn't going to post about this issue, to be honest, as it's a little unpleasant, but having found these products has revolutionized my stitchy life, seriously, and I figure that I can't be the only one with base metal sensitivities. Hopefully, these products (or ones similiar to them), will benefit you as much as they have me!


