
I am currently writing another Epic Embroidery Start-to-Finish Post, but I wanted to share some thoughts on the embroidery pattern transfer process I used! These transfer images are from a specific project but the guidelines are general :)
As I mentioned in my last post, I was SO disappointed when my Black Sulky Iron-On Transfer Pen finally ran dry and I couldn't find a retailer anywhere locally! Having a good transfer is essential to any embroidery project, and although the pencils do work (I used them for my Couched Rose), they are hard to control and transfer faint.

Shortly before Easter, my Stitchy Guru Mother suggested that I look around online, and made me an offer I couldn't refuse (LOL!): If I could find some for a decent price, including shipping, she would buy them for me as an Easter gift. With that incentive, I hopped online faster than you can say "bunny" ;) But I hit dead ends everywhere!
Sulky recently expanded the colours in the line and repackaged the product into 4 and 8 pen multipacks, and although the individual pens are still available, most stores seem to have opted to carry the new packs only. Sublime Stitching, run by authoress Jenny Hart, stocks the 8-pack and the individual Black pen only, for example.
I can understand this from a business standpoint as there is less product to carry, but as a beginning embroiderer, I'm not yet interested in investing so heavily in the pens. Also, the rainbow colour spectrum - the 8-pack has Black, Green, Blue, Brown, Orange, Yellow, Red and Purple! - didn't personally strike me as very useful.
 |
| Image from the Sulky Transfer Pens Product Page |
However, I've discovered that some embroiderers, like Giddy99 on Flickr, like to colour code their patterns, as shown in this project. The near-finish shows that this worked awesomely for that primary colourway, but I'm not sure how it would work for more muted colours and intricate patterns? It would take some experimenting ;)
By the way, the lady whose image appears on all the STP marketing is Joyce Drexler, who co-founded the company Speed Stitch with her husband Fred in 1979 (this info is from an interesting article about them both). Speed Stitch is now the online retailer The Uncommon Thread, which is the authorized seller of Sulky products in the US and Canada. They do carry Sulky Transfer Pens, but they only accept US funds.

It took me several days to locate retailers (willing to take Canadian funds and ship to Canada) who had any of the products in stock and it was a frustrating search, because Sulky's own Retailer Locator is very out of date. Also, a lot of the smaller quilt shops do not have websites, or if they do, they do not take online orders. Many don't even have product lists, so there's no indication of what Sulky lines they do carry. And some, which seems rather incredible in this day and age, don't even have e-mail (?!).
Finally, I determined - astoundingly - that the best place to order from was Dharma Trading in California! Although the company specializes in fabric dyes, they carry a good selection of quilting notions and accessories too. This was not actually the lowest-cost option, but it was the least expensive from an established company. I have heard great things about DT over the years from the beading community, and a good reputation is extremely important to me when dealing with unknown retailers.
It seems many online stores these days do not have "bricks and mortar" storefronts, which is fine - and can be quite an advantage when it comes to product availability - but there are many that do not have any contact information, and that's suspicious.
So I finally bit the bullet and ordered craft supplies online for the first time ever :) I bought 2 Black Sulky pens, 1 Blue pen (Dharma also carries Yellow and Red), and a white Nonce pencil for marking on dark fabric. As a nice bonus, Dharma offers a free gift with your first purchase, and I chose the silk scarf (in bag, below). I've seen some interesting tutorials online for dying these with Kool-Aid or Sharpie Markers, but both methods need ventilation, so I intend to try it out when the weather is warmer :)

I'm making a point to mention Dharma Trading here because I had a lot of trouble trying to find retailers that were willing to answer e-mails or questions in a timely manner, and I was also really impressed by the company's customer service. Ideally, I wanted two specific types of Sulky pens - the Black and the White. I have learned from reading online quilting forums that the Yellow does NOT write on dark fabrics, only on lights. So I e-mailed Dharma to ask if they were intending to carry the White.
The DT customer service rep consulted their contact at Sulky, who forwarded some important information: the White pens were so problematic, the company stopped making them some time ago! Any on the market are very old stock, and not likely to work. Here is explanation at the Sulky site, but basically there is no white ink at the moment, and the White pen was filled with thinned paint which was very difficult to control - necessitating the black "pump" on the top - tended to clump, and dried up.
Needless to say, I would NOT have been pleased to purchase a dud product and have discovered this the hard way. Since my order with Dharma, by coincidence or design, the White Sulky pens have been removed from the Sulky website. Here is a product photo from A Great Notion, which is an online retailer in Vancouver, CA that carries all kinds of neat and hard-to-find notions that is another source for Sulky pens for anyone interested in ordering them. They are well worth taking the trouble to find :)
A word about prices: My total purchase at Dharma, including Shipping from the US to Canada, was very reasonable, and bought me almost two-thirds more than if I had gone with some other online stores, including several "specials" on e-Bay. However, shipping prices from the States to Canada have more than doubled since my Mom's Easter gift to me, which is something to be aware of when sourcing supplies online.
I should also say that I made the purchase with a special time-limited credit card for online-use only, a precaution I highly recommend taking. Although the final result was very satisfactory, I've always had the illusion that anything is available easily on the internet, and that is no longer the case for craft supplies! It's very troubling.
Now, on to the fun part!

For this project, I decided on a blue 100% cotton background fabric (NOT shown above, that's posterboard!), so I wanted to try out my new Blue STP! (I have noticed that my pen cap looks much darker than the turquoise colour cap in the new packs, but I'm not sure if the ink colour has changed). In my excitement, I forgot to take a picture of the package before I opened it (oops). Here it is out of its packaging:

As you can see, the barrel of the pen is sleek and straight, and not much larger than a standard ballpoint pen. It is very easy to hold and comfortable to grip! The cap is short, and can be stuck on the end of the pen while working, or put aside as I did (I tried keeping the cap on the end first, but was worried it would fall off while I was tracing). The cap on this one is a little bit finicky, and needs an extra wiggle or two to connect tightly when finished. I do prefer the longer caps on the older models, but these do the job. I put mine back in the packaging between uses, for now at least.
Iron-on pens (and pencils) are, as the name suggests, permanent, meaning that the transfer lines never wash out, although the Sulky package does state that they can lighten over time depending on the fabric used. The "How do the Sulky Transfer Pens work?" question on the Sulky FAQ page is short and well worth reading.

The nib of the pen is brush-like and very sensitive to pressure, so finding the right balance for writing is the trickiest part in the whole process! As the FAQ page states, the ink is contained in a reservoir in the stylus, and pressing down on the tip opens the valve that governs the ink flow. Too hard, and your ink leaks and splatters (and you might break your pen), too light and you don't get enough ink to transfer.
However, I never had a problem with too little ink :) In fact, having a "fresh" new pen is amazing, because once you start the ink - with one or two gentle presses of the nib on some scrap paper - the pen just glides smoothly over the paper! It's amazing :)
The ink came out very dark at first, almost a navy, but lightened after a few practice strokes. When you increase the pressure it does get darker again for a while. So I found it helpful to keep some scribble paper around to use for adjustments.
My biggest weakness is that I don't have a lot of experience with tracing, and I haven't really done it in years, so it's going to take some time to build that skill up again. I'm intending to try and get some felt tip artist's pens to practice tracing lines with, because ballpoint pens - even gel pens - have a totally different feel.
There is nothing to press with, and pressing only adds ink you don't need, so I found it best to keep my touch light but firm, and to try and trace lines in "swoops" - big sweeping motions, from the line start to the stop if possible, - rather than "strokes", because the joins where you lift the pen off the paper and replace it will show.
I did find that having a firm steady surface to trace on with a softer surface right under the pattern helps a lot. This sounds a bit strange, but it just means that I used a lapdesk with a thick wooden top and then put the pattern on top of the pad of graph paper I was using for the transfers. Tracing on a tabletop also works really well!

Here's a photo of my pattern print-out, my tracings and my Blue STP! Normally, I'd only trace the pattern in one part. However, since I wanted to applique the umbrella, I did two transfers: the handle and flowers (to be ironed to the blue fabric) and the umbrella (to be ironed to the yellow fabric and then appliqued to the blue fabric).
As you can see, I printed off the pattern as original and in reverse, because I wasn't sure which image I wanted to go with. I was glad I did this, because I did change my mind! Although I sized my transfer to 4.5" square, I ended up extending the sprigs on either side and the finished stitching is roughly 5" square.
When working from a digital image like I did, I've learned to edit the image and crop the white space as close to the pattern as possible, because it makes it so much easier to determine the real size of your transfer more accurately! You can then resize your image (make it larger or smaller) with more confidence too :)
Here is the Flower Transfer:
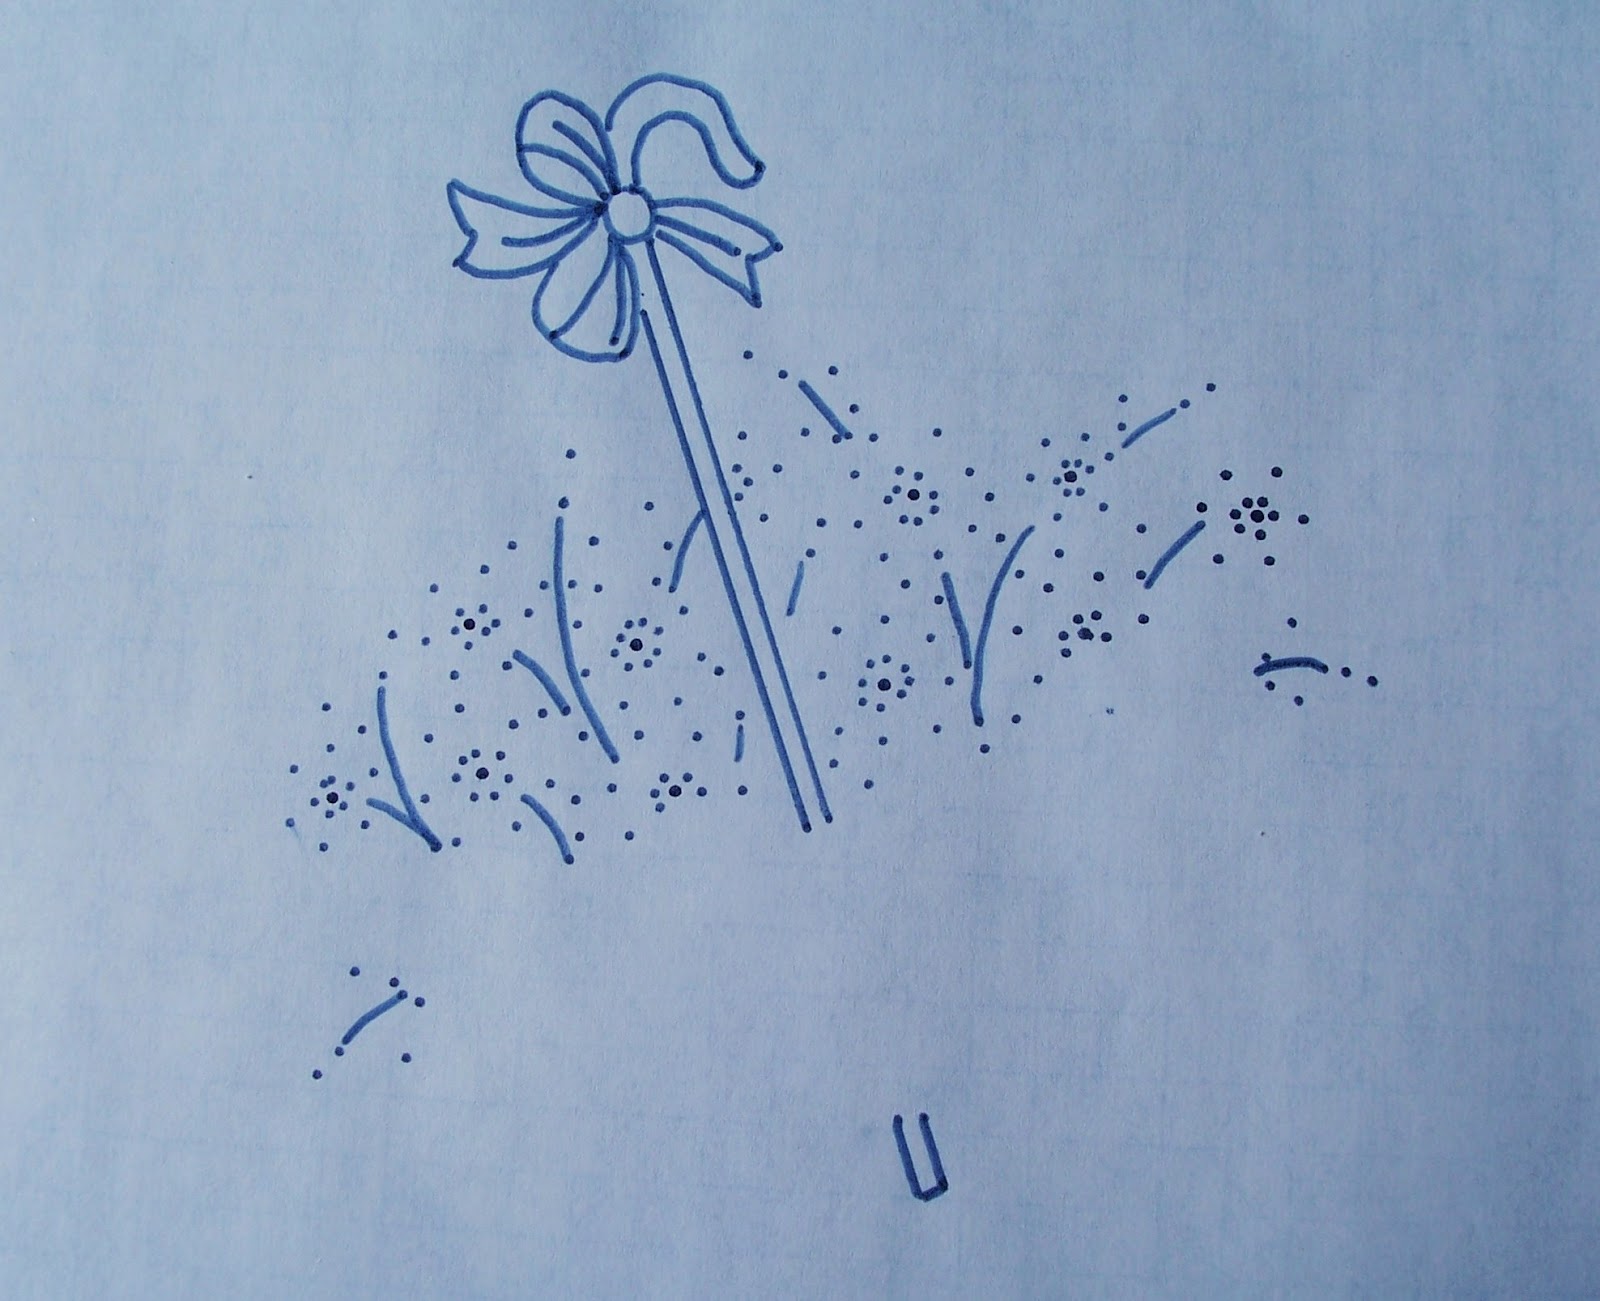
As you can see, I followed the method I discovered while transferring my Floral Heart, which is to only dab the pen at the critical junctures for the flowers. For the handle, I used the edge of the packaging as a ruler (because I didn't think to grab a ruler ahead of time), and I traced the whole bow. I left out the corner flower though.
And here is the Umbrella Transfer:

For the umbrella, I only traced the shape and the ribs, I left off the directional lines that were meant to add shading. I was interested in the idea, but decided to leave the decision until later, and I'm glad I did, since I decided that it would be too busy.
From what I've read online, Tracing Paper is suggested for use with the pens. There is a huge variety of Tracing Papers though from the thin onion-skin types to the thick artist's sketch paper, and I went with what has worked for me so far: Graph Paper. This is the regular inexpensive blue-lined type you can buy in packs most anywhere.
Although it doesn't show up well in the above pictures, the grid lines are still visible through the transfer - I use the blank side to trace on - and this can be very helpful when placing the transfers on the fabric. Here is the Flower Transfer held up to the sunlight so you can see what I mean, please pardon my fingers:

The transfer instructions on the back of the packaging are also on the Sulky site!
NOW - I honestly had really good intentions here. I had my camera at the ready to record the transfer process but it happened SO FAST that I never got off a shot! All you need is an ironing board, parchment paper to protect the surface (NOT wax paper!) or an old towel, and an iron - along with your fabric and transfer.
If you have wrinkles, iron your fabric first (you may have to use steam, in which case be sure to let the fabric dry thoroughly before transferring anything). My Stitchy Guru Mother's tip, when working with 100% cotton, it to loosely roll it up and put it in a plastic bag in the freezer for half an hour, and THEN iron it. I was very skeptical, but it worked like a charm! Wrinkles will mess up your transfer lines.
Try transferring a small scribble on the corner of your fabric first because the material will make a difference and you'll know how your finished transfer will look. You may need to adjust your times completely. This is why trial designs (also called test designs) used to be included with pre-printed iron-on pattern packs :)
Then center your pattern, ink-side down, on your fabric, and rest the hot iron (no steam) over the transfer, pressing lightly but firmly, and then count off the seconds. My package says 30-60 seconds, the Sulky site says 30, which is what I used.
With my old pen, I needed that full minute and more, and had to be constantly checking the transfer, which is risky because it is so easy to accidentally move your paper and ruin your transfer (and your fabric, woe!).
With the new pen, I was AMAZED how fast it transferred!!! If you don't want your lines super dark then try 20 seconds and then left up a corner to see how dark it is - if it's too light, lay the corner down and repeat. Getting nice dark lines is not a problem, and they are crisp and clear, unlike the pencils which bleed and blur and smear!
A few amazing seconds later, VOILA!:

ABRACADABRA! ALAKAZAM! BIPPITITY BOPPITY BOO!
I have a wonderful transfer, and with Sulky, you can too :) LOL!
I have a wonderful transfer, and with Sulky, you can too :) LOL!
Can you tell how EXCITED I am about this?! Can you, huh?!!! Hint: It's a LOT ;)
If Sulky made a commercial for these pens, it would have glittery fireworks and peppy music for the many happy embroiderers dancing down the neon-lit street with arms full of perfectly ironed-on transfers on reams of colourful fabrics, just waiting to be stitched with the ribbons of sparkly threads that are twirling by in the air!
I know this sounds a little extreme. I know there are a lot of needleworkers (quilters, embroiderers and tranfer-ers of all stripes) who will disagree with me, some very vehemently. There are those stitchers like Mary Corbet who thoughtfully point out the limited use of a product that leaves thick, permanent lines on your fabric.
You really don't want to have those lines showing under your embroidery, and it's a valid concern. It would be WONDERFUL if the Sulky Transfer Pens were available in different nib sizes, including Fine-Point! I fervently hope Sulky is working on that right now, in fact, along with the problem of White Ink for Dark Fabrics (please, OH PLEASE, solve that soon! Think of all the poor dark fabrics who long for embroidery in bright cheerful colours!! And the sad embroiderers who cannot fulfill that wish!!!)
But for a beginning embroiderer, who wants nice clear vivid lines - lines that will not fade, that will not wash away - to guide their first stitcheries, this product is a little miracle! No taping your fabric to your window and trying to trace your design with a pencil. No fussing and fooling around with powders and paints and brushes!
The Sulky Transfer Pens are Easy to Use. They are Fast. They do exactly what they say they are going to do, and you really can't ask any more than that!
Of course, you can forsee my obvious problem now, right? I really should have bought the 8-pack in the rainbow of colours, LOL! In fact, there should be Pink! ;)
Oh, and the umbrella? Here's the transfer, all trimmed and ready to be appliqued:

NEXT TIME: The Wonder of Stitch Witchery, The Amazingness of Applique, and The Sheer Pleasure of Spontaneous Stitching! Please stay tuned ;)
Have you tried STPs? Did you love them or hate them?! I'd really like to know :)
Disclaimer: I was not compensated for this review in any way! I'm always looking for products that make my stitching easier, and I love to share them when I do :)
7 comments:
Oh Aurelia, another great post! I love that this on is all about transferring - I am just about to transfer a LiliPopo caravan pattern (in fact reading your post has put me a little behind schedule - I was hoping to get it done before a tv show starts st 8.30 ha ha ha). I will be using a Pilot Frixion pen for the first time ...meant to be eraseable by ironing over at the end.
Thanks so much for your kind and thoughful comment Lisa! I hopped over to your blog for a moment - I'll be following ASAP when I get my embroidery section set up - and that caravan pattern is SO CUTE, both versions are adorable, but the pink one is especially lovely ;)
Re: Frixion pens - I've heard a lot of conflicting opinions about them online, and I'm really interested to hear about your experience with them! Mary Corbet spoke out against them last year, but there are a lot of different comments on the article with other perspectives worth reading.
At any rate, I really hope they work for you! Sulky TP aren't very popular in certain online circles either, so I would definitely experiment yourself! They sound like a really neat product to me :) Can't wait to read about your results!
Oh no! I just read the Mary Corbet piece. I was so happy after doing the transfer last night - the pen marked really well with a nice crisp line. I wasn't pressing hard, and at one place was able to rub a bit of line out, although I did think that was a bit rough on the fabric. Was saving the iron test until later. How interesting the Mary Corbet piece was though, with the ghosting and reappearing lines. Oh dear!! Luckily, I don't think my pieces would often get to the low temperatures required to make the lines reappear. This one is for a swap going to someone also in sunny Sydney. I've only stitched the outline of the caravan so far, and the thread covers the thin line well, so that also makes me feel better :-) ...I've added MC's blog to my Feedly - lots to learn there - thanks for the link!
Thanks for the interesting article, Aurelia. I have the 8 color set of Sulky Pens and love them. I like to use the different colors such as the green one for leaves, red one for red or pink flowers, etc. They are a nice product and much better than the transfer pencils.
I loved your fantasy commercial with the happy dancing embroiderers, that's hilarious!
Great review! I've never tried transferring anything before in my life and only recently looked into how to do it. You explain it so well!
I looked at your photos on flickr and your finished piece is beautiful! For a beginning embroider, you do amazing work! Oh, and I've never seen or heard of the DMC threads you used before, but they worked very well for this design!
Thank you so much for the thoughful comments ladies! :)
@ Lisa: So sorry, I didn't mean to panic you, LOL! The bit about the ghosting stuck with me when I read it, which is why MC's article came to mind immediately when you mentioned the Frixions. They are really popular products in quilting circles though and some of the commenters had used them for years without problems, so like I said, well worth trying out yourself :)
RE: The link: You're very welcome! MC does right some interesting articles that have a lot of tips and tricks in them, and the many comments she usually gets are usually helpful to read too!
I've never participated in a swap before, but I've heard they can be fun, your partner is very lucky to have gotten you ;) Looking forward to seeing your finish!
@ Karen (SG): Thank *you* very much for your lovely comment :) I can't tell you how happy I am to hear that you use STPs too - woo hoo! It's really interesting to learn that you do the colour coordinating too, since a lot of your stitcheries are so intricate. I can foresee that I will soon be developing an 8-set STP envy *sigh*
Re: my flight of fancy - I posted this late at night, and felt SO embarrassed that I had put the commercial bit in when I woke up the next morning, LOL! What can I say? My brain is a very strange place sometimes ;) Glad you found it amusing though!
@ Karen: Thank you, I had hoped that this might help a bit when you start! I'm so sorry I blanked on the ironing photos though, I should have at least taken an "at the iron, ready to transfer" sort of photo, but honestly it's just as well, because an iron is an iron really.
One thing I should have mentioned - because you can't use steam, where the holes are in your iron plate can turn out a little bit lighter, so you may have to fiddle around with your iron a bit if that's happening. I haven't done many transfers yet either, and am still trying to work the best way out :)
And I really didn't mean to be all Miss Mysterious with the project photo, LOL, sorry about that! I totally spaced on posting it up. I'll be doing a review of the Prism threads too ASAP, I'm so happy you like the effect too! They were a bit weak for fill stitching, but I think they'd work great for outline embroidery :)
* (in @Lisa): "MC does *WRITE*", oops!
Post a Comment