
A HUGE and heartfelt "Thank You!" to everyone for your patience :)
The good news is that I've *finally* finished my bookmark stitching:

I really enjoyed the Rhodes Hearts...

...although I had a little bit of trouble with the curliques at the top of the first bracket and had to take it back because the bottom leaflets were turned the wrong way:

Also, I made a minor change in the spacers - I filled in the diamonds:

Like the pink flower centers, I added Upright Cross-Stitches for extra colour since they just weren't showing up well on the yellow. Plus, now the diamonds match ;)
I had hoped to have at least one good tutorial to show you today, but I just haven't been able put one together yet. However, I did take some quick photos while I was making my ribbon marker, and so I have a sort of mini-tutorial I hope will be helpful!
I first made one of these for my Blackwork Bookmark, way back in 2011, which you can see here. And, as recently shown, I've since made a few of these for family gifts.
Simple ribbon markers like these only take a few minutes to make and need very few supplies. The ribbon you use and the beads you choose will make the most impact :)

To share, please use this graphic and link back to this post! Thanks :)
My finished marker is roughly 9 inches long, which seems like a lot of length but at least 1 inch on the bottom will be sewn into the bookmark during finishing. To be on the safe side, always add an extra inch or two if at all possible, as the ends do fray a bit and need trimming. You can cut your ribbon down but you can't make it longer :)
You can easily vary the width of your ribbon, the ribbon material (e.g. satin, velvet, brocade) and the beads you use, but keep in mind that you'll need a double-faced ribbon since the back shows! Grosgrain is great to start with because it's low-fray.
When looking for large-holed beads, look for "pony" or "crow" beads, which are usually acrylic but also come in wood (like I used) and glass. These are most often used with leather cording and natural fibres like hemp, so check the Macrame and Leather Crafts sections of your craft or fabric store (if there is one).
Materials:
~ 1/2 meter of 1/4" wide Grosgrain Ribbon (at minimum)
~ Matching Sewing Thread
~ Six large-hole Wooden Beads (Mine are 6mm rounds with 2mm holes)
~ Sewing Needle (I used one from my Singer Hand-Needle Assortment)
~ Sharp Embroidery/Fabric Scissors
Optional: Thimble for hand-sewing
The first time I tried this, I used lots of extra ribbon and sewed one end first, before I added any embellishments, and this turned out to be fortuitous since I had to cut that end off twice before the third time was the charm ;) So leave some wiggle room, LOL!
Ready to go? Okay!

Make an overhand knot at least three inches from one end of your ribbon. Be careful not to pull your ribbon too tightly or the shape will be distorted: I've learned by error that it's better to give several gentle but firm tugs rather than one hard yank :)
Fold the end of your ribbon together into a point, and then thread the tip through your first bead. This may take some finagling, so don't worry if it doesn't work on the first try! Bring your bead down against your knot, and test the knot against the hole to be sure that it will serve as a stopper. Repeat with the next two beads.
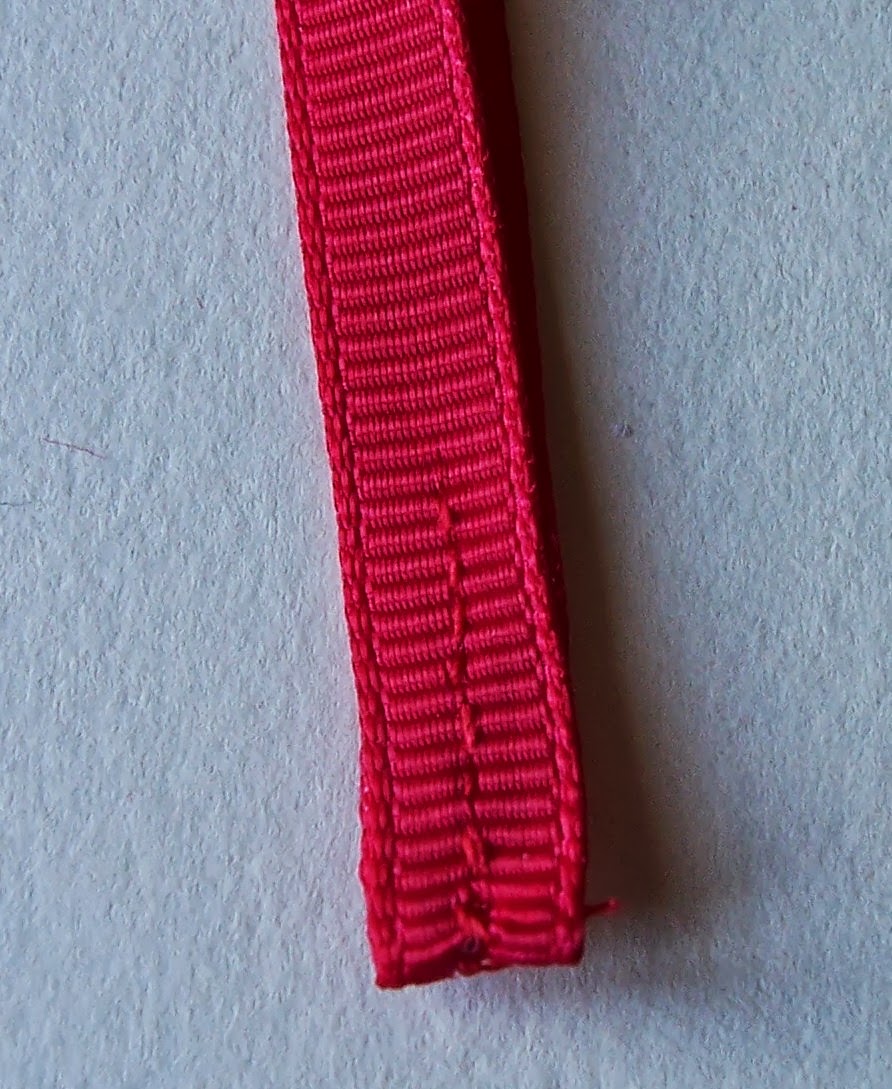
At this point, the end of your ribbon will start to fray, but don't worry about that right now. If you cut it, it'll only start to fray again!
Nestle your beads tightly together and then tie another overhand knot:
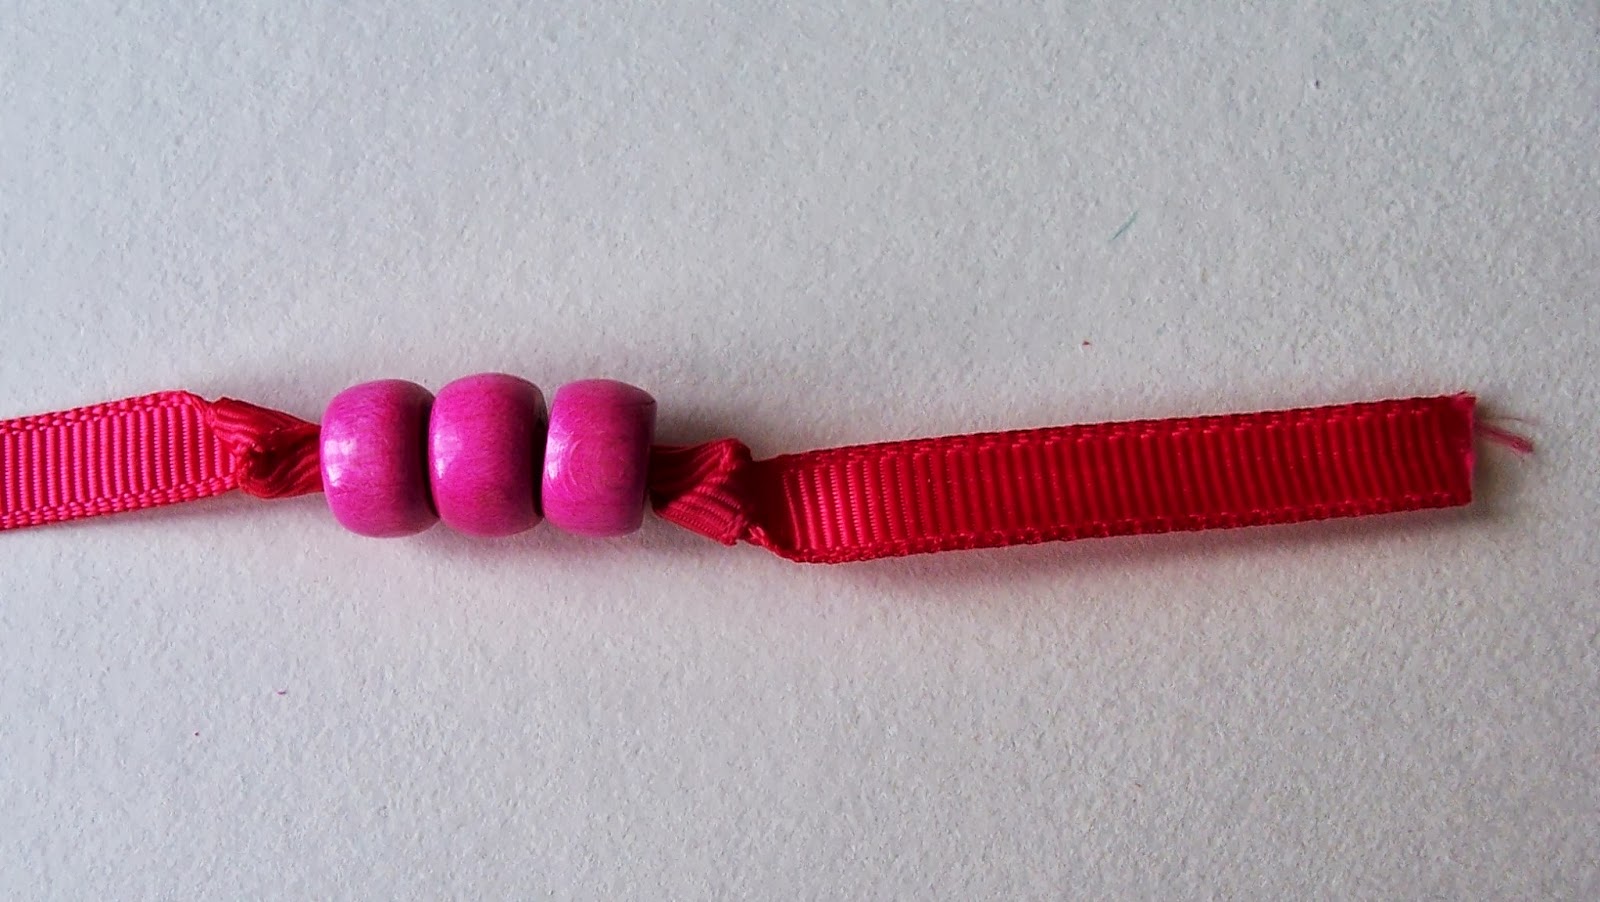
Try to keep both folds facing the same way if you can, with the flat parts of the knot together on the "front". The ribbon marker twists with use, so it's not a big deal if your knots aren't aligned, but it helps the ends look a little bit neater if they are.
Select your sewing needle - one with a small eye and sharp point - and thread it with a length of sewing thread (I usually measure mine off roughly from wrist to shoulder).

Fold roughly a 1/4 inch of ribbon towards the side you've designated as the back of the ribbon (ideally, you should leave a little bit more length than I did at the end for trimming!), anchor your thread at the side of the loop and sew across the ribbon, following one of the Grosgrain lines as a guide. Here's a *really* close-up look:
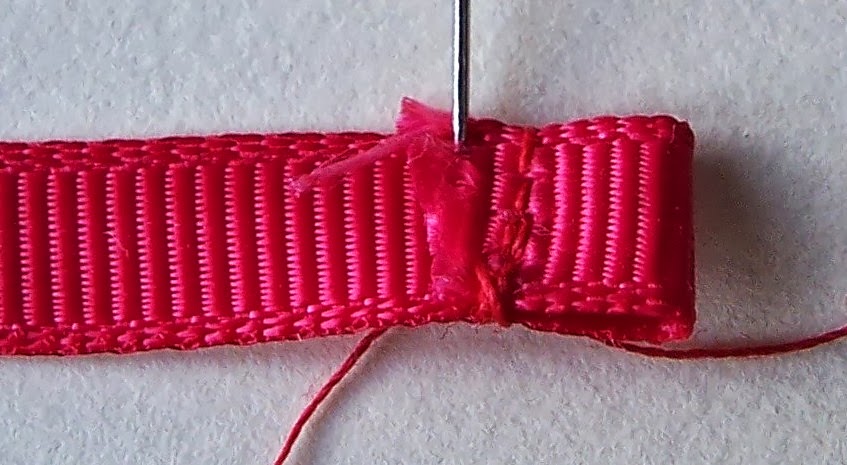
You can see where I anchored my thread at the bottom edge (using a loop-knot); then sewed over to the other side, worked a loop-knot over the other edge and came back.
Don't end your thread yet! Use your scissors to snip the frayed part off just beneath the stitching. Then, from the front of the ribbon, fold about 1 1/2 inches of ribbon into a larger loop. The smaller loop you just made will be sandwiched in between the layers of this large loop. Pick up your needle again and sew through the previous line of stitching, passing through the edge of the small loop at the front of the ribbon:

I sewed back and forth twice to make sure the join was secure and ended by weaving between a few stitches on the back and then taking my needle into the seam of the small loop between the layers and out on one edge. Cut your thread closely.

Voila! You have a finished double-loop ribbon end :) Repeat on the other side:

Fold your marker together, right sides facing out, and take up your needle and thread again. Sew up the bottom of the ribbon, for roughly an inch:
This will keep your marker together and make it easier to sew into your bookmark. Also, since this stitching will be hidden, you don't need to worry about neatness :)

ABRACADABRA! You've Magically Made a Marker :)
Here's my marker with my bookmark-to-be for some perspective:


The chunky wooden beads picked up the pink thread really well, and the marker goes well with my simple stitching, but you could fancy it up anyway you like!

Marker Love! I just couldn't resist, LOL ;)
So there you have it, that's how I've been making my ribbon markers! Hopefully, I'll have the Tassel Tutorial finished soon for those who would rather not use ribbon. In the meantime, if you have any questions, please don't hesitate to ask :)
What type of marker do you prefer, ribbons or tassels or something else entirely? Or do you like markers on your bookmarks at all?!
For SAL Participants: I really apologize for the delay in posting up finishing tutorials. The end date of June 20th was more of a goal than a deadline anyway, but I'd like to know - would you like more time, say until the end of the month? Any thoughts are appreciated :) You can also e-mail me to let me know if you'd rather! Thanks ;)
10 comments:
Your stitching looks lovely! Thanks for putting together this post on how to make the ribbon marker. Extending the deadline to the end of the month might be a good idea. I might have it done by the end of this week, but if not it will be after the 20th.
Your stitching looks great! So far I'd not even thought about putting markers on bookmarks, but I have usually just glued the cross stitching onto card rather than finished it with a fabric backing.
ohhh that is lovely and thanks for the tutorial on the ribbon etc ... need to do something like that for an ornament :) love mouse xxxx
Thank you all so much :)
Karen: Well, this is a moot point for you now that you've finished your beautiful bookmark (!!! I am AMAZED), but I am going to extend the deadline and I really do appreciate your input and your lovely kind comment :)
Emma: Thank you so much! You know, that seems to be the most common finishing method. I think I can't live without markers on my bookmarks because I love tassels so much, LOL :) And I really like seeing them dangling out of the books, looking pretty and patiently holding my place!
Mouse: You're very welcome, I'm so glad it was helpful :) Good luck with your ornament - you'll have to let me know how it turns out! You do lovely finishing work.
Glad you came to my blog and commented so I could find yours, too! I love the bright colors in this one. They're so cheerful. :)
that heart stitch looks beautiful! I wish I could embroider like that (I think I need a bit more practice! Thanks for the tutorial too
embroider
Thank you both for the lovely comments :)
Stitcher S.: Welcome to ES! You have a lovely blog and do gorgeous stitching :) This is my first time working with such a bright Aida, as I usually go for jeweltones or neutrals, but it is indeed very cheerful and something I'd like to try again!
Emily: A big welcome to you too and thank you very much for your kind words! This was actually the first time I've worked a Rhodes Heart and they are much simpler than they look :)
Mine looks a little different because of the border, but this diagram inspired me, and there is another good diagram here that may be helpful :) I hope you give it a try!
P.S. To Emily: I just popped over to visit your blog (your felted guinea pig is so cute!) but couldn't comment because you've got your blog restricted to Google+ users only. I saw that you encouraged commenting, so I thought I'd mention this in case you were wondering why you haven't gotten many yet :) Hope this helps!
Aurelia, sorry that I missed this post earlier! Your bookmark is absolutely beautiful, you did a wonderful job on it! The ribbon and beads will look so nice with it, too! You do such thorough tutorials, it's nice to learn new things from you!
That's totally okay, I'm just happy you found it now LOL :) I'm really behind in my blog reading too *rolls eyes* Thank you very much for your very kind compliments, I'm very happy that you like the combination and enjoyed the tutorial!!!
Post a Comment