Showing posts with label Tutorials. Show all posts

Sunday, April 12, 2020

Flashback: Easy Felt Easter Ornaments


Happy Easter, Happy Spring, Happy Happy Everything! This year, due to the pandemic, I think Easter is going to look very different for everyone, but if you have some extra time this afternoon and would like to make something for the holiday, I have an older tutorial (from 2015) that you might enjoy for Fun Felt Easter Egg ornaments!


They're really simple - just pull out your stash of felt and your embellishment tin (or wherever you keep your sparkly bits!) and go to town with your imagination πŸ˜†


This egg with the ribbon embroidery - which was surprisingly simple! - is probably my favourite 🌸 The beaded ruching was really fun to do and it turned out to be really pretty. It's a technique I'm definitely going to try again in a future project. I think it would make a great edging for an ornament too!

Wherever you are and whatever you're doing this year, I wish you a Spring filled with Sunshine, Flowers and Small Joys Everywhere πŸ’• And lots of Creativity too! 🎨

Thursday, October 3, 2019

Free Style SAL: Progress & Inspiration


My stitching on my double heart for the Free Style Sew Along on Instagram is starting to take shape! But first, I wanted to let you know about a Pinterest Board I just made for the SAL, with links to tutorials and stitch guides for flowers, leaves, lattices and outlines:


If you have any suggestions for this board, please e-mail me the links!

Even if you are not stitching along with us, these are ideas you can adapt to any project!

For anyone who missed my previous post, the Free Style Sew Along is a stress-free, stitch-at-your-own-pace simple SAL! Started by my Instagram stitchy friend Marianne and myself, you can join in at any time and post your progress anywhere online, including your own blog. The idea is to find a simple outline motif you like - Marianne and I are both using the same double heart, which you are welcome to use as well (please see my previous post for the free pattern and other motif ideas) - and fill it with spontaneously stitched flowers 🌼🌷🌻

My last post covered my materials, pattern choice and transfer. I've added a few new colours, which I'll list in a later post since I may add a few more before I'm finished 🎨

Here are my first stitches:


A trio of Spiderweb Roses and a little lattice!


Then I added some Fishbone Stitch Leaves (following Mary Corbet's excellent video tutorial) and a little pink ruffle using Mary's Scalloped Buttonholed Chain Stitch Tutoria, which looks fancy but is super easy once you get the hang of the tension!


I find it very helpful to hold on to the top of the chain stitch with one hand while gently tightening the Buttonhole Stitch loops with the other, and sort of slide them close together until each space is filled. I didn't count my Buttonhole Stitches, I just filled each arch until I couldn't add any more.


You could stitch down the center of each arch, and I might do so before I'm finished, but I like the free standing texture right now, even if my loops are a little wonky 😊


Fishbone Stitch Leaves are something I've been wanting to try for AGES, so I was very excited with how these turned out!!! They are fun to stitch too, and have great texture; I'm sure I will be adding some more here and there before I'm finished πŸƒ

And that's it from my end so far! Please do feel free to jump in and stitch with us πŸ˜ƒ You can follow the link in my sidebar at right to my Instagram profile (@aureliaeglantine) or leave a comment below! If you have any questions, please don't hesitate to ask and I'll do my best to answer πŸ’

Wednesday, May 18, 2016

GG SAL: Silk Lovebirds Final Finish!


I'm so happy to report that I realized my goal from April's Gifted Gorgeousness SAL and final-finished my Silk Lovebirds off into this pretty diamond ornament for the merry month of May! Although I struggled a bit with the finishing process, I am very pleased with the result :)

For the full project details, please read my last GG post here. A quick summary:

~ Pattern from Cross Stitch & Country Crafts magazine, Sept/Oct 1990
~ Worked on gifted 14 count Aida in a pretty buttercream yellow
~ Stitched with gifted overdyed silk floss, the gorgeous Airlie (#95) by Dinky Dyes
~ Stitched using the Mirror Technique for Variegated Threads

Recently, I've been experimenting with ornament making methods! One of my long-standing stitchy ambitions is to get better at final-finishing so I'm pushing myself to try new things :) My usual go-to method is using a quilt batting insert with fabric backing and corded edging, such as I did with my Blackwork Snowflake.

Although in the past I greatly preferred store-bought cording, like the navy cording I used in that tutorial, I'm hand-twisting my own lately, which is harder to attach but has the great advantage of being a perfect colour-match to the stitching!

For this ornament, I used two squares of mat board and wrapped them each with a piece of quilt batting, which I hot-glued to the back of each mat board square.

I used a beautiful dusky blue 100% cotton for the backing fabric:


Then I laced each side around a mat board form, and sewed the two halves together. Because of the padding, and the stiffness of the mat board, both sides turned out to be rather thick and it was difficult to sew them together. I ended up using a curved upholstery needle for the first ladder stitch pass, stitching about 1/4 inch in from the edge, and then did a second pass close to the edge like usual.

The first pass brought both sides together loosely while the second pass tightened the seams and brought both sides together fully, giving me a more even surface for attaching the cording. Although this was more time consuming, it worked well!

Tanja Berlin of Berlin Embroidery Designs has a great photo tutorial showing how to lace work onto mat board, and there is a close-up look at lacing small squares here.

Vonna at The Twisted Stitcher calls this style of mat board finish a basic Flat Ornament and has a few interesting variations (the Layered Flat Ornament and the super cute Layered Felt Mounted Ornament) on her popular finishing blog.

Mary Corbet of Needle N' Thread finished a goldwork embroidery ornament much the same way back in 2008 and had the same troubles with extra thickness that I did! She greatly reduced the thickness by remaking the ornament with a thinner board.

This great tutorial, with a style similar to my ornament, suggests using comic book boards instead of mat board, as it is much thinner but still stiff and of archival acid-free quality, and that's something I'm definitely going to check out :)

You can see the thickness mostly at the corners, like this:


Thankfully, the cording mostly covers it and it's not really noticeable at all once the ornament is hanging up! I do like the nice, crisp corners that mat board makes.

I also added some small squares of batting in the middle of the ornament to fill in the lacing gaps and make sure the center was flat and even:


This photo also shows the cording join at the bottom left, right above the start of the tassel. That was the single most troublesome part of the finishing, sinking the end of the cording back into the ornament and making it look as seamless as possible.

You can definitely see the join, obviously, but it was the neatest I could make it (and I redid that part over a dozen times!). Eventually, I reached that dangerous point where I needed to stop fussing with it and let it be or take it apart altogether and start over, and I am glad that I decided to stop and take a step back.

I really find that when you're working closely with little details for a while that they can overwhelm you with dissatisfaction, but if you take a break and then look at that detail in larger context, it may not be nearly as big of a problem as you thought :)

Here is a close-up of the tassel, which is my favourite part:


I love tassels! As I mentioned, I made the cording by hand, and I also made a smaller corded hanging loop and the cording loop that was the basis for the tassel. In all, I used 6 full skeins of DMC 3803 - 3 skeins for the cording, 1 skein (split evenly) for the two cording loops, and 2 skeins for the tassel. I wanted both the cording and the tassel to be extra thick, and I really like the way it turned out :)

I tied the tassel with a bit of the silk floss I had left (amazingly - and sadly LOL - this project used nearly all of the 8 meter skein of Airlie silk!) and simply wrapped it around the tassel, securing it in the back with some stitches through the wrap:


I love the rainbow effect, and the sheen of the silk against the cotton floss!


Initially, I had planned to use a metallic gold cording, and I'm really glad that I went with a simple floss instead. When I first decided on floss, I was thinking of a light buttercream yellow to match the Aida but I couldn't find an exact match.

Although the burgundy 3803 is not actually used anywhere in the stitching, it's a darker match that is close to the deepest mauve in the overdyed silk and I think it really sets off the lighter colours and subtle tone shifts in the variegated thread.

My Stitchy Guru Mother has a rule for colour-matching a sewing thread to fabric - when in doubt, go with a darker thread instead of a lighter one - and I think it applies to choosing finishing trims like cording as well :)


What is your favourite way to final-finish stitchy ornaments? I'd love to know! If you're reading this post in your e-mail, please visit the blog to leave a comment :)


Gifted Gorgeousness is a monthly SAL hosted by Jo @ Serendipitous Stitching! It is a fun and relaxed way to thank those who have given us Stitchy Gifts and show off what we've made with those generous gifts. It's never to late to come and join us!

Thursday, May 5, 2016

Please Vote For Me in the UT Contest!


MOST WONDERFUL NEWS!!!

I made it to the Top 5 in the Hand Embroidery Category of the Urban Threads Coloring Contest! You probably already know Urban Threads (UT) as the designers of amazingly cool machine and hand embroidery patterns, and may remember their last Coloring Contest held 2013 with the Create theme.

Although I'm fairly new to embroidery, and this is my first time doing an embellished piece like this, when I saw the theme of this contest design - which is "Art is Craft" - I was very inspired by the sentiment and decided to try a version of my own. 

I deliberately chose to use more "crafty supplies" - craft thread, buttons, beads and sequins - to enhance the message. All of them were inexpensive, and pretty common.

The two satin butterfly appliques and the fanciful peacock-inspired Feather were added to symbolize Creativity, and the idea of "Letting your imagination soar!"

The coloring method I used was Crayon Tinting (learned from this tutorial with a very cute pair of pears on the UT site), and the outline was entirely hand-stitched using a variety of stitches, and heavily embellished with beads and sparkle :)

There are two categories in the contest, the first is Machine Embroidery which has 10 Finalists and Hand Embroidery, my category, which has 5 Finalists. I'm so thrilled to be considered as a Finalist, and I would really love to win the amazing prize pack. 

Please - pretty pretty please! - consider visiting the contest and voting, as there is so much talent on display and all the interpretations are very different!

To see all the entries and to vote, please visit this page:

Voting is open to everyone and takes only seconds - and you do not need to sign-up or enter any personal information! The winners will be chosen entirely by popular vote, so I'd really appreciate your help :)

Voting closes May 10 at Noon, Central Time

As a stitcher, I always enjoy learning more about the maker's creative process and reading about how a project develops! So I'd like to share some more information about my entry, including materials and stitches. First, here's some detailed photos:


Here's a view from the side to show the dimension the beads add to the design


Here is a close-up of the fanciful Feather, filled with beads and sequins and an acrylic heart gem, which is super sparkly! This ended up being one of my favourite parts :)


And this is a collage showing my stitching progress, from Crayon Tinting to Stitching to the start of Beading to the Final Embellishment. I learned so much along the way!

This project has been a marvelous experience for me, and it wasn't easy. I had to totally rethink my approach several times. I started off with the idea to invert the design colors and stitch a white outline on black fabric, and color it with sequins, but that didn't work out. It's so hard to transfer an embroidery design onto dark fabric!


So by necessity I needed a light fabric to trace the design on, which finally lead me to using a basic white polycotton. Because it was a little thin, after tracing I backed it with iron-on interfacing from Pellon. This made it sturdy enough to stitch on!


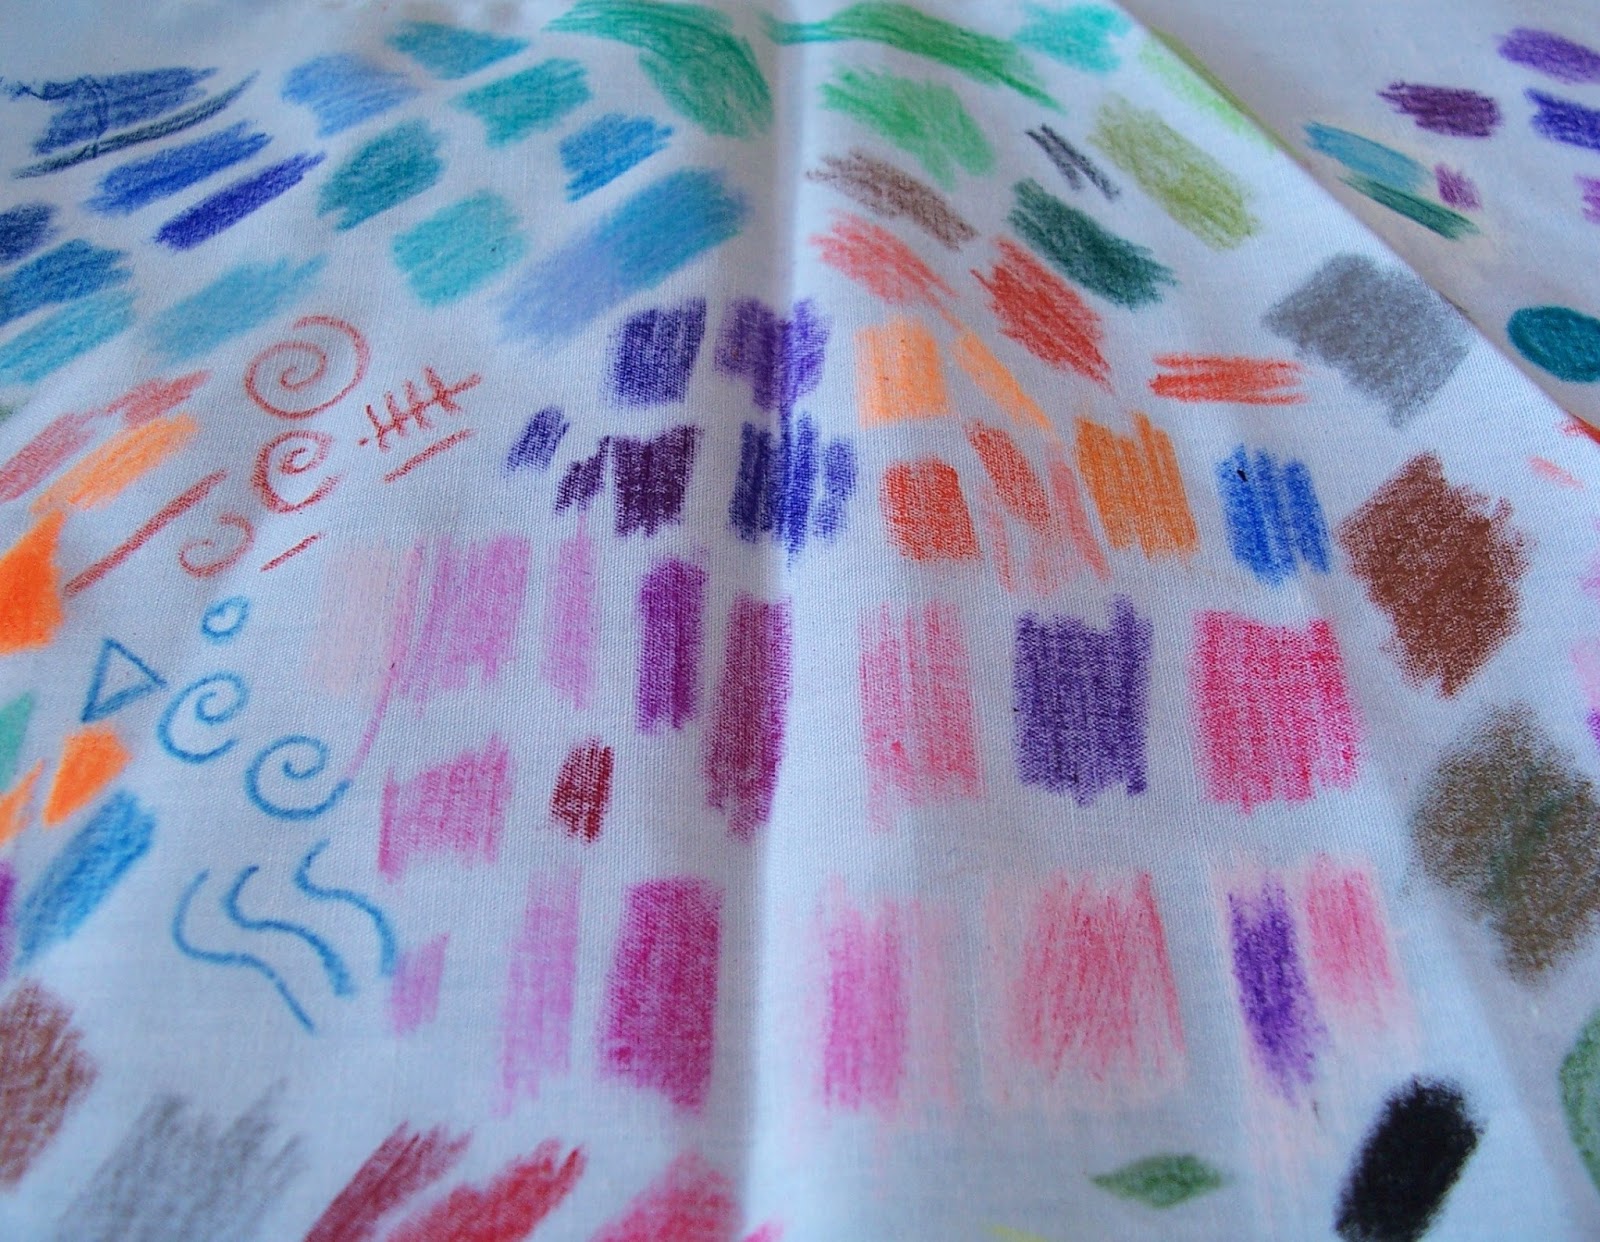
After pondering many different ideas on how to add color, and nearly giving up all together a few times, I remembered Crayon Tinting and looked up some tutorials online. In addition to the UT tutorial, which was my main inspiration, I found some others at Wild OliveLittle Dear TracksPimp Stitch and A Girl In Paradise. All the tutorials say that you should use light pressure, so you can build up the color, and short strokes to keep it even, and there is an interesting video showing this here.

There is also an alternate White Background or Foundation method developed by Crabapple Hill Studio for quilts with embroidered blocks, which is illustrated in photo tutorials at Blueberry Backroads and Sew Mod. A video for this is here.

Both methods use a hot, dry iron to set the wax, which then seeps into the cloth. It is semi-permanent, and so Crayon Tinting is not recommended for washable items.


Here are some testers I made: White Background at top, Just Color at bottom


After Ironing: White Background on left, Just Color on right

As you can see, I found that the White Background method did not work for me. The white wax seemed to saturate the fabric, making it difficult to color over and leaving streaks, and when it was ironed, the coloured wax bled badly outside the lines and made the fabric very stiff. It also faded the color and made it look blotchy.

So I recommend coloring directly on the fabric, though coverage will depend on the materials you are using so doing quick testers like these might be a good idea. The one thing everyone seems to agree upon is the superiority of Crayola Crayons.


So I dug out my trusty old 64-pack tin; I was gifted this new in 1993! I collect tins, and I've always loved this one. It's been years since I've done anything with crayons, but the smell of the wax immediately took me back to my childhood :)


After some scribbles on scrap fabric, I chose some colors to match my thread:


I used Loops & Threads Craft Thread (the Michaels Brand), which is like a coarse version of Perle (Pearl) Cotton. I loved the fun, bright, vibrant colours and they were easy to work with with! In the end, I didn't use the Lavender in the photo above but added a Dark Green J. P. Coats Craft Thread, so I used 12 different colours in all.


The seedbeads I used to outline the letters - which was done by mostly by Couching - are inexpensive large "E" glass beads, with a pretty transparent AB (Aurora Borealis) finish. As you can see, I actually bought them at the dollar store :) I used all of the colors (7 total) except the gold at the bottom right.


I really love the extra dimension these beads added, and the way the variations in the AB coating shimmer with different tones of color, and they seem to glow in the sun! They are so sparkly in real life that the photos don't really do them justice.


Close-Up of Buttonhole Wheel (Yellow) Flower Center

Hand Embroidery Stitches Used Include:
1. Back Stitch
2.  Stem Stitch
3. Long Stitch
4. French Knots
5. Blanket Stitch
6. Buttonhole Wheel
7. Detached Fly Stitch
8. Chain Stitch
9. Heavy Chain Stitch (used on the Feather outline, learned for this project)
10. Scalloped Buttonhole Picot Trim (also learned from this project, variation of this trim by Mary Corbet worked over Back Stitch instead of Chain Stitch)
11. Cross-Stitch (used to sew on the buttons)
12. Couching (the majority of the beading)


Close-up of Scalloped Buttonhole Picot Trim Flower Petals

Finally, after the stitching and beading was finished, and I had filled in the fanciful Feather with sequins secured with smaller coordinating seedbeads and bugle beads, I added some embellishments. I used three colors of basic shirt buttons as accents. 

Then, a serendipitous thing happened: while sifting through the tin where I keep my sequins and fancy trims, a little bag of puffy satin butterfly appliques fell out! And I suddenly remembered buying these appliques many years ago when I was about eight years on, a trip to Florida to visit my Grandparents. 

Butterflies have always symbolized creativity to me, and when two of the appliques just happened to match perfectly, I just couldn't resist adding them!


To sew them on, I used coordinating Craft Thread and took Long Stitches over the wing joins and then made antennae using Long Stitches and French Knots! I hope they bring me a little luck in the Contest :)

So there you have it! My Craft Is Art embroidery from start to finish. Overall, the best thing about this project is that once it got going, it was FUN. Working with the bright colors of the crayons and the chunky threads all brought me back to the many very happy hours I spent coloring and crafting when I was a child ;)

I know Adult Coloring is a huge trend right now, and I even bought a book to try, but I don't think it's for me. But this method of "coloring" embroidery with threads and embellishments is something I can get behind, and I may try it again in the future!


Please consider voting for me!
I would greatly appreciate your support :)

If you have any questions about my entry, feel free to ask away in the comments! What do you think about Crayon Tinted Embroidery - would you try it?

Saturday, April 12, 2014

Scratchin' Eggstravaganza: Easter Egg!


New FREE Pattern - Chicken Scratch Easter Egg!!!
(PDF. Pattern via Dropbox - need Adobe Reader? Get it for free!)

Oh, I'm so excited to share this with you!!! You ever have ideas that don't work out? Most of mine don't, but every now and again they do. Which is great. But you know what's absolutely wonderful?! When they completely exceed your expectations, like this little Easter Egg did! And I had so much fun stitching it up that I had to share :)

Now, I know it's a little late in the game. Easter is only next weekend (?!). I have no idea how that happened, but that's what I realized today. But this project really is super quick to stitch and finish, and can easily be completed in an afternoon or two. It took me three, but I was designing (and re-designing, LOL) as I went along!


The materials - 11 count white Aida, a size 20 tapestry needle and DMC Prism Craft Thread - are the same as I used for my Chicken Scratch Sampler. And the finishing technique - the Chain Stitch and Whip Stitch Edging - and ornament assembly are the same as my Blackwork Poinsettia Christmas Ornament (with photo tutorial).

Along with the patterns for the Front of the Easter Egg - with the Floral Medallion (which I first designed in red as a Poinsettia for family ornaments this Christmas) - and the Back with the "Happy Easter!" greeting - I've included a few photo tutorials for some of the stitches and other information that I hope will be useful :)

Next to the Flower, I'm happiest with my "Egg Stitch" - an elongated version of the traditional Circle Stitch that ended up looking like a nice little row of mini eggs:


As you can see, it follows exactly the same movements as the Circle Stitch, it's the adjustment to the foundation stitches that makes it oval. The completed row is in the middle. I had lots of fun working each one in different colours!

My stitching is a little wonky in the progress pictures because I was working it in hand instead of a hoop. My Aida cloth was a looser weave and the stitches pulled it badly. It's okay though because it all worked out with some gentle stretching and a little rest, and it actually made the woven stitches - like the eggs - so much easier:


As you can see, I could bend the fabric and make the foundation stitches stand off from the fabric a little bit so it was super fast to slip the weaving thread under. So if it happens to you, worry not ;) I hope this Easter Egg will entice you to try Scratchin', and inspire some new variations! Here's a close-up of the edging:


I think I'm getting a little better at this everytime I try it, and it's really fun with the Craft Thread because you don't have to worry about not catching all the strands of floss. I like including a seasonal Sentiment, and it helps me actually final-finish things faster because I'm not waiting to find the perfect backing fabric and trims :)

Speaking of Chicken Scratch, Mary Corbet at Needle N' Thread recently posted her own floral variation on gingham, and may be offering some patterns soon.

And speaking of Easter, Jo at Serendipitious Stitching is having her wonderful Easter Blog Hop again this year! Click this very handsome Mr. Bunny for more info:


I was hoping to sign up to be a Hop Host, but I think I've run out of time for this year. The Chicken Scratch Easter Egg is actually the first thing I've ever stitched for that holiday though, so I'm doing pretty good :) I'm looking forward to Hopping along the Bunny Trail for the Mystery Phrase on Easter! Jo's Hops are always great fun.

While you're visiting, why not congratulate Jo on three great years of blogging and enter to win a fabulous yet-to-be-final-finished Alice in Wonderland gift?!

As for me, I wish you a Wonderful Spring and a Very Happy Easter!


P.S. I'm entering this project at Dream A Little Bigger's Link Party:

Dream a Little Bigger

P.P.S. I just got the most wonderfully amazing news!! I'm trying to catch up with my blog feed this weekend, and to my absolute astonishment and delight, I discovered my Chicken Scratch Sampler featured on the DMC Threads website!!! *so excited*

The article was published yesterday and features "Creative Samplers" - there are three other beautiful and inspiring projects profiled that are well worth seeing :) 

Here's a little preview:


Thanks very much to Emma for the feature, and to all ES readers! It is so great to see that there is new interest in Chicken Scratch, and I hope it comes back in a BIG way ;)

Tuesday, October 1, 2013

Stitchy News for September!


UPDATE: Many thanks to Karen for letting me know that some of the links in this edition weren't working! As of today, October 2nd, they should be working again :) So sorry for any inconvenience!

Autumn is in the air and Hallowe'en is on its way, but there are still some bright and colourful projects well worth making too :) And Giveaways! Without further ado:


Special Event: "Pumpkins For Cathey"


On Friday, September 27th, pumpkins started popping up all over the Blogsphere with the mysterious title "Pumpkins for Cathey". This was a special surprise event organized by Daffycat for her friend Cathey, also known as Pumpkin at Pumpkin Patch & Co. for her 7th Blogoversary! Sadly, along with the happy congratulations for this wonderful achievement, this event had a serious purpose - Cathey is suffering from end-stage cancer, and Daffycat wanted to raise Cathey's spirits.

Cathey has written two posts well worth reading: A Much Needed Rant and What Cancer Is Not.... Although I'm late and do not know Cathey, I'd just like to add my best wishes - there are links to all the blogs that participated in the comments on Daffycat's post, and you can still visit and offer your own best wishes if you'd like :)


Learn How To Stitch Small Leaves + Stitch A Tiny Pumpkin!

Over at Needle N' Thread, Mary Corbet has recently added a quartet of great posts with stitching suggestions for miniature leaves, perfect for little floral motifs, as part of her awesome Stitch Fun series! So far, there are Fly Stitch Leaves, Cretan Stitch Leaves, Buttonhole Stitch Leaves and the unusual and very pretty Rose Leaf Stitch.

While you're there, you might also want to visit Mary's great tutorial showing how to embroider a cute little pumpkin with bullion knots!


Why Not Embroider A Whole Pumpkin Patch?

Speaking of embroidered pumpkins, Annet at Fat-Quarter has an interesting guide showing how to make a needle-woven one! This stitch is very dimensional, with great texture, just perfect for the Great Pumpkin in your patch :)


Stitchy Inspiration: Beaded Pumpkin Pins

Paulette, who blogs at Beedeebabee, does absolutely amazing work with felt, and her adorable pumpkin brooches - adorned with beaded flowers - are gorgeous! Also, the beaded picot edge is easy and elegant, a wonderful technique I'd like to try! She kindly shares a yummy recipe for Chocolate Chip Oatmeal Cookies too ;)


Beautiful Finish: Harvest Moon House

Over at the always-amusing Spinster Stitcher blog, Coni has just finished an amazing Autumnal canvaswork design called Harvest Moon House by Laura J. Perin. See the finish in this post - be sure to click on the photo to see all the lovely details! And if you like the project, you can find lots of update posts by scrolling through her blog :)


Free Pattern: "Autumn Is Here"

Thanks to Ingrid's lovely finish (her beaded rick rack trim is amazing!) at her Mii Stitch blog, I discovered a freebie of a very cute yellow birdie on a branch full of changing leaves! Called "Autumn Is Here", the pattern is available here at The Snowflower Diaries. The designer also offers several other free primitive patterns.


Get Ready For Hallowe'en Stitching With Fun Freebies!

Emma Broidery at the DMC Threads blog has a great round-up, including a host of cute Japanese "kawaii" style monsters. And Jo at Serendipitous Stitching compiled a wonderful list last year! Cyberstitchers also has a spooky Hallowe'en Alphabet (with "Halloween" word chart) and several small frightful freebies, perfect for ornaments.


Tutorial: Two Tiny Embroidered Coin Purses, With Patterns

Bev, who blogs at Flamingo Toes, has little project for using up scraps of fabrics and threads: two cute miniature coin purses! The projects are really made by the vintage-looking purse clasps she used, but the sweet little patterns she provides - an umbrella raining hearts and a bicycle holding flowers - could be used anywhere!


Sew A Patchwork Of Memories!

Amy has written her first tutorial at Cloud CouCou Crafts, and it's a really lovely idea that makes for a beautiful project! She had been saving some clothes from her young daughter's early years for a special project, and made a very cute cushion of simple squares from the material :) It's sewn on the machine, but the idea is easily adaptable to other family members and to hand sewing too. A wonderful keepsake gift to give!


Great Gift Idea: Embroidered Jewelry Pouch!

Speaking of gifts, over at Feeling Stitchy, for Tutorial Tuesday, there is a guide to hand-sewing a small drawstring pouch. Suitable for storing jewelry or other small items, it would also make a lovely personalized gift bag! A link is included to the free monogram frame pattern, which is very pretty, but the lettering is done by hand.


Stitchy Inspiration: Embroidered Magazine Cover

(Found via DMC Threads) Donatella, at the fashion blog Inspiration & Realisation, recently tried embroidering on paper and she shares her results! The image she picked is gorgeous, and the simple running stitch adds a lovely textured overlay :)


Take A Virtual Tour Of Scotland's Textile Treasures

Susan Elliott, of Plays With Needles, recently went on a trip to Scotland and has posted a trio of wonderfully detailed posts about the historical needlework that she saw at the Burrell Collection in Glasgow: Mirror, Mirror On The Wall, A Tisket, A Tasket, and A Tale of Two Coifs. Her post on The Great Tapestry of Scotland is also very interesting, and Susan also has some lovely photos of the Scottish scenery too!


Quick Lesson: Stitching "Over 1"

Veronica, at Veronica's Stitching Vault, has stitched up an excellent example of "over 1" options for stitching on linen! These smaller scaled stitches are often used for fine detailing, including skin shading, but the terminology is so confusing :)


Stitchy Books To Learn From

Over at &Stitches, the team has been sharing their favourite embroidery books, the ones they turn to time and time again for stitchy inspiration! I'd never heard about any of these three previously, so it's very interesting to learn about the contents:

Carina chose Mary Gostelow's "The Complete Guide to Needlework Techniques and Materials", Julie picked the French edition of Mary Thomas' classic "Dictionary of Embroidery Stitches" and Nicole opted for Jacqueline Enthoven's "The Stitches of Creative Embroidery". Do you have a favourite stitchy book? I'd love to know!


"Stitched Blooms" Blog Tour With Giveaways!

Carina Envoldsen-Harris, who co-hosts &Stitches and blogs at Carina's Craftblog, is releasing her first craft book! "Stitched Blooms: 300 Floral, Leaf & Border Motifs to Embroider" comes with digital versions of the motifs on a CD and 20 suggested projects. Carina is currently hosting a Blog Tour for the book, which is almost over, but the full schedule is here and she noted still open Giveaways at the bottom of her most recent blog post. The dates run from October 1st to 6th, so hurry on over and enter to win your own copy! Disclaimer: I have entered one of the Giveaways!

Some of Carina's larger patterns are available for FREE on the DMC site, in the "Pearl Cotton Embroidery" section! My favourites are Summer Days and Bird of Paradise :)


Perfect for Hallowe'en: Historical Dracula Pattern Giveaway!

Fellow &Stitches co-host Julie (of Button, Button) designs as Little Dorrit & Co. and has just released a new Dracula pattern for Hallowe'en. Not your typical vampire, this bloodsucker displays his literary heritage proudly! You can find the full rules and enter to win a copy of the pattern on this post, contest closes on October 9th!


Stitch A Sweet And Simple Bunny With Felt Applique!

Bridgeen Gillespie at Cherry & Cinnamon has a guide for a quick and easy Spring Bunny, but the background fabric is actually quite Autumnal :) The free pattern is more of an inspiration than a real template, but this is an adorable idea that is very adaptable! It would be supercute stitched on a floral print with lots of lazy daisies ;)


Quick and Cute Stitching: Felt Owl Brooch

Laura (aka Lupin) at Bugs and Fishes has an old but wonderful tutorial on making a cute little owl brooch, perfect for brightening up your Fall coat, scarf or bag :)

While you're visiting, Laura also has a great tutorial for a larger feathered owl and templates for an assortment of felt Autumn leaves with 15 project suggestions!


Fine Crochet: A Lovely And Unusual Rose

Olga at Lacy Crochet has a wonderful pattern and tutorial for a very unique one-dimensional rose! Inspired by traditional Irish Crochet roses - which are commonly three-dimensional - she designed this modern yet elegant flower with asymmetrical petal layers! This motif would be look lovely in a table runner, as Olga suggests, or as a doily and would be practical too, since you could actually lay items on top of it :)


Fantastic Fairy Tale Finish!

Miss Lilly, from the great stitchy blog Back On The Wall, posted an amazing finish at the end of August that I've been impatiently waiting to share with you ever since :) Called "Once Upon A Time", it is a JCA kit designed by Michael A. LeClair, and it is shaped like a real open book!!! Unfortunately, this design no longer appears to be available, but as a finishing idea, the open-book concept is simple and stunning :)


Catch Up With Crafty News From Across The Pond!

Finally, I'm very excited to share that Emma Lenton (good friend of ES and host of EveningEmma) and Michael Westgarth (of the gaming blog MegaWestgarth) have started an exciting new venture called CraftiHub! CraftiHub is devoted to providing daily updates about all kinds of interesting things going on in The United Kingdom. My favourite article so far has been about NeuroKnitting, which is amazing!

The site is in its early stages and could use your support :) If you like what you see, you can follow Craftihub on Bloglovin' like I do, or add it to your favourite RSS reader. I'm really looking forward to watching this site grow!


Thanks Very Much For Reading!

Please feel free to share your favourite crafty/stitchy book in the comments below!

If you have an item of interest for Stitchy News - including your own - please e-mail me! My address is in my sidebar at right (>) under the pretty postage stamps :)